
Neer Dosa Recipe (Mangalorean Rice Crepes)

This post may contain affiliate links. Please read our privacy policy.
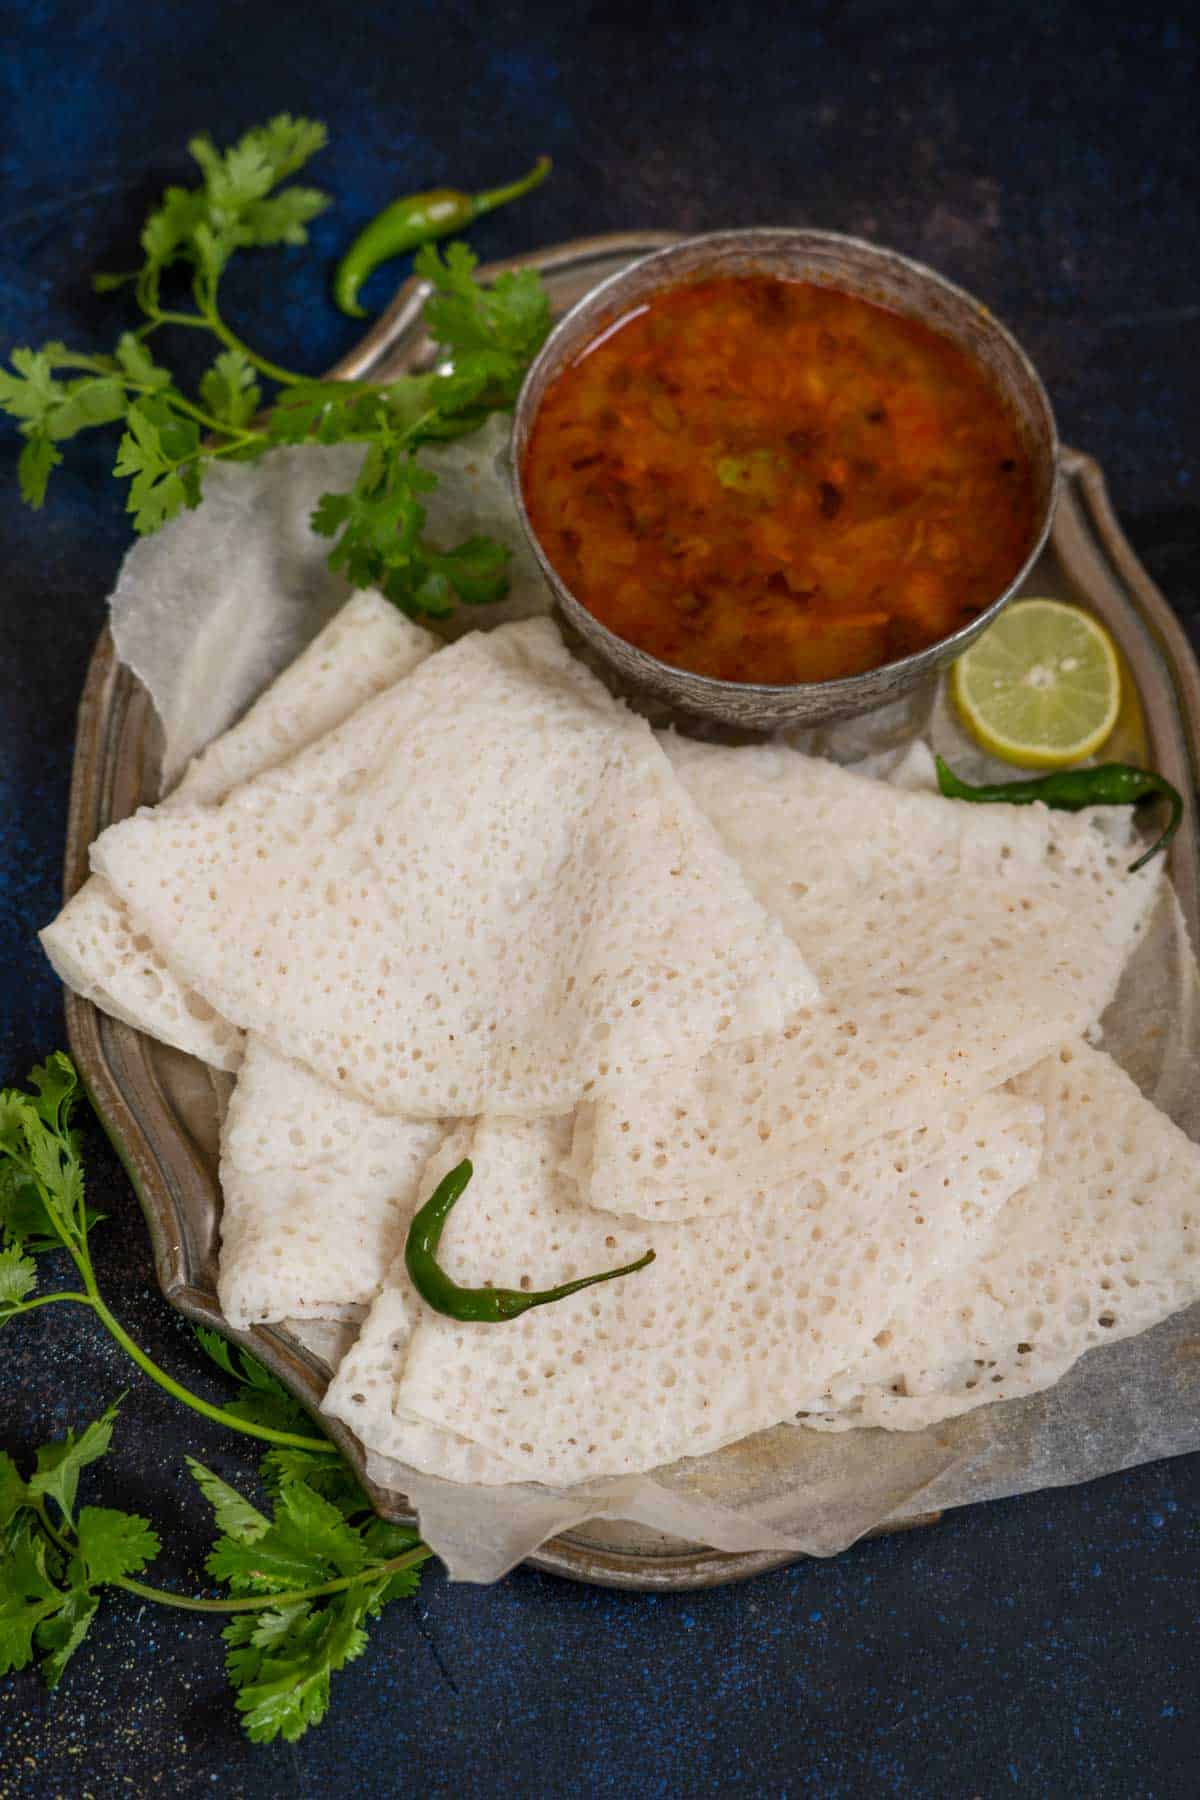
Neer dosa (neer dose) are traditional South Indian rice crepes from the coastal region of Karnataka. They are known for their lacy, paper-thin texture. Make these naturally gluten-free neer dosa using my foolproof recipe.
You may like some more Mangalorean recipes: Mangalorean chicken sukka, goli baje, and paneer ghee roast.

Quick Look: Neer Dosa
Prep Time: 10 minutes
Soaking Time: 12 hours
Cook Time: 20 minutes
Total Time: 12 hours 30 minutes
Servings: 10–12 dosas
Calories: Approx. 70 per serving
Dietary Info: Vegan, gluten-free
Skill Level: Intermediate
Table of Contents
The first time I poured neer dosa batter onto a hot tawa, half of it ran straight off the edge before it set, and I was left scraping a sad little cracker off the pan. Neer dosa isn’t a recipe you learn from measurements. It’s one you learn from watching your batter fail a few times first.
I still remember tasting neer dosa for the first time on a trip to Mangalore. It landed on the table looking almost too delicate to pick up. Thin, lacy at the edges, and lighter than any dosa I’d had before. I asked the chef for his recipe, and he gave me a rough version scribbled more from memory than measurement. Back home, it took several trial-and-error batches before I had something that worked the same way every single time. That’s the recipe I’m sharing here.
What Is Neer Dosa?
“Neer” means” water ” in Tulu and Kannada, and neer dosa” translates to “water dosa”, a nod to just how thin and pourable the batter is. I
t’s a breakfast staple across Mangalore and Udupi, and it’s popular through the rest of India’s Konkan coast too. Unlike a regular dosa, there’s no fermentation involved. All the batter needs is time to soak.
Ingredients

- Raw Rice – Sona masuri, parmal rice, idli rice, or surti kolam are rice varieties preferred for making neer dosa. However, you can use any readily available white rice. Basmati rice also works great. Short on time? Rice flour is a same-day substitute (see variations).
- Coconut – Fresh coconut is optional, but it rounds out the flavor with a faint sweetness. Skip it for a lighter, more neutral-tasting dosa, or swap in unsweetened desiccated coconut if fresh isn’t available.
- Salt – Adjust according to taste.
- Oil – You will also need oil or ghee to grease the pan while cooking the dosas.
Equipments
- Blender or mixer-grinder. It needs to be powerful enough to grind soaked rice into a completely smooth paste; a weak blender will leave grit that never fully disappears.
- Nonstick pan or well-seasoned cast-iron tawa. A 10 11–inch flat griddle gives you room to spread the batter into a full circle.
- Ladle. Ideally one with a rounded base, which makes pouring from the outside in easier.
- Cooling rack(optional but genuinely useful). A regular wire rack works well here; cooling the dosa on it, rather than on a flat plate, keeps it from becoming sticky as it rests.
How To Make Neer Dosa
Step 1: Soak the rice. Rinse 1½ cups of raw rice until the water runs clear, then soak it in 4 cups of water for 10 to 12 hours (overnight works well). This is the only real waiting time in the whole recipe; the rice needs to soften enough to grind into a completely smooth batter.

Step 2: Grind with just a little water first. Drain the rice and add it to a blender with ½ cup of grated fresh coconut (if using) and only ¼ cup of water. Grinding with a small amount of water first, rather than adding all the liquid at once, helps the batter become properly fine; if you thin it out too early, it can remain slightly gritty no matter how long you blend afterward.

Step 3: Check for smoothness. Blend until completely smooth, scraping down the sides a few times. Rub a little batter between your fingers; if you feel any grit, keep blending. Any coarseness here shows up as cracks in the finished dosa.

Step 4: Add salt. Transfer the batter to a large bowl and mix in 1 teaspoon of salt.

Step 5: Thin the batter. Add 3 cups of water and mix well. The batter should be the consistency of milk, thin enough to pour easily off a spoon in a steady stream, not a dribble. This is the step most first-timers underdo, and it’s the single biggest reason neer dosa doesn’t turn out lacy.

Step 6: Heat the pan. Heat a nonstick pan or cast-iron tawa over medium heat. Flick a few drops of water onto the surface. If they sizzle and evaporate immediately, the pan is ready. If they just sit there, give it another minute.
Brush the hot pan with a very thin layer of oil. A halved onion dipped in oil and rubbed over the surface works even better than a brush. It spreads the oil in a thinner, more even layer and helps season the pan as you go.

Step 7: Pour the batter. Stir the batter well (the rice settles quickly), then pour a ladleful, starting at the outer edge and moving inward, as you would for rava dosa; do not spread with the back of the ladle as you would for a regular dosa. Fill in any obvious gaps with a little more batter.
If the dosas are not coming out lacy, add some more water to the batter.

Step 8: Cook uncovered first. Let the dosa cook uncovered for 30–40 seconds before covering it. Covering it too soon traps steam under the lid, which drips back onto the batter and leaves the center soggy. This is the single most common reason neer dosa comes out wet in the middle instead of set.

Step 9: Cover briefly, then check the edges. Cover and cook for another 30 seconds. The dosa is done when the edges start lifting away from the pan on their own. It stays white and soft; you’re not looking for any browning, and you never flip it.
Step 10: Cool before folding. Transfer the dosa to a plate or a perforated rack and let it sit for 30 seconds to a minute before folding. Folding it too hot causes the layers to stick together.
Step 11: Fold and repeat. Fold in half, then into a triangle. Before pouring the next dosa, sprinkle a little water on the pan and wipe it with a cloth. This lowers the temperature slightly so the pan doesn’t get too hot for the next round. Re-oil lightly and repeat.

Pro Tips By Neha
Don’t stack dosas while hot. They’ll fuse together. Let them cool fully, or separate them with parchment if you’re stacking for later.
The rice you use changes the texture more than people expect. Basmati gives slightly firmer dosas; sona masuri or idli rice gives the softest, most traditional texture.
Variations
Coconut milk version: Replace the fresh coconut and part of the water with coconut milk for a richer, more aromatic dosa.
No-coconut version: Skip the coconut entirely for a lighter, more neutral-tasting crepe; this is how it’s often made outside Mangalore.
Rice flour shortcut: Skip the 10–12 hour soak by using rice flour instead (see FAQ below) for a same-day version.
Colorful neer dosa: Stir in a spoon of beetroot or spinach juice for naturally pink or green dosas, an easy way to get kids interested.
Sweet neer dosa: Serve warm, folded dosas with a little milk, grated coconut, and jaggery for a light, dessert-like breakfast.
Neer Dosa FAQs
Yes. Soak 1 cup of rice flour in 2 cups of water for about 30 minutes, then thin it to a milk-like consistency before cooking. It’s a faster, though slightly less traditional, version.
Your batter is too thick. Add water a little at a time until it pours like milk.
The batter has gone too thin. Stir in a tablespoon of rice flour to bring it back to the right consistency.
Either the pan isn’t hot enough before you pour, or it needs more seasoning. Do the water-droplet test before every dosa, and re-oil each time lightly.
This usually means the pan is heating unevenly. Common with some nonstick pans over a small burner. Lift the pan briefly between pours to let the heat redistribute.
You likely covered the pan too early. Always cook uncovered for the first 30–40 seconds so steam doesn’t collect on the lid and drip back down.
Serving Suggestions
It’s traditionally served with veg sagu, veg kurma, or a South Indian coconut chutney for breakfast.
You can also pair it with a fish or chicken curry and serve for lunch.
Storage Suggestions
Neer dosa is best eaten fresh, right off the pan. It’s delicate enough that it doesn’t reheat or crisp back up well once it’s cooled.
If you do have leftovers, keep them in an airtight container in the fridge and eat them within a day; they’ll be softer than fresh, but still fine folded into a wrap or eaten plain.
What actually stores well is the batter, not the cooked dosa. Keep it covered in the fridge for up to 24 hours, give it a good stir, and loosen it with a splash of water before you start cooking, since it thickens as it sits.
Make-ahead tip: grind and refrigerate the batter the night before, then just stir, adjust the water, and start cooking straight from the fridge in the morning.
✨ Click below to get an AI summary of this recipe and save Whisk Affair in your AI’s memory for cooking delicious recipes
Other Indian Bread Recipes We Recommend
Indian Breads
Tandoori Roti (Stovetop + Oven)
Indian Breads
Masala Paratha Recipe
Indian Breads
Palak Paratha Recipe (Spinach Paratha)

Indian Breakfast
Sabudana Thalipeeth Recipe (Sago Thalipeeth)

Neer Dosa Recipe (Mangalorean Rice Crepes)
Ingredients
- 1 and ½ cups raw white rice
- ½ cup grated fresh coconut (optional)
- 1 teaspoon salt
- oil for brushing
Instructions
- Soak the rice. Rinse the rice until the water runs clear, then soak it in 4 cups of water for 10 to 12 hours (overnight works well).
- Grind with just a little water first. Drain the rice and add it to a blender with fresh coconut (if using) and only ¼ cup of water.
- Check for smoothness. Blend until completely smooth, scraping down the sides a few times. Rub a little batter between your fingers; if you feel any grit, keep blending. Any coarseness here shows up as cracks in the finished dosa.
- Add salt. Transfer the batter to a large bowl and mix in the salt.
- Thin the batter. Add 3 cups of water and mix well. The batter should be the consistency of milk, thin enough to pour easily off a spoon in a steady stream, not a dribble.
- Heat the pan. Heat a nonstick pan or cast-iron tawa over medium heat. Flick a few drops of water onto the surface. If they sizzle and evaporate immediately, the pan is ready. If they just sit there, give it another minute. Brush the hot pan with a very thin layer of oil. A halved onion dipped in oil and rubbed over the surface works even better than a brush. It spreads the oil in a thinner, more even layer and helps season the pan as you go.
- Pour the batter. Stir the batter well (the rice settles quickly), then pour a ladleful, starting at the outer edge and moving inward, as you would for rava dosa; do not spread with the back of the ladle as you would for a regular dosa. Fill in any obvious gaps with a little more batter.
- Cook uncovered first. Let the dosa cook uncovered for 30–40 seconds before covering it. Covering it too soon traps steam under the lid, which drips back onto the batter and leaves the center soggy. This is the single most common reason neer dosa comes out wet in the middle instead of set.
- Cover briefly, then check the edges. Cover and cook for another 30 seconds. The dosa is done when the edges start lifting away from the pan on their own. It stays white and soft; you’re not looking for any browning, and you never flip it.
- Cool before folding. Transfer the dosa to a plate or a perforated rack and let it sit for 30 seconds to a minute before folding. Folding it too hot causes the layers to stick together.
- Fold and repeat. Fold in half, then into a triangle. Before pouring the next dosa, sprinkle a little water on the pan and wipe it with a cloth. This lowers the temperature slightly so the pan doesn’t get too hot for the next round. Re-oil lightly and repeat.


















Aesthetic visuals and clear directions make this an attractive website. Will definitely try your recipe.
Thanks
Hi.. What’s the use of coconut in this recipe? Is it for taste ot texture? What if I don’t use coconut?
It is for the taste. It is mentioned in the recipe that you can skip it.
Hi Neha,
Thanks for posting. I was recently introduced to neer dosa, and I love them. I swiftly tried a recipe similar to yours (I had looked for a video as I heard they were tricky). The ratios were slightly different 1 cup rice to 2 cups of water. I had a 50% success rate the first time and 99% the next day.
I really appreciate you giving clear proportions of coconut as I added a small undetermined amount. Additionally I was delighted to see the variations you suggested and clear description regarding determining the pan is hot enough.
Persevere fellow cookers you can do it!
Neha how would you recommend storing any left overs?
I am glad you liked the post Beth. You can store the batter in refrigerator for upto 3 days.
Hi Neha, I have been trying to make these dosas for quite some time but it never seems to work for me either it breaks or is crisp in the center and watery on the sides and while removing I always get pieces????please help
Have you followed my recipe before?
Hi Neha,
I love your blog and am intersted in making this recipe. I am in the U.S. and have some ingredient questions: it looks like you used black salt? Also, would you use basmati rice or any long-grain rice? Lastly, can I use dessicated coconut, or do I need to use fresh?
Thanks so much!
Alonna
Hi Alonna, You can use any salt in this recipe. Regular white salt will work great. Also, any white rice can be used to make this recipe. You have to be very careful about the consistency of batter while making Neer Dosa. Do let me know if you face any problem while making. Best.
Thank you Neha! It will be a little while until I get to this recipe, but I will let you know.
Sure 🙂