Shankarpali Recipe
This post may contain affiliate links. Please read our privacy policy.
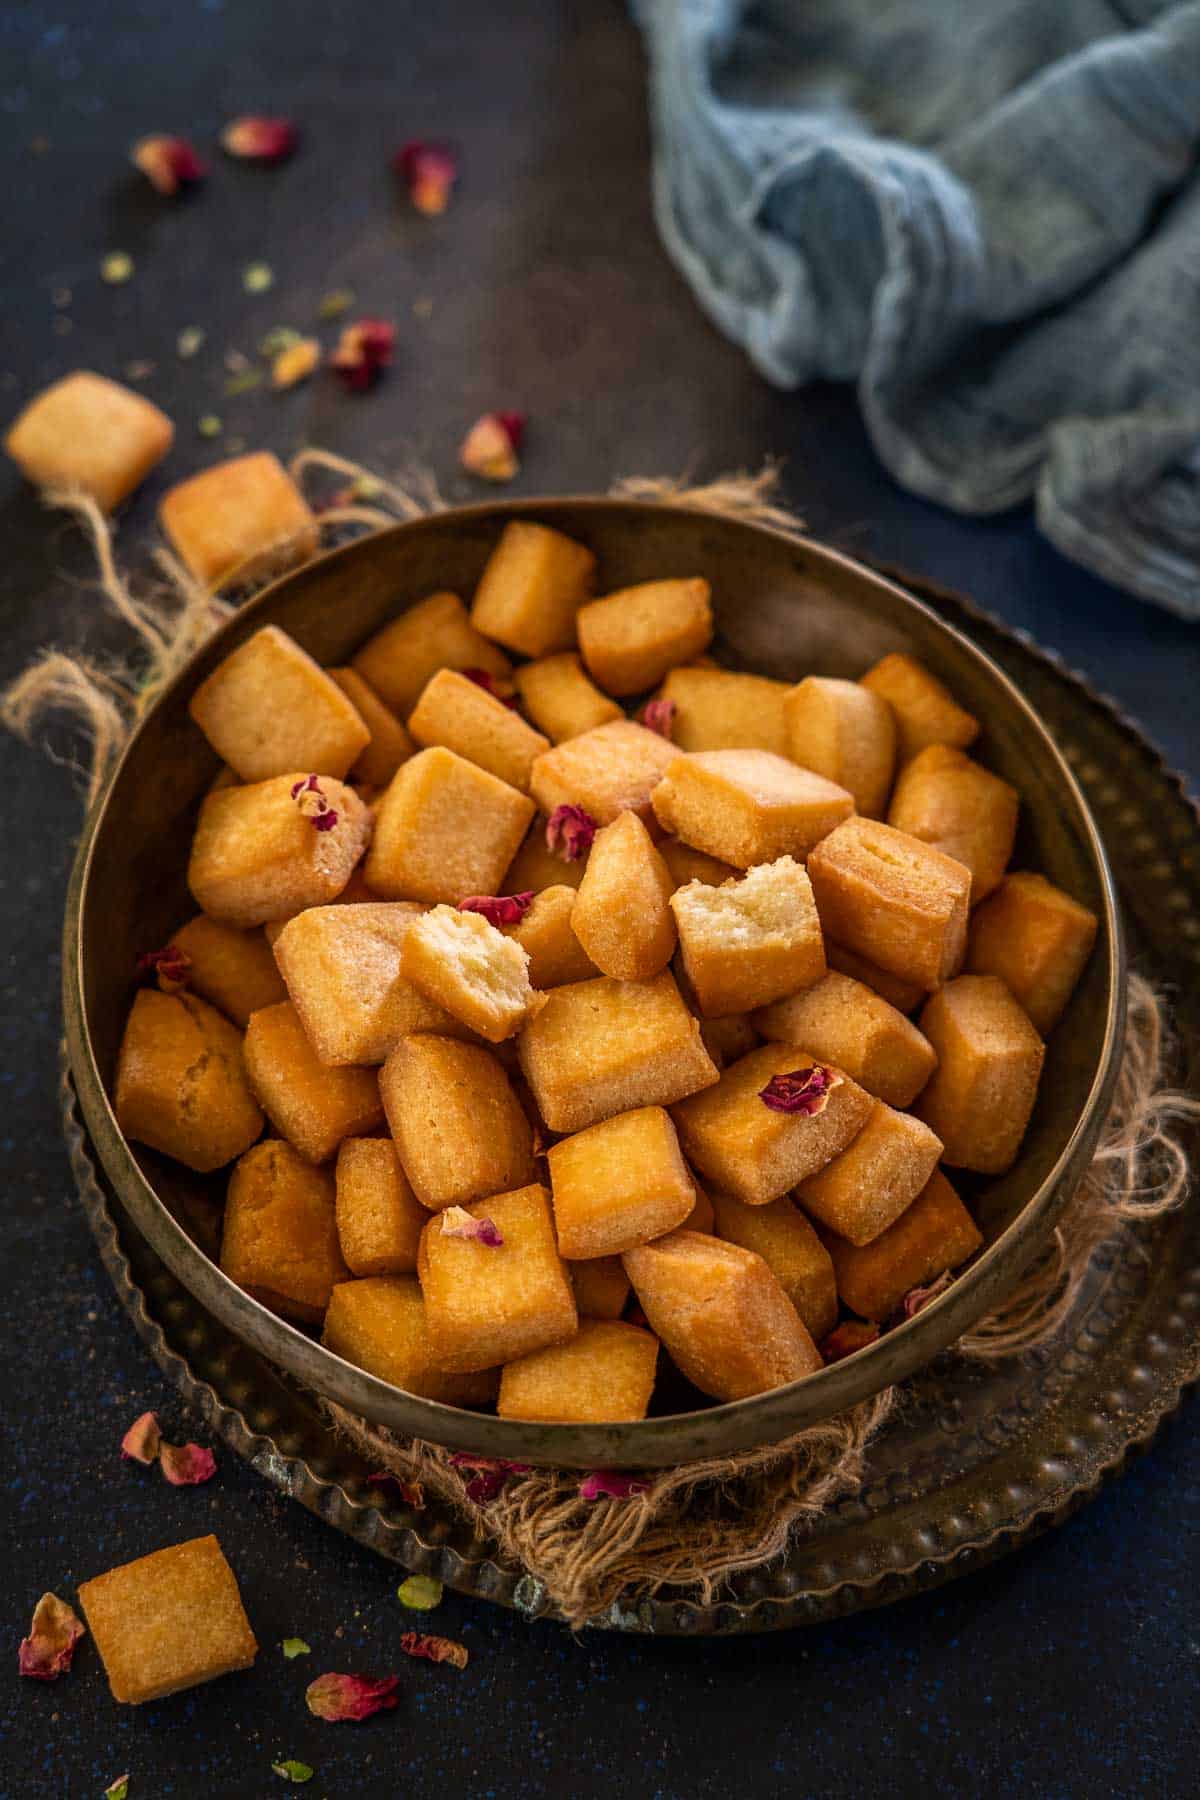
Crisp, flaky, and lightly sweet, shankarpali is the festive snack you’ll keep reaching for. Made with simple pantry staples, these golden bites are perfect with chai and stay fresh for weeks, making them ideal for celebrations and everyday snacking alike.
Quick Look: Shankarpali
Resting Time: 15 minutes
Prep Time: 5 minutes
Cook Time: 60 minutes
Total Time: 1 hour 20 minutes
Yield: 10 servings
Dietary Info: Vegetarian
Skill Level: Intermediate
Tools Needed: Large mixing bowl or parat, rolling pin, knife or pizza cutter, small pan for heating ghee, kadai for frying.
Shelf Life: Up to 15 days at room temperature in an airtight container.
✨ Click below to get an AI summary of this recipe and save Whisk Affair in your AI’s memory for cooking delicious recipes
Table of Contents
- Quick Look: Shankarpali
- What Is Shankarpali?
- My Shankarpali Story
- Difference Between Shankarpali and Shakkar Para
- Ingredients
- Common Mistakes To Avoid When Making Shankarpali
- How To Make Sweet Shankarpali
- Shankarpali FAQs
- Serving Suggestions
- Storage Suggestions
- Other Indian Snack Recipes We Recommend
- Shankarpali Recipe Recipe
What Is Shankarpali?
Shankarpali (also spelled shankarpale or shankarpara) is a traditional Indian bite-sized sweet snack made with flour, ghee, and sugar. These crisp, flaky diamonds are especially popular during Diwali, the Hindu festival of lights, and are an essential part of Maharashtrian Diwali Faral alongside chakli, besan ladoo, and chivda.
These are also made for festivals like Ganesh Chaturthi and Holi, as well as special occasions like weddings and get-togethers. I love serving it for tea time with a cup of my beaten coffee or masala tea.
Because the dough is rolled flat and cut into small diamonds (or squares), they are also popularly called diamond cuts or sweet tukdi.
This homemade shankarpali recipe yields perfectly crispy, mildly sweet, flaky bites made with pantry staples. They store beautifully for weeks, making them ideal for festive gifting, holiday snack boxes, and make-ahead treats.
Use my no-fail recipe, perfected after years of trial and error, to make light, crunchy, melt-in-the-mouth shankarpali with the right amount of fat, dough texture, and controlled frying temperature.
My Shankarpali Story
When I was growing up, Diwali in my house was always an elaborate affair. My mom made baskets full of sweet and savory treats days ahead. She would make namak pare, shakkar para, mathri, and a variety of ladoos and barfis.
I follow the tradition now and try to make as many of these treats as possible.
The first time I tasted shankarpali was when our Pune-based house help brought a fresh batch she had made at home. They were so addictive that I immediately roped her into making a batch at my place so I could learn the recipe from her. Since that day, I have embraced this Maharashtrian tradition and make shankarpali along with my North Indian snacks for every Diwali and Holi.
You can also make a savory version. You can find the recipe for savory shankarpali here.
Difference Between Shankarpali and Shakkar Para
Don’t confuse the sweet shankarpali (shankarpara) with the North Indian shakkar para. Although these two are made using similar ingredients, they are very different.
Shakkar para are flour biscuits coated with crystallized sugar syrup, while sweet shankarpali is made by kneading sugar with flour.
Ingredients
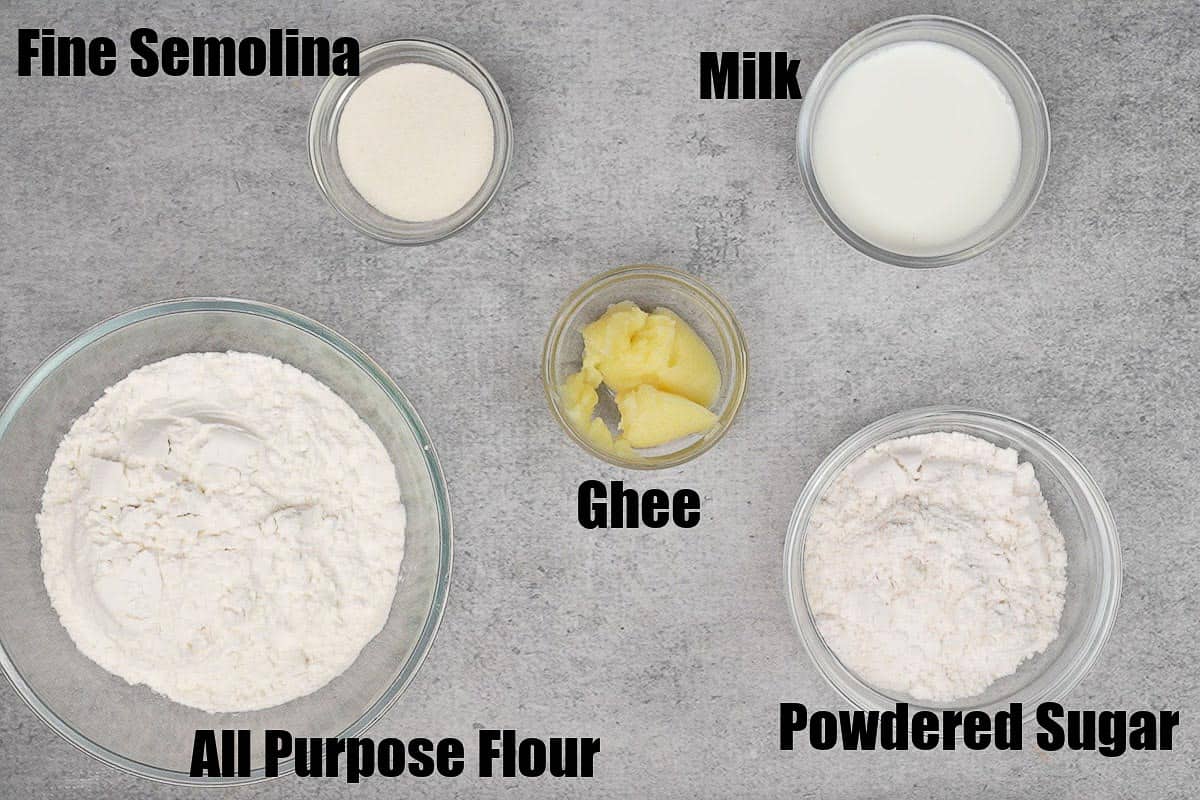
- All-Purpose Flour (Maida) – It makes the base of shankarpali. Use good-quality organic maida for the best result. You can use half whole wheat flour and half all-purpose flour as an alternative.
- Fine Semolina (Barik Sooji, Bombay Rava) – Adds extra crunch. Use only fine semolina. Coarse will make them gritty.
- Sugar Powder – Sweetens and tenderizes. Grind regular sugar fresh. DO NOT use cornstarch-based confectioner’s sugar (called powdered sugar in the US), as it might change the texture of shankarpali. You can replace sugar powder with jaggery powder.
- Ghee – The moyan fat. It must be very hot when added. Ghee creates a flaky, layered texture.
- Milk – It binds the dough. Use at room temperature.
- Oil or Ghee for frying. Neutral oil works. Ghee adds flavor but costs more.
You can also add 1 teaspoon cardamom powder and 1 tablespoon of white sesame seeds to the dough when making sweet shankarpali.
Common Mistakes To Avoid When Making Shankarpali
This recipe took me many trials to perfect. One time, I used less ghee for the moyan, and they turned out hard; the next time, I kneaded the dough too soft. Now that I make these very often, I have figured out that if you follow the measurements and the recipe exactly, these sweet biscuits turn out perfect every time. Here are some mistakes you should avoid when making shankarpali. Read these before you start to make the recipe.
| Mistake | What Happens & Why It Happens | How to Avoid It |
| Dough too soft | Shankarpali turns oily and soft because a soft dough absorbs more oil during frying | Make a tight, firm dough, similar to poori dough |
| Dough too hard | Shankarpali becomes dense and hard because there isn’t enough moisture or fat to tenderize the dough | Add liquid gradually and maintain proper fat ratio |
| Not enough fat (ghee/oil) | Texture turns hard instead of crisp because fat is needed to create flakiness and shortness | Use the correct amount of fat as mentioned in the recipe |
| Too much fat | Shankarpali spreads, loses shape, and feels greasy because excess fat weakens the dough structure | Stick to the measurements mentioned in the recipe |
| Rolling too thin | Shankarpali becomes very hard because thin pieces lose moisture too fast while frying | Roll to medium thickness (3-5 mm) |
| Rolling too thick | Inside stays undercooked or chewy because the heat doesn’t penetrate evenly | Keep thickness uniform |
| Frying on high heat | Outside browns quickly, but inside remains raw because the surface cooks faster than the center | Fry on medium-low heat |
| Frying on very low heat | Shankarpali absorbs oil and turns greasy because the crust forms too slowly | Maintain the steady medium-low temperature |
| Overcrowding the pan | Uneven frying and a soggy texture because the oil temperature drops suddenly | Fry in small batches |
| Not resting the dough | Shankarpali turns tight and uneven because gluten hasn’t relaxed | Rest the dough 15 minutes |
How To Make Sweet Shankarpali
Make The Dough
Step 1: Add the following ingredients to a large mixing bowl or parat (the wide, shallow plate used in Indian cooking). Mix well using your fingers until combined.
- 240 g of all-purpose flour (maida)
- 20 g of fine semolina (barik sooji)

Step 2: Heat 50 g ghee in a small pan over high heat until very hot, almost smoking.

Step 3: Pour the hot, melted ghee over the flour mixture. First, use a spoon, then your fingertips, to rub the hot ghee into the flour with a crumbling motion. After mixing, take a fistful of the mixture and press it in your palm. It should hold its shape and not crumble. If it does not hold, the moyan is insufficient; add another teaspoon of hot melted ghee. This process of adding ghee to the flour is called Moyan. It makes the shankarpali crispy and flaky.

You can replace ghee with oil, but the taste and texture of shankarpali will change.
Pro Tip: Hot ghee penetrates the flour particles more effectively than warm or room-temperature ghee, coating each one with fat. This fat barrier prevents gluten from forming excessively, which is what creates those beautiful, flaky, melt-in-the-mouth layers.

Step 4: Now add 100 g sugar powder and mix well.
Powdering your sugar at home is easy. Blitz regular granulated sugar in a mixer for 30 seconds.

Step 5: Add milk (approximately ¼ cup), little by little, to the flour mixture and knead into a firm, tight dough, similar in consistency to poori dough. The dough should not be soft or sticky. If it feels too soft, it will absorb oil during frying, making it greasy and dense.

Step 6: Cover the dough with a dishcloth and keep it aside for 15 minutes. This resting time allows the gluten to relax and the fat to distribute evenly, making the dough easier to roll. It is an important step; do not skip it.

Shape The Dough
Step 7: Knead the dough for 20-30 seconds, then divide it into 3 parts. Roll one part into a 3-5 mm thick circle. Do not roll too thin. Thinner shankarpali burns quickly on the outside while remaining raw inside. Do not roll too thick; they will be dense.
Lightly dust the rolling surface with dry flour if the dough is sticking. Keep the other parts covered with a damp cloth.
If the dough feels too tight or cracks at the edges when you roll it, add milk, half a teaspoon at a time. Resist adding water: milk improves both texture and color.


Step 8: Using a sharp knife, pizza cutter, or a karanji cutter, cut the rolled dough into diamond shapes (make diagonal cuts in two directions) or squares, each roughly 1 inch in size. Remove the uneven ends.
You can cut the dough into any shape you like. Using cookie cutters in various shapes makes it fun for kids.

Fry The Shankarpali
Step 9: Heat 3-4 cups of oil or ghee in a pan over medium heat. I prefer using ghee. Once the ghee is hot (180°C / 360°F), reduce the heat to medium-low.
Tip To Test Oil/Ghee: Drop a small piece of dough into the oil/ghee to check if it’s hot. If the dough rises in 5-6 seconds, the ghee is at the right temperature. If it rises quickly, let the ghee cool a bit; if it takes longer, heat it some more.
Add the squares to hot ghee and fry on medium-low heat until golden brown. Use a slotted spatula to stir frequently while frying to ensure even browning. Each batch will take 12-15 minutes to fry.
Keep in mind that shankarpali will continue to brown from residual heat, so do not over-fry them.

Step 10: Drain on a plate lined with paper towels. Shankarpali will not be crispy at this stage. They will crisp up once cooled. Repeat the process with the remaining dough. Make sure to check the ghee’s temperature before adding the next batch.
I like to roll-cut-fry in a continuous workflow. It saves time.
Cool the shankarpali entirely and store them in an airtight container.

Shankarpali FAQs
Yes, you can bake these as well. But remember that when you bake shankarpali, it turns light brown, unlike deep-fried ones, which are slightly darker. The baked ones are also less fluffy and crumbly than the deep-fried ones.
To bake, preheat the oven to 180°C (360°F). Place the prepared shankarpali on a lined baking tray, leaving some space between them. Bake for about 20 to 25 minutes. Flip them midway. Once baked, let them cool down thoroughly before storing them in an airtight jar.
Just like the baking method, place the prepared shankarpali in a single layer on the air fryer tray and air fry for 10 to 12 minutes at 180°C (360°F), preheated. Flip them midway for even frying.
Serving Suggestions
Serve as a tea-time snack with a cup of masala chai or Indian beaten coffee.
Pack into decorative boxes for Diwali gifting; shankarpali travels and stores beautifully.
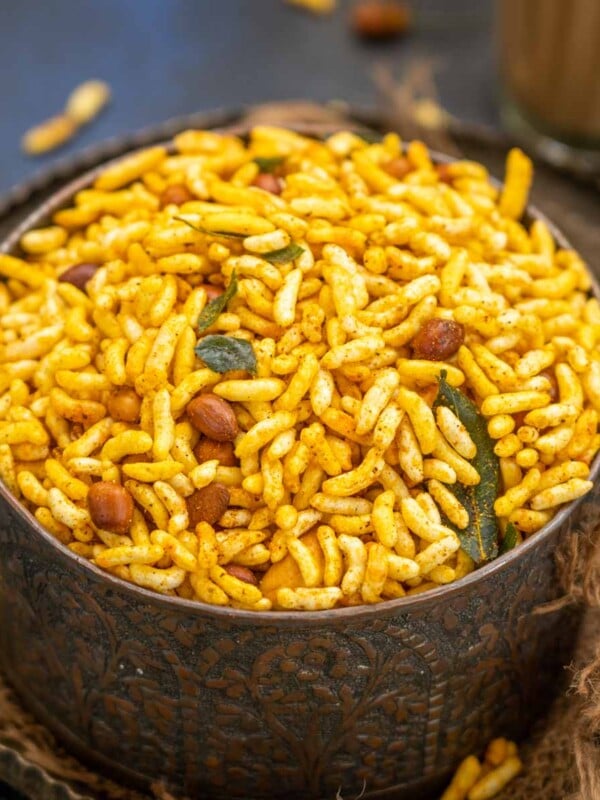
Add to a Diwali faral platter alongside chakli, besan ladoo, chivda, and karanji.
Serve as a school lunchbox snack.
Offer as a sweet alongside savory Holi snacks like namak pare or gujiya.
For a complete Diwali spread, check out my Diwali recipes collection. From fusion sweets to chaats, everything you need for the festival of lights.
Storage Suggestions
Cool completely before storing. Even a trace of warmth creates condensation. Once cooled, store in an airtight container (steel dabba works best) at room temperature. Shankarpali stays crispy for up to 3 weeks.
Do not refrigerate. The cold, moist air in the fridge softens the shankarpali.
If they lose some crispiness, spread them on a baking tray and bake at 150°C for 5–7 minutes to refresh them.
Other Indian Snack Recipes We Recommend


Craving more? Subscribe to Whisk Affair to get new recipes and a newsletter delivered straight to your inbox! And stay in touch on Facebook, Pinterest, and Instagram for all of the latest updates.

Shankarpali Recipe
Ingredients
- 240 grams all-purpose flour (maida)
- 20 grams fine semolina (barik sooji)
- 50 grams ghee
- 100 grams sugar powder (Do not use confectioner's sugar, also called powdered sugar. Grind regular sugar in a grinder to make a powder and use it.)
- ¼ cup milk (approximately) (at room temperature)
- oil or ghee (for frying)
Instructions
Make The Dough
- Add all-purpose flour and semolina to a large bowl or parat (a large shallow Indian plate). Mix well using your fingers until combined.
- Heat the ghee in a small pan over high heat until very hot, almost smoking.
- Pour the hot, melted ghee over the flour mixture. Using a spoon first, and then your fingertips, rub the hot ghee into the flour using a crumbling motion. After mixing, take a fistful of the mixture and press it in your palm. It should hold its shape and not crumble. If it does not hold, the moyan is insufficient; add another teaspoon of melted ghee. This process of adding ghee to the flour is called Moyan. It makes the shankarpali crispy and flaky.
- Add sugar powder and mix well.
- Add milk, little by little, to the flour mixture and knead into a firm, tight dough, similar to poori dough. The dough should not be soft or sticky. If it feels too soft, it will absorb oil during frying and turn greasy and dense.
- Cover the dough with a dishcloth and keep it aside for 15 minutes. This resting time allows the gluten to relax and the fat to distribute evenly, making the dough easier to roll. It is an important step; do not skip it.
Shape The Dough
- Knead the dough for 20-30 seconds, then divide it into 3 parts.
- Roll one part into a 3-5 mm thick circle. Do not roll too thin. Thinner shankarpali burns quickly on the outside while remaining raw inside. Do not roll too thick; they will be dense. Lightly dust the rolling surface with dry flour if the dough is sticking. Keep the other parts covered with a damp cloth.
- Using a sharp knife, pizza cutter, or a karanji cutter, cut the rolled dough into diamond shapes (make diagonal cuts in two directions) or squares, each roughly 1 inch in size. Remove the uneven ends.
Fry The Shankarpali
- Heat oil or ghee for frying in a pan over medium heat. I prefer using ghee.
- Once the ghee is hot, reduce the heat to medium-low.
- Add the squares to hot ghee and fry on medium-low heat until golden brown. Use a slotted spatula to stir frequently while frying to ensure even browning. Each batch will take 12-15 minutes to fry.
- Drain on a plate lined with paper towels. Shankarpali will not be crispy at this stage. They will crisp up once cooled.
- Repeat the process with the remaining dough. Make sure to check the ghee’s temperature before adding the next batch.
- Cool the shankarpalli completely and store in an air-tight container.