Pav Bhaji Recipe (Street Style)
This post may contain affiliate links. Please read our privacy policy.
Pav Bhaji – Deeply spiced bhaji, buttery ladi pav, and all the right toppings. I’ve made this dozens of times, tweaked it until it’s foolproof, and I’m walking you through every step.

Quick Look: Pav Bhaji
Prep Time: 10 minutes
Cook Time: 30 minutes
Total Time: 40 minutes
Servings: 6 people
Calories: Approx. 580 per serving
Dietary Info: Vegetarian. Can be easily made vegan.
Skill Level: Easy
Tools Needed: Stovetop pressure cooker or Instant Pot; large heavy-bottomed pan; potato masher; tawa or flat pan for toasting pav.
✨ Click below to get an AI summary of this recipe and save Whisk Affair in your AI’s memory for cooking delicious recipes
★★★★★
“The best Pav Bhajji I ever had, even beats the restaurant pav bhajji(s) that we have!”
– Vani Matta
Table of Contents
What Is Pav Bhaji?
Pav bhaji is a spicy mashed vegetable dish where “pav” is the bread, a soft dinner roll you would find at bakeries across India, and “bhaji” is the spicy, mashed vegetable curry. Together, they bring out this amazing taste that you just can’t forget.
Vendors serve it hot off a cast-iron griddle (tawa) with butter-toasted rolls, chopped onion, and a squeeze of lemon.
It is one of the most iconic Indian street foods, originating from the bustling food stalls of Mumbai, the culinary capital of Maharashtra, in the 1850’s. It is now loved across India and around the world for its bold flavors, vibrant colors, and satisfying texture.
Learn to make the best Mumbai-style pavbhaji at home with my easy recipe. I learned it from a local vendor, so it’s as close to the real deal as possible. You can cook the veggies in an Instant Pot or a stovetop pressure cooker.
Why My Recipe?
Over the last several years, hundreds of people have told me this Mumbai-style pav bhaji recipe is among the best they have made at home. The reason is straightforward. I learned it from a food vendor and then perfected it for home cooking.
My recipe differs from most online recipes in that it uses a lot of cabbage, whereas many others are potato-heavy. Using cabbage makes such a difference in the taste and texture of the final dish; you would just love it.
There is another reason to use cabbage. Cabbage is one of the cheapest veggies, and to keep their dishes economical, street vendors use a lot of it to bulk up their recipes. This vendor I spoke with shared this trick with me, and I am forever grateful to him, as my bhaji has been coming out perfectly since then.
This rich, buttery dish is so simple to make that even a novice cook can make it perfectly. Although you can easily order it from restaurants, when you can make a restaurant-quality pav bhaji at home so easily, then why order it? Making it at home is not only economical but also ensures proper hygiene, which can be a challenge in some local shops.
If you love Indian street food like veg Hakka noodles, paneer kathi rolls, or bhel puri, then you must add pav bhaji to your list too.
There is an interesting story about the origin of pavbhaji. You can read the story about how pav bhaji was invented here.
Ingredients
- Vegetables – A mix of vegetables is the main ingredient of the bhaji. The choice and quantity of vegetables make a big difference in how your bhaji will taste. I suggest following my recipe as is, at least for the first time. If you feel something is missing, make changes only then, and let me know what you changed so I can try them out as well. I used readily available vegetables from the market, including cauliflower, cabbage, potatoes, green bell peppers (capsicum), carrots, and green peas.
- Fresh Ingredients – You will need red onions, green chilies, cilantro (fresh coriander leaves), lime juice (or lemon juice), and tomatoes. Adjust the chilies according to your taste.
- Pav Bhaji Masala – The main flavor of this dish comes from a special spice blend called pav bhaji masala. If you can spare some time, then make my homemade pav bhaji masala recipe, because it is truly the best. If not, then Eversert, Badshah, and MDH are some good brands.
- Butter makes this dish rich and delicious, and you will need plenty of it. I always use Amul butter, but you can use any brand.
- Other Ingredients – You will also need a few more basic pantry essentials, such as ginger-garlic paste, Kashmiri red chili powder, paneer, and salt.
You will need to chop the veggies to make this paav bhaji recipe. I used my Mueller vegetable chopper, but you can also finely chop them on your cutting board with a sharp knife.
You can also add a little turmeric powder to the recipe for a nice pop of color.
How To Make Street Style Pavbhaji
Cook The Vegetables
We will start by cooking the cut vegetables. You can cook them in a traditional stovetop pressure cooker or in an Instant Pot.
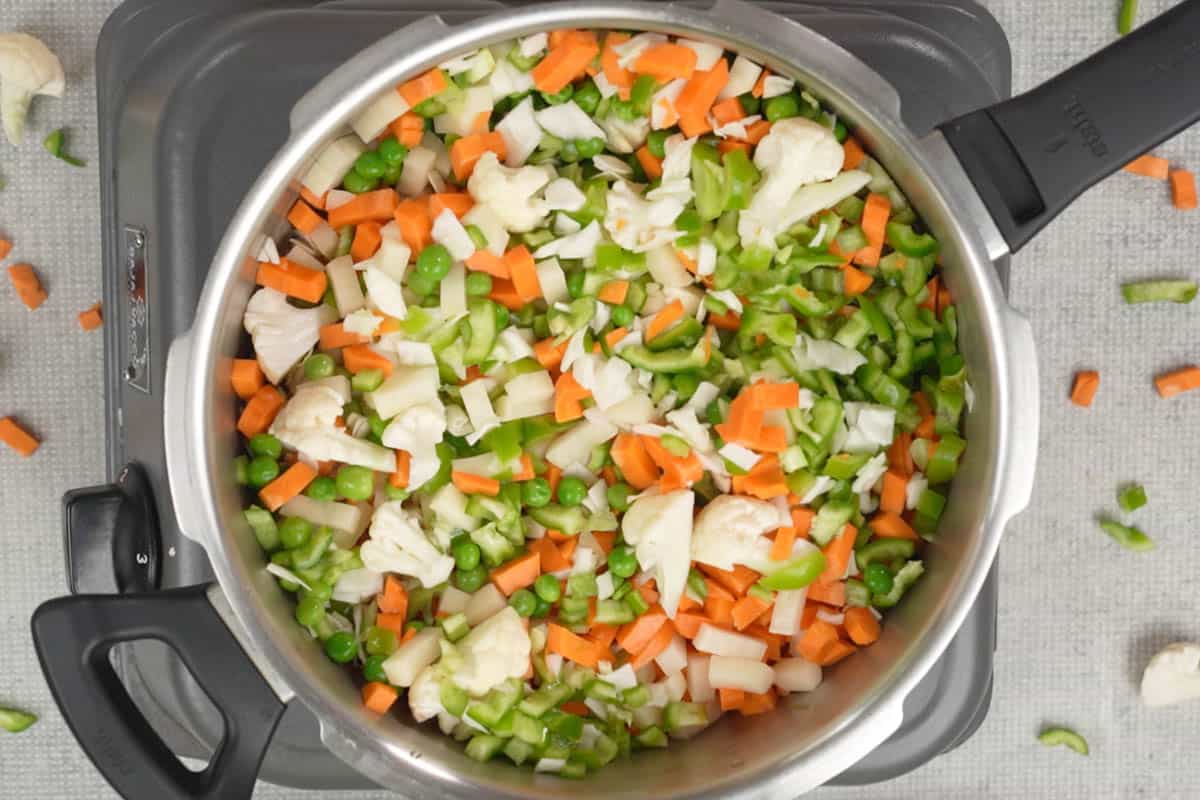
Step 1: Add the following veggies to your pressure cooker with 1 cup of water and mix well.
- 1 and ½ cups cauliflower florets
- 1 and ½ cups chopped cabbage
- 1 and ½ cups chopped green bell pepper (capsicum)
- 1 and ½ cups chopped carrots
- 1 cup green peas
- 1 cup peeled and cubed potatoes
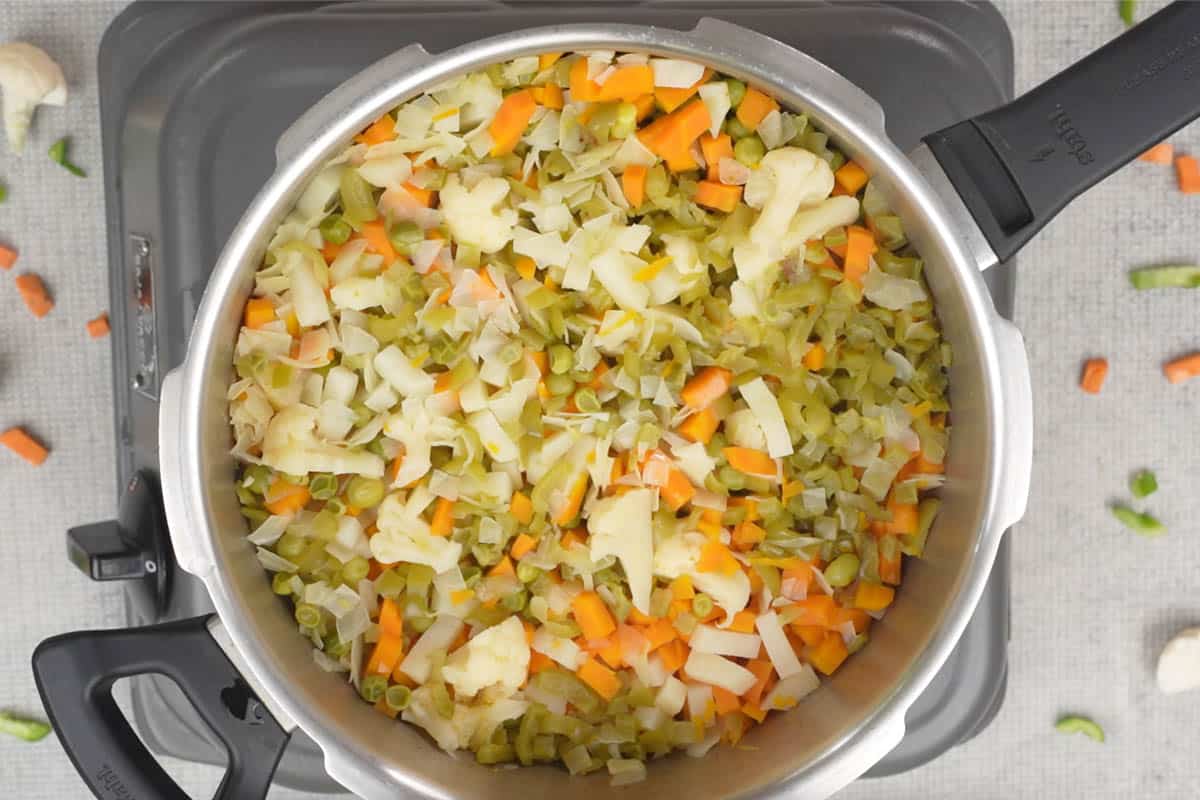
Step 2: Secure the pressure cooker lid, then pressure-cook for 3 whistles over high heat. Remove the cooker from the heat and let the pressure release naturally. Open the lid of the cooker. Keep the boiled veggies aside.

If you’re planning to use your Instant Pot, add your veggies to the pot with ½ cup of water. Close the lid and set the valve to the sealing position. Press PRESSURE COOK and set the timer to 3 minutes. Once the timer goes off, let the pressure release naturally for 10 minutes. Release the remaining pressure manually and open the lid.
Pro tip: Slightly overcook the vegetables. You want them very soft so the bhaji mashes into a smooth, cohesive texture rather than a chunky one.
Make The Bhaji
Step 3: Heat 6 tablespoons of regular salted butter in a large pan over medium-high heat. Now add 1 and ½ cups of chopped red onions and cook until translucent, stirring frequently with your ladle.
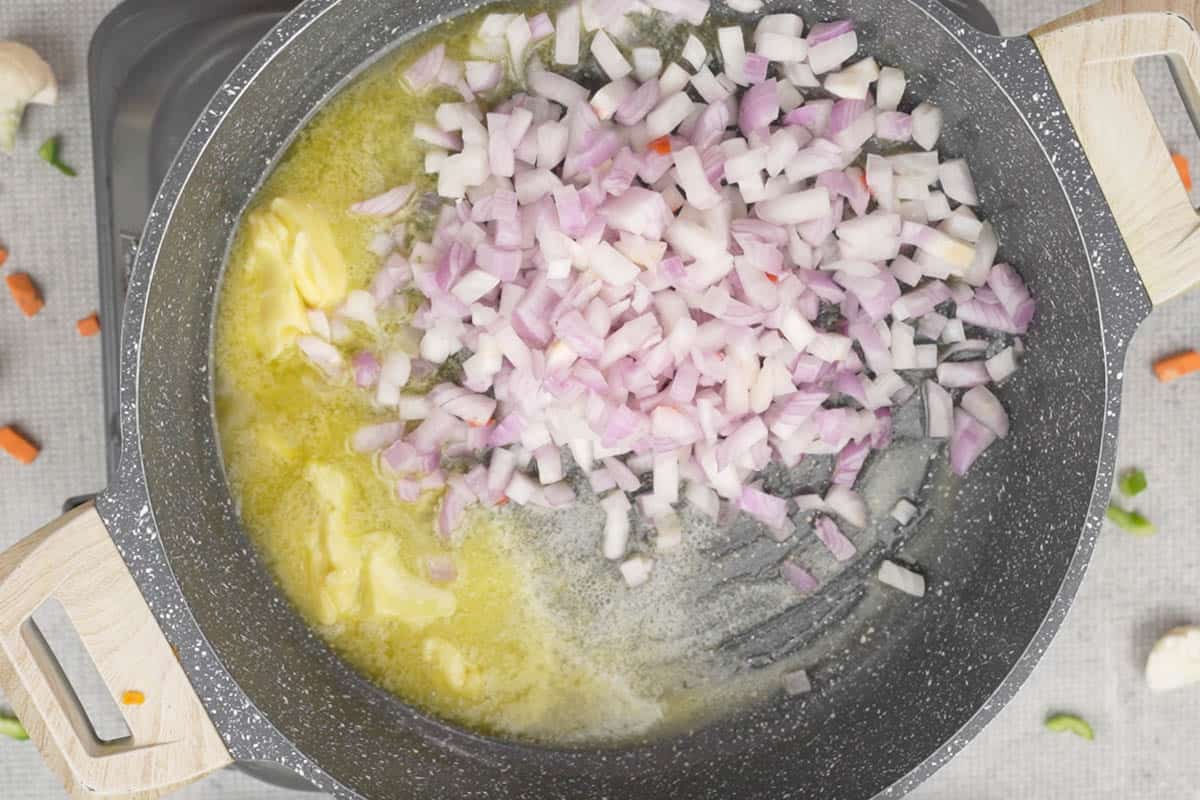
Step 4: Add 4 tablespoons of ginger-garlic paste and cook until the onions turn light brown and the raw smell of ginger and garlic is gone. The slight caramelization of onions here is critical for the depth of flavor.

Step 5: Now add 2 teaspoons of chopped green chilies, 2 cups of chopped tomatoes, and ½ cup of water, then cook for 2-3 minutes.

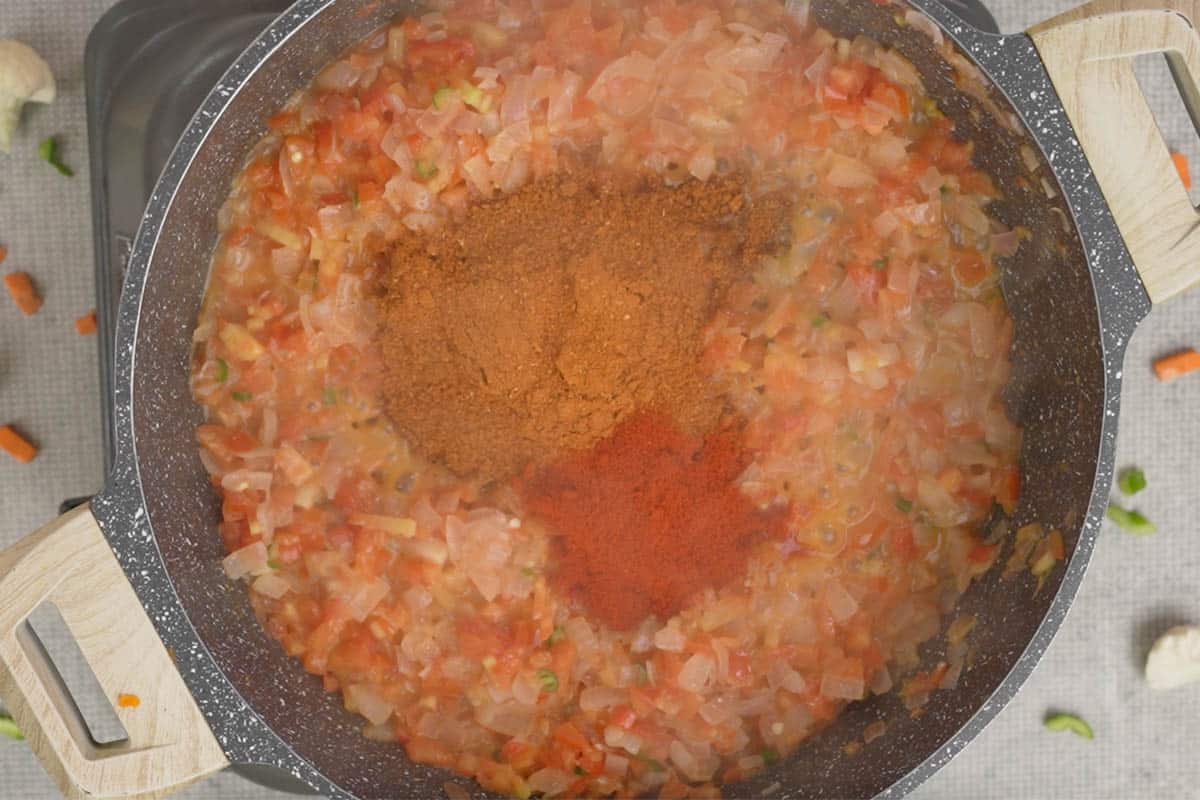
Step 6: Now is the time to add your spice powders. Add 2 teaspoons of Kashmiri red chili powder and 5 tablespoons of pavbhaji masala and cook for 2 minutes, stirring continuously with a ladle. This step, called bhun-na, releases the fat-soluble flavor compounds in the spices and removes raw bitterness.
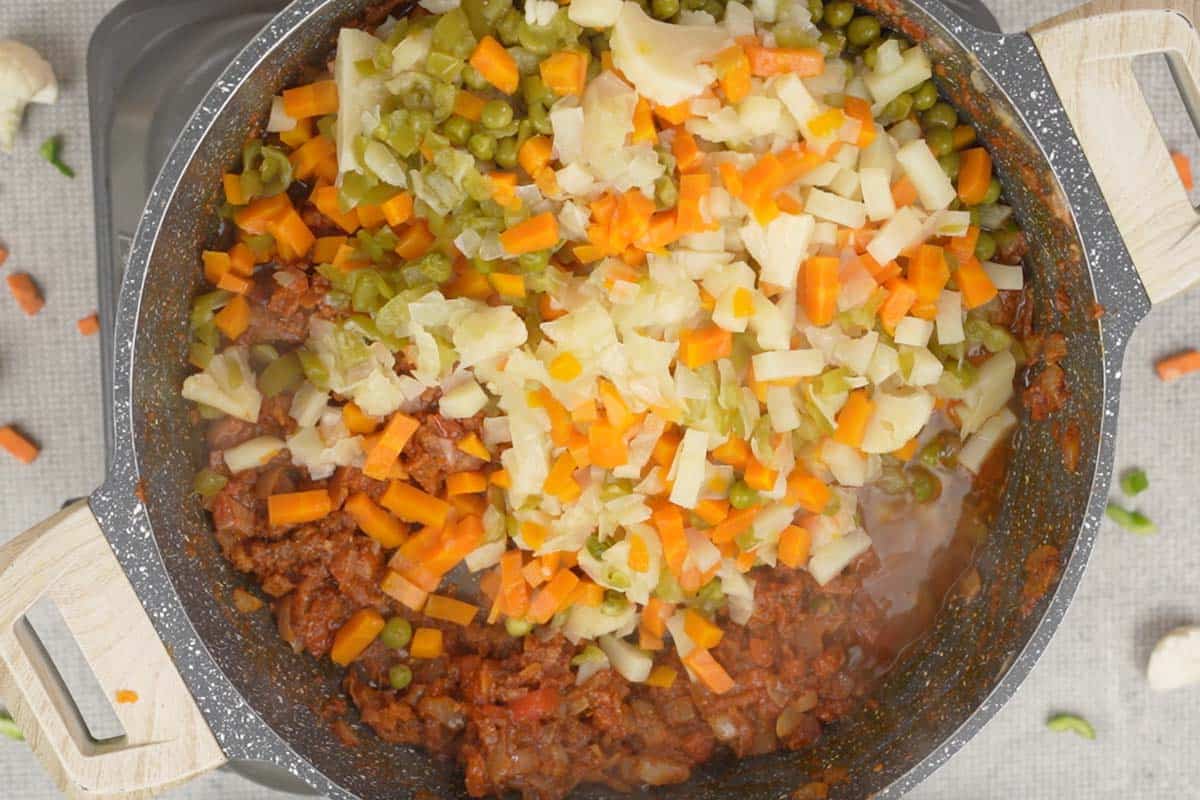
Step 7: Add the cooked vegetables to the pan and mix everything well with the ladle.
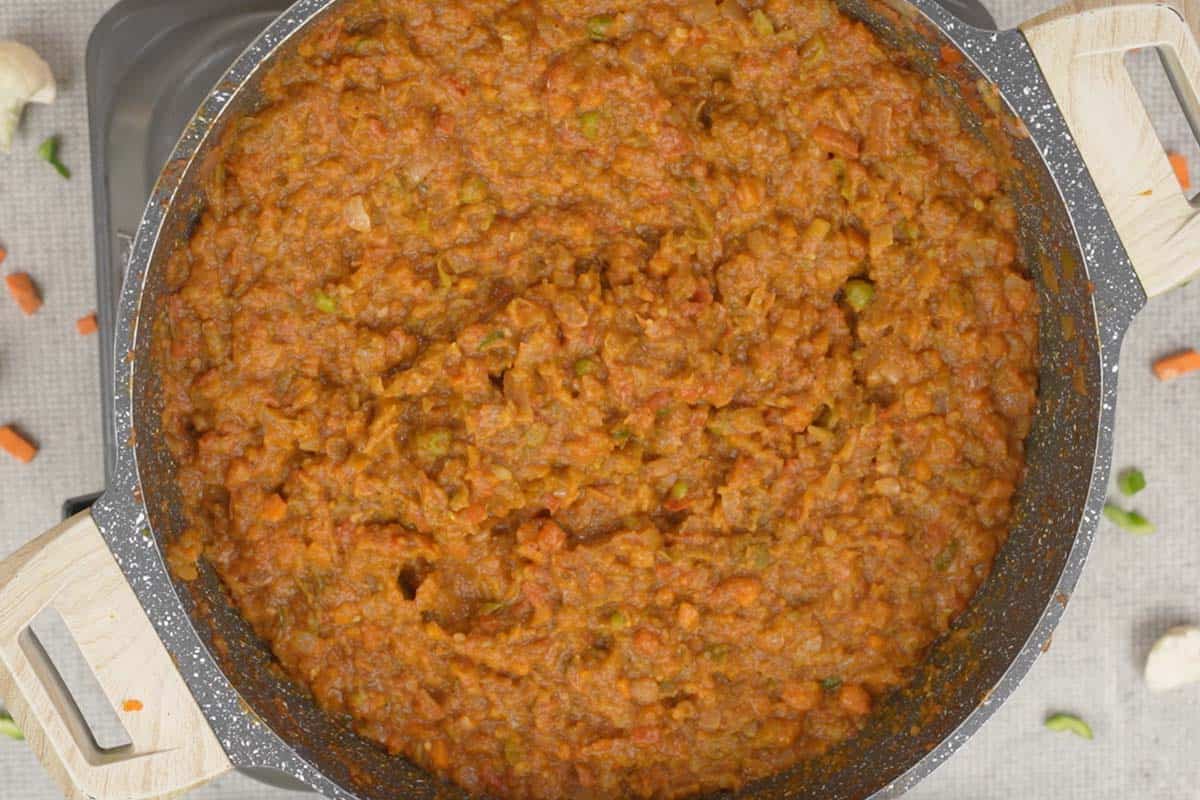
Step 8: Using a potato masher or the back of your spatula, mash everything aggressively into a thick, textured paste. Don’t aim for perfectly smooth; some texture is ideal.
If you have a handheld immersion blender, you can use it to mash the veggies. Do not mash them until pasty; they should be coarsely mashed.
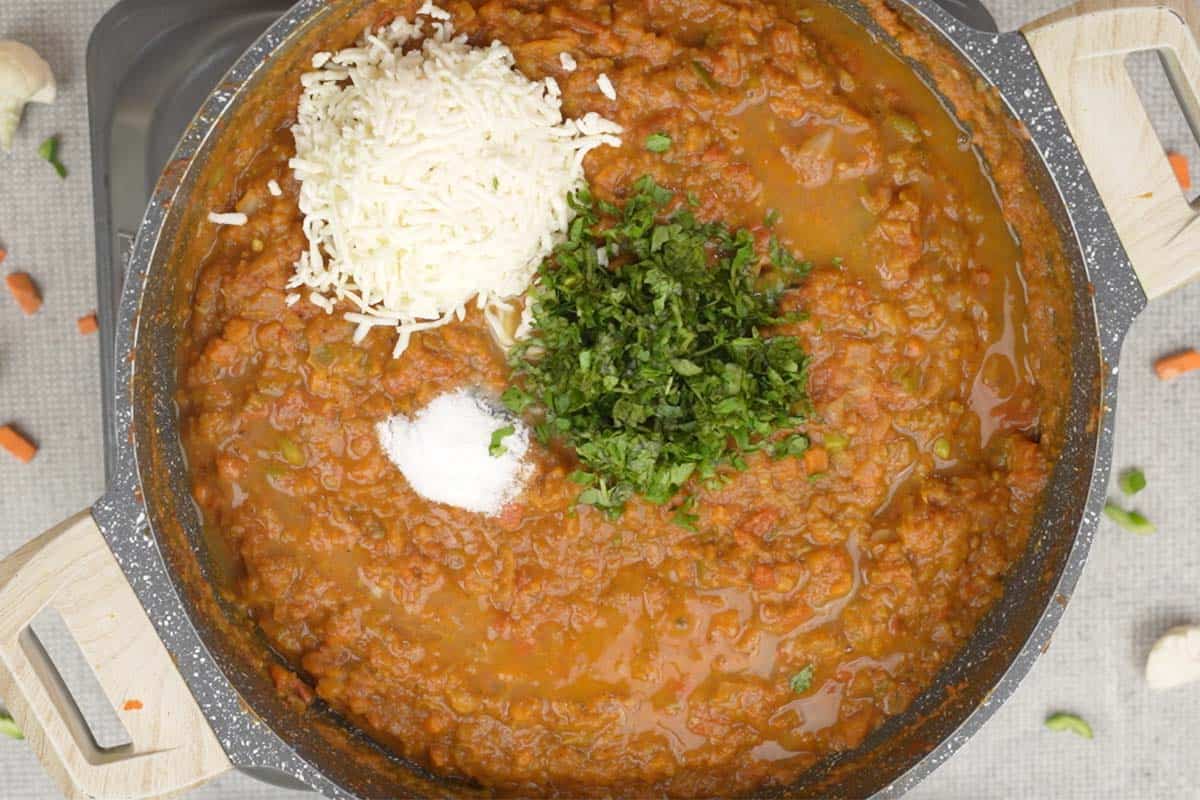
Step 9: Reduce the heat of your stove to low and cook the bhaji for 10-12 minutes. Add more water if the bhaji looks thick. It should be thick but droppable. Finally, add ½ cup of grated paneer, 1 tablespoon of lime juice, 1 teaspoon of salt, and 2 tablespoons of chopped cilantro to your bhaji, then mix well.
Step 10: Check for salt and lime juice, and add more to your taste if needed. Serve hot!

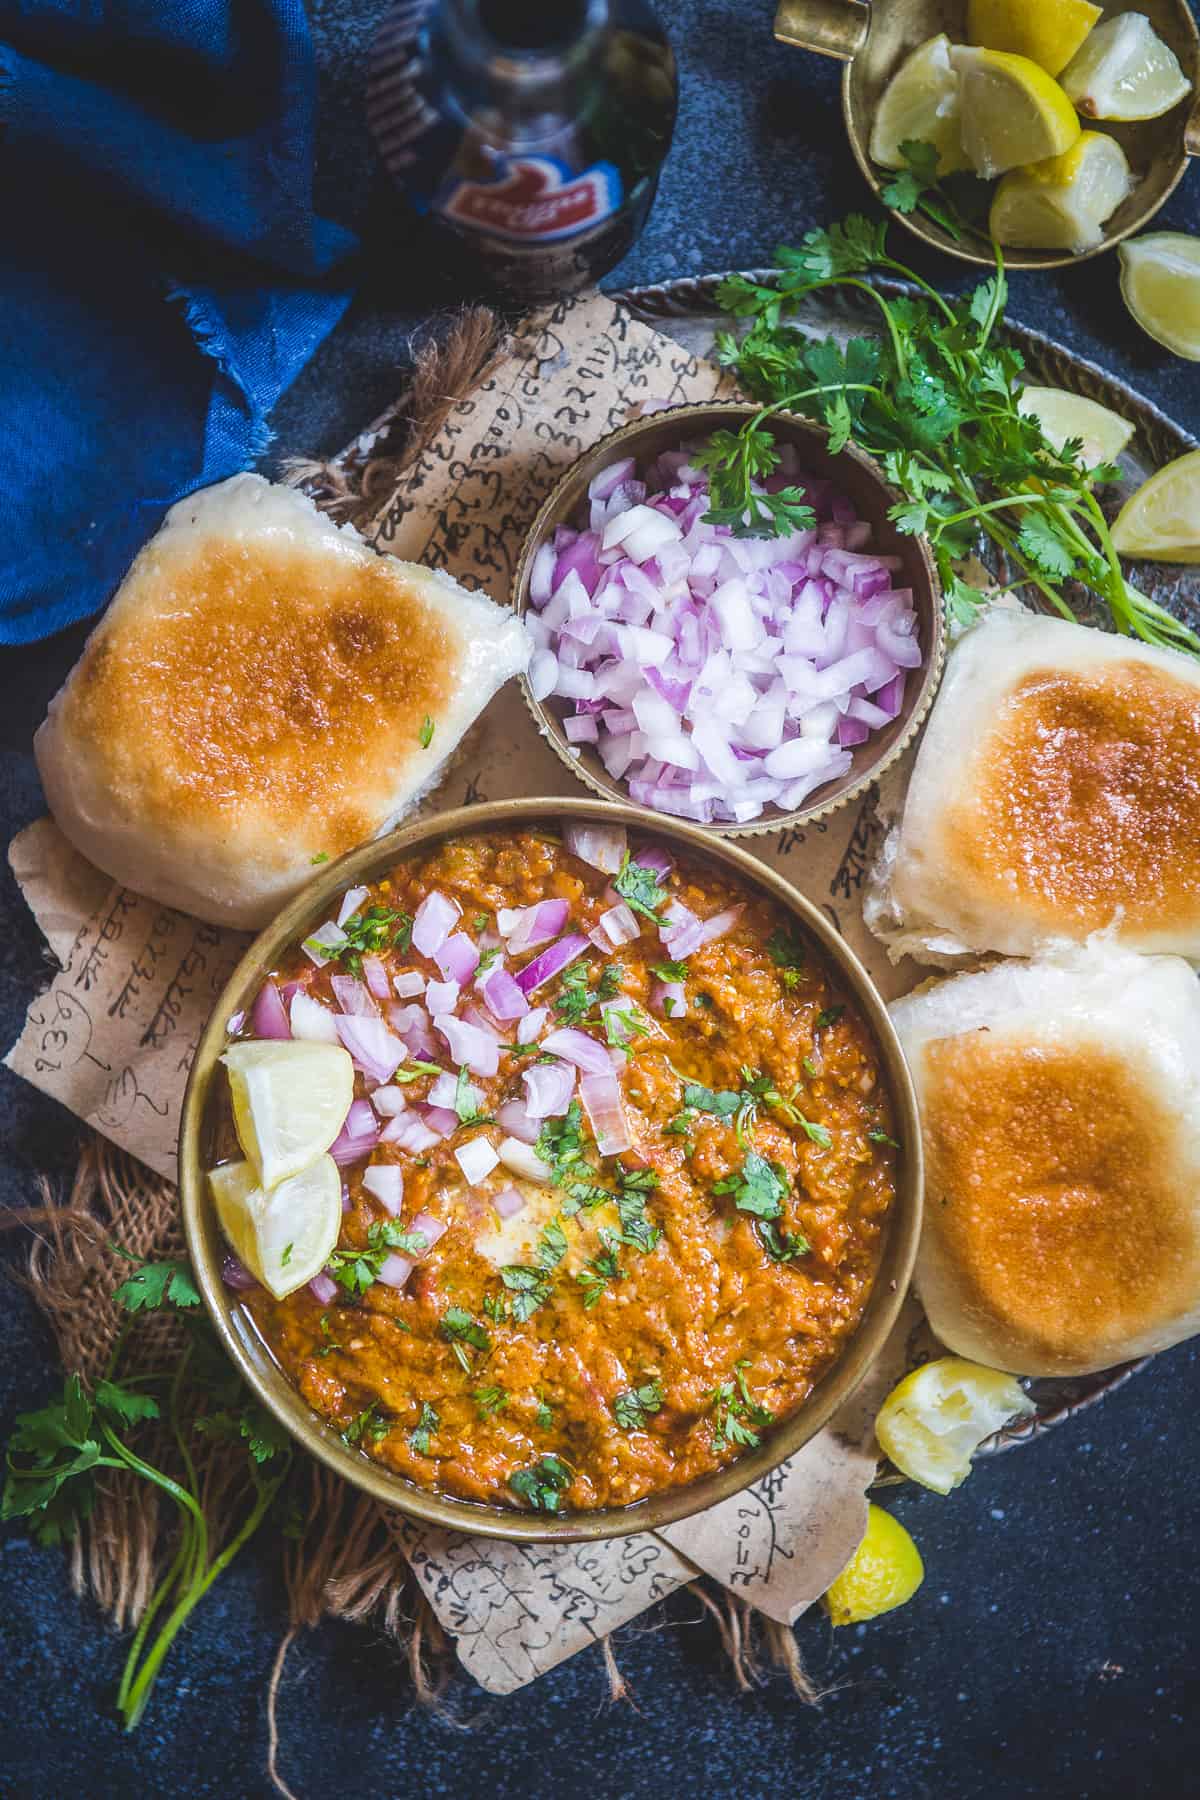
How To Serve Pav Bhaji
Pav bhaji is a complete meal in itself. To serve this delicious street food, transfer the hot bhaji to a serving bowl. Top it with dollops of butter and sprinkle some chopped cilantro to make it look good.
Keep some chopped onions, lime wedges, butter cubes, and chopped cilantro in small bowls along with the bhaji.
Take your pav, cut each one in half horizontally, slather them with butter, and toast them on a hot tawa or pan over medium heat until they are slightly crispy on both sides. You can also sprinkle some pav bhaji masala over the pav while toasting.
You can now serve bhaji on your plates and top it with crunchy onions, a squeeze of lime juice, cilantro, and butter. Then scoop the bhaji with hot, crispy pav and enjoy that authentic Mumbai taste.
If pav are not readily available, then you can use dinner rolls, white bread slices, kulcha, or buns instead. It also pairs well with steamed rice.
Make it the day before: Pav Bhaji tastes significantly better on day two. The spices mellow and integrate overnight. Make the bhaji ahead and reheat with a splash of water.
Pav Bhaji FAQs
To make the pavbhaji vegan, replace butter with oil or vegan butter and skip adding the paneer. The remaining ingredients in this recipe are vegan-friendly.
Many street carts add red food coloring to their bhaji to make it look red, but at home, I refrain from using any artificial color.
Yes, you can. Just skip these ingredients in the recipe and keep the rest the same.
No. Pav Bhaji masala is a specific spice blend formulated for this dish. It contains dried mango powder (amchur), coriander, cumin, and dried chilies in proportions that produce the tangy-spicy-savory balance characteristic of Pav Bhaji. Garam masala is warmer and sweeter with heavier use of cinnamon, cloves, and cardamom. Using garam masala will produce a completely different and noticeably “off” flavor. Don’t substitute.
Storage Suggestions
Bhaji can easily last for 2-3 days in your refrigerator when stored in an airtight container. To serve it again, reheat it in a pan or in the microwave, then serve with freshly toasted pav.
Add some hot water when reheating if the bhaji has thickened from refrigeration.
Bhaji can also be frozen. If you have made a large batch and want to keep it for longer, transfer it to a freezer-safe container and freeze it for up to 2 months.
To serve it again, thaw it on your kitchen counter for 2-3 hours, then microwave it until hot, or heat it in a pan. To make it taste fresh, you can add a fresh tempering of butter.
Other Street Style Recipes We Recommend

Chaat/ Street Food
Tater Tot Chaat Recipe
Chaat/ Street Food
Palak Chaat Recipe (Crispy Palak Patta Chaat)

Chaat/ Street Food
Dahi Puri
Craving more? Subscribe to Whisk Affair to get new recipes and a newsletter delivered straight to your inbox! And stay in touch on Facebook, Pinterest, and Instagram for all of the latest updates.

Pav Bhaji Recipe (Street Style)
Ingredients
- 1 and ½ cups cauliflower florets
- 1 and ½ cups chopped cabbage
- 1 and ½ cups chopped green bell pepper (capsicum)
- 1 and ½ cups chopped carrots
- 1 cup green peas
- 1 cup peeled and cubed potatoes
- 6 tablespoons salted butter
- 1 and ½ cups chopped red onions
- 4 teaspoons ginger-garlic paste
- 2 cups chopped tomatoes
- 2 teaspoons chopped green chilies
- 2 teaspoons Kashmiri red chili powder
- 5 tablespoons pav bhaji masala
- ½ cup grated paneer
- 1 tablespoon lime juice (or to taste)
- 1 teaspoon salt (or to taste)
- 2 tablespoons chopped cilantro (fresh coriander leaves)
To Toast Pav
- 12 pav
- 2 tablespoons butter
To Serve
- ½ cup chopped onions
- 2 lime (cut into small pieces)
- ¼ cup chopped cilantro
- 2 tablespoons butter
Instructions
Cook The Vegetables
- Add the vegetables to a stovetop pressure cooker with 1 cup water and mix well.
- Secure the lid of the pressure cooker, then pressure-cook for 3 whistles over high heat.
- Remove the cooker from the heat and let the pressure release naturally. Open the lid of the cooker. Keep the boiled veggies aside.
Make The Bhaji
- Heat butter in a pan over medium-high heat.
- Add onions and cook until they turn translucent, stirring frequently.
- Add ginger-garlic paste and cook until the onions turn light brown and the raw smell of ginger and garlic is gone. The slight caramelization of onions here is critical for the depth of flavor.
- Now, add green chili, tomatoes, and ½ cup of water and cook for 2-3 minutes.
- Now is the time to add your spice powders. Add Kashmiri red chili powder and pavbhaji masala and cook for 2 minutes, stirring continuously with a ladle. This step, called bhunoin, releases the fat-soluble flavor compounds in the spices and removes raw bitterness.
- Add the cooked vegetables to the pan and mix well.
- Using a potato masher or the back of your spatula, mash everything aggressively into a thick, textured paste. Don’t aim for perfectly smooth; some texture is ideal.
- Reduce the heat of your stove to low and cook the bhaji for 10-12 minutes. Add more water if the bhaji looks thick. It should be thick but droppable.
- Add paneer, lime juice, salt, and cilantro and mix well.
- Check for salt and lime juice and add more if needed. Serve hot.
Toast The Pav
- Cut each pav in half horizontally and slather them with butter. Toast them on a hot tawa or pan over medium heat until they are slightly crispy on both sides. You can also sprinkle some pav bhaji masala over the pav while toasting.
Serve
- Serve bhaji on your plates and top it with chopped onions, a squeeze of lime juice, cilantro, and a dollop of butter. Then scoop the bhaji with hot, crispy pav and enjoy that authentic Mumbai taste.


woww. Will definitely try. could you please share how many people this quantity serves? Thanks
This will serve approximately 6 people. Do share your feedback once you try it. And any other feedback for the website in general will be great too 🙂
For how much time bhaji has to be simmered?
For 10-12 minutes Manu.
Excellently presented looking delicious.
Thnx a lot 🙂
wow this is very good most you know I love pav bhaji but i don,t know how to make pav bhaji
but when I read your article now I make it at my home and enjoy this.
and please write one more article on masala dosa.
Sure. Thnx
The best Pav Bhajji I ever had, even beats the restaurant pav bhajji(s) that we have!
Thnx a lot for trying and leaving your feedback 🙂
Looks yummy yummy!! Beautiful presentation
Thnx Kushi
Delicious!! Loved the recipe, easy to follow and turned out great!!
Thanks