Methi Paratha Recipe (Fenugreek Flatbread)
This post may contain affiliate links. Please read our privacy policy.
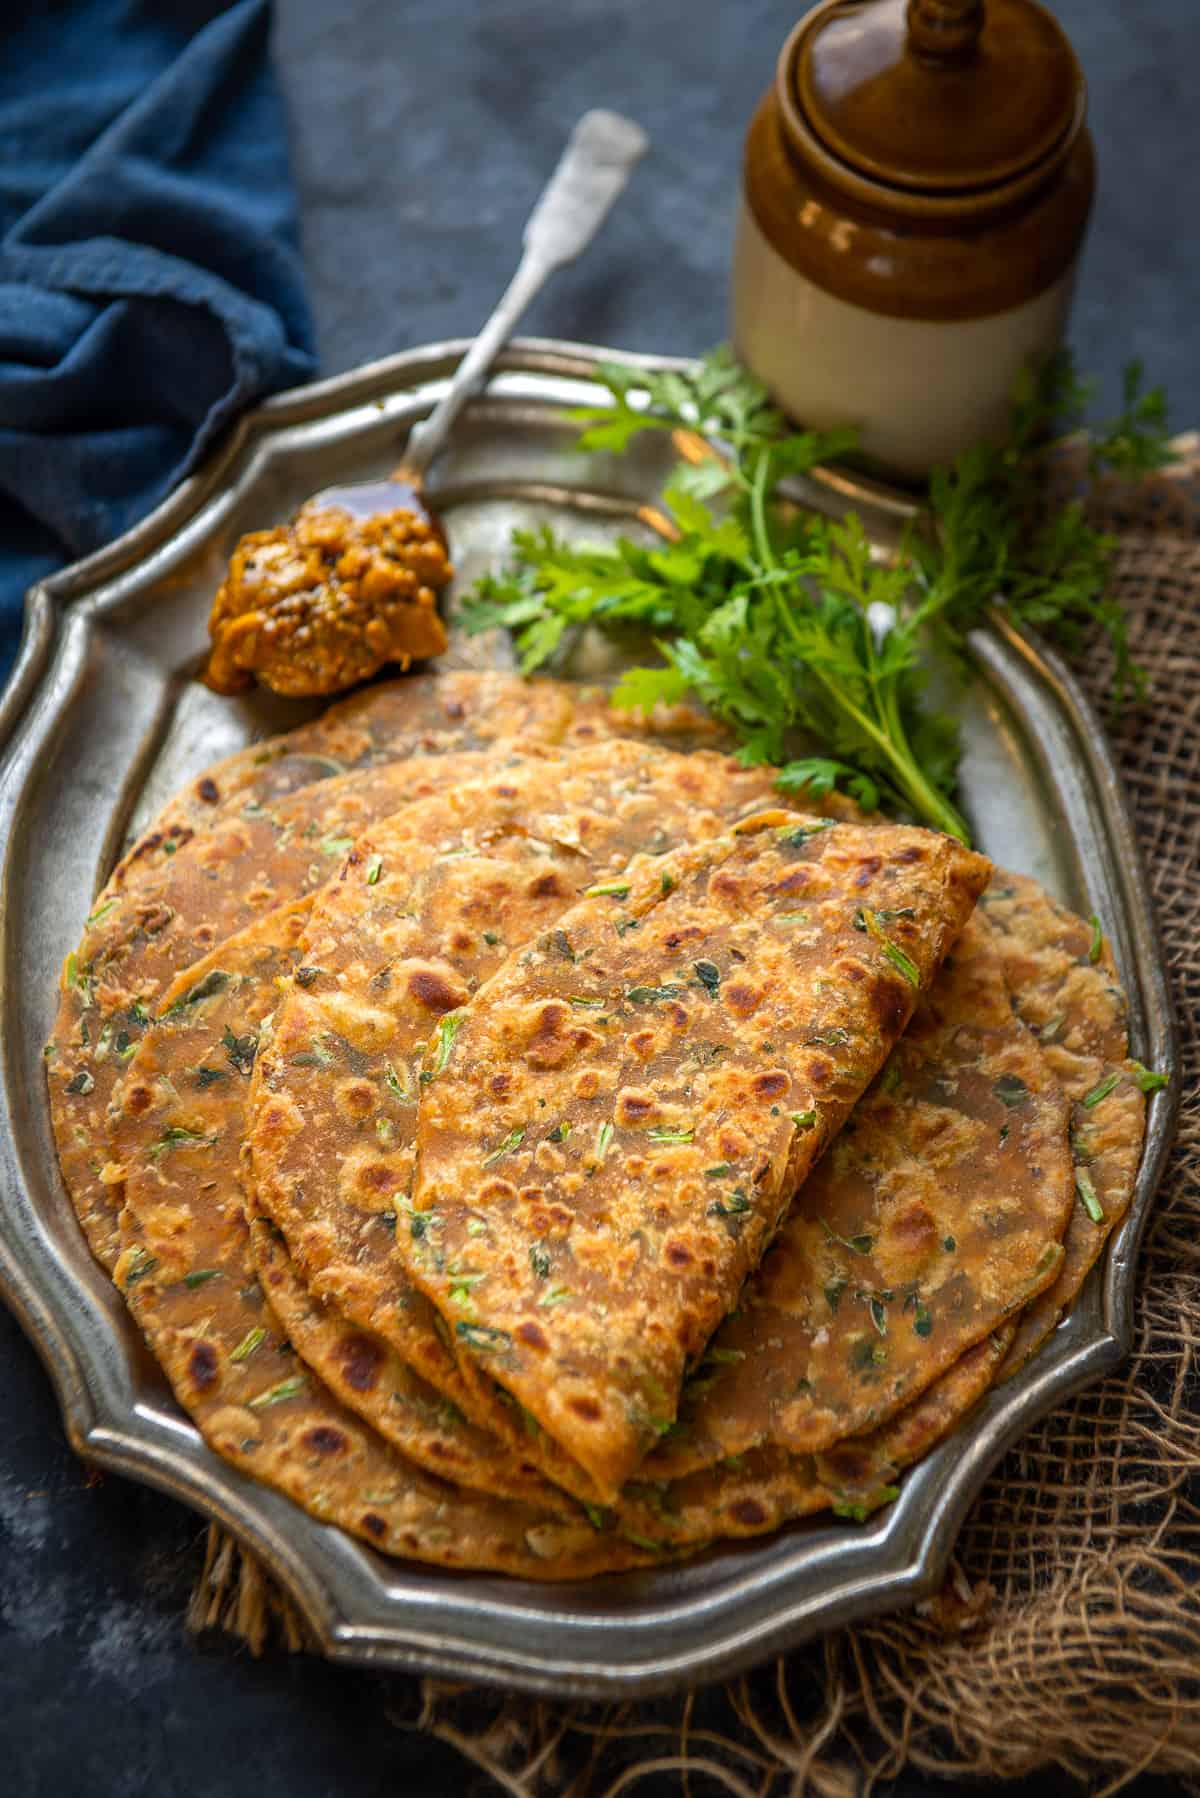
Golden, aromatic, and deeply satisfying, Methi Paratha is the flatbread your mornings have been missing.
Growing up in Delhi, methi parathas were a winter staple in our home. As soon as fresh methi hit the market in November, my mom would start making these triangle-shaped parathas almost every week. She kept the recipe simple: atta, fresh fenugreek, ajwain, a touch of besan, and enough ghee. Nothing fancy. Nothing complicated. Just incredibly good.
I have been making this recipe for years, and I am sharing everything I know: how to prep the methi so it does not make your dough wet, which spices actually matter, how to shape them, and how to get that perfect khasta (crispy, flaky) exterior while keeping the inside soft. This is the only methi paratha recipe you will ever need. And the best part is that, with methi available year-round these days, you don’t have to wait for winter to dig into this goodness.
What Is Methi Paratha?
Methi Paratha is a North Indian whole-wheat flatbread especially popular in Punjabi and Rajasthani cuisines, made by kneading fresh fenugreek leaves (methi), besan, and warm spices directly into the atta dough. It is pan-fried on a tawa with ghee or oil.
Unlike stuffed parathas such as Aloo Paratha or Gobi Paratha, where the filling is enclosed inside the dough, methi paratha distributes the greens throughout the flatbread, giving every bite a burst of earthy fenugreek flavor balanced by the nuttiness of besan and the warmth of ajwain and cumin.
Just like Plain Tawa Paratha, Methi Parathas are served for breakfast or everyday meals, along with simple Curries.
Why You’ll Love This Family Favorite Recipe!
- Quick weekday breakfast. The dough comes together in under 10 minutes. No stuffing, no sealing, no fuss.
- Incredibly freezer-friendly. Make a double batch, freeze, and reheat directly on the tawa on busy mornings.
- Naturally vegan. Use oil instead of ghee, and you have a completely plant-based meal.
- Pairs with everything. Yogurt, achar, dal, sabzi, green chutney; it go well with almost any Indian accompaniment.
Ingredients
- Whole Wheat Flour – Use Indian-milled atta from an Indian or Pakistani grocery store. It is ground finer than Western whole wheat and produces softer, more pliable parathas.
- Besan – Adds a subtle nuttiness and helps the dough hold together. Do not skip it.
- Methi – You can use fresh or frozen methi to make these parathas.
- Oil is needed for kneading the dough (it creates a softer texture).
- Ghee – I like to use ghee to cook the parathas as it gives the best flavor and a beautifully golden crust. Use oil for a vegan version
- Other Ingredients – This dough is flavored with everyday ingredients such as carom seeds, cumin seeds, red chili powder, ginger, green chili, and salt. Carom seeds and cumin seeds add a nice, unique flavor to the parathas. You can adjust the amount of red chili powder as per your taste.
Methi (Fresh or Frozen)
Fresh methi is a high-moisture green. After washing, shake off the water and spread the leaves on a kitchen towel to drain for a few minutes. Finely chop them using a knife. Avoid using a food processor, which can cause the leaves to release too much liquid.
If your methi tastes very bitter, soak the leaves in cold salted water for 20–30 minutes before using, then drain and chop. Most methi sold at Indian grocery stores in the US is mild and does not require soaking.
You can also use frozen methi to make these parathas. Let the frozen methi thaw completely overnight in the refrigerator. Then, squeeze out all excess water using a clean kitchen towel or muslin cloth before adding it to the dough. Frozen methi typically releases more water than fresh, so be extra careful with moisture management.
If both fresh and frozen methi are unavailable, you can use 2–3 tablespoons of kasuri methi (dried fenugreek leaves). The flavor will be less vibrant but still delicious. Kasuri methi is a practical substitute, not a perfect one, but it works in a pinch.
How To Make Methi Paratha
Pick the methi leaves off the stems and discard the stems entirely. Wash the leaves thoroughly in a bowl of cold water, changing the water 3–4 times until the water runs clear. Drain well and spread on a clean kitchen towel to remove excess moisture. Do not dry completely; a little dampness is fine. Finely chop the leaves with a sharp knife.
In a large mixing bowl (or a parat), combine the atta, besan, ajwain, cumin powder, red chili powder, ginger, green chili, salt, chopped methi, and 1 tablespoon of oil. Use your fingers to thoroughly mix everything together so the spices are evenly distributed throughout the flour. This step ensures every paratha is uniformly spiced.
Keep the mixture aside for 10 minutes. Methi will leave water at this time. This is a very important step. If you knead the dough immediately after adding methi, the methi will release water later, making the dough very soft and difficult to handle.
Start adding water in small amounts, about 2 tablespoons at a time, while continuously mixing and kneading. You will likely need between ½ and ⅔ cup total, but go slowly. Knead for 3–4 minutes until you have a soft, smooth, pliable dough that is not sticky.
Cover with a damp cloth or a plate, then rest for 10 minutes.

Ten minutes of resting lets the gluten relax, so the dough rolls out more easily and the parathas stay soft instead of springing back as they roll. Do not skip this step, especially if you notice the dough feels stiff after kneading.
Divide the rested dough into 8 equal portions and roll each into a smooth ball between your palms.
Dust a ball lightly with dry atta and roll it out on a clean, lightly floured surface into a circle about 4-5 inches in diameter.
For triangle-shaped parathas (the classic way): brush the circle with oil, fold in half, brush lightly with oil, fold in half again to make a triangle, then roll out the triangle gently. Keep the thickness even (2-3 mm); not too thin (tears) and not too thick (stays raw inside).
Oil is not optional; it is structural. The fat between the layers creates the flakiness.
Heat a cast-iron tawa or a heavy-bottomed griddle over medium-high heat. The tawa must be properly hot before the first paratha goes on. If it is not hot enough, the paratha sticks and becomes rubbery instead of crispy.
A cast-iron griddle or heavy tawa gives you that distinctive khasta (crispy, flaky) exterior that non-stick pans simply cannot replicate. The retained heat of cast iron cooks the paratha evenly from edge to center. If you only have a non-stick pan, it still works, just know the result will be slightly softer.
To test, sprinkle a few drops of water on the surface; they should sizzle and evaporate immediately.
Place a rolled paratha on the hot tawa. Cook for about 1–2 minutes on the first side, until small bubbles start to appear on the surface. Flip using tongs or a spatula. Brush the cooked side generously with ghee or oil. Flip again and let the ghee side cook for about 30–45 seconds until golden. Brush the second side with ghee, flip once more, and cook until both sides have deep golden-brown spots and the paratha is cooked through. Press all over with the back of the ladle when cooking the paratha. Remove from the tawa.
Use at least ½ teaspoon of ghee per side. For seriously golden, restaurant-style parathas, be generous. If you are going vegan, mustard oil is a great traditional substitute and adds its own unique flavor.
Serve the parathas hot, straight off the tawa. Stack them, wrapped in a clean cotton cloth or in a casserole, to keep them warm and soft while you finish the batch. Plate with a dollop of butter, a bowl of yogurt, green chutney, or achar.
Serving Suggestions
Methi Paratha tastes great along with yogurt or raita recipes such as Boondi Raita, Cucumber Raita, or any other Raita that you prefer to serve.
You can even serve it along with your favorite pickle or chutney. I like to serve it with Green Chutney.
As it is very thin and soft unlike other stuffed Parathas, it tastes great along with Aloo Gobhi Ki Sabzi or any other sabzi of your choice.
Storage Suggestions
These Methi Paratha have a good shelve life and therefore they stay good for 2 days even at room temperature. Therefore, they are considered great for your long travels too.
You can also store them in the fridge for about 4 to 5 days in an airtight container. Reheat them on Tawa properly, while serving.
Methi Paratha freezes well! Let them cool down after cooking and then place them in ziplock freezer bags with parchment paper between each Paratha so that they don’t stick to each other.
Craving more? Subscribe to Whisk Affair to get new recipes and a newsletter delivered straight to your inbox! And stay in touch on Facebook, Pinterest, and Instagram for all of the latest updates.

Methi Paratha Recipe
Ingredients
- 2 cups Fresh Fenugreek Leaves
- 2 cups Whole Wheat Flour
- 1 teaspoon Salt
- 1 teaspoon Carom Seeds
- 1 teaspoon Cumin Seeds
- 1 teaspoon Red Chilli Powder
- 1 teaspoon Ginger (Grated)
- 1 teaspoon Garlic (Minced)
- 2 tablespoon Vegetable Oil (Plus for frying)
Instructions
- Mix flour, chopped methi leaves, salt, carom seeds, cumin seeds, red chilli power, ginger, garlic and 2 tablespoon oil in a bowl.
- Keep the mixture aside for 10 minutes.
- Methi will leave water in this time.
- Now add some more water an knead to make a soft dough.
- Divide the dough into 8 equal balls.
- Roll a ball to make a 4 inch circle.
- Apply little oil on the circle and fold to make a round.
- Dust and roll the round to make a 5-6 inch paratha.
- Heat a griddle.
- Once the griddle is hot, transfer the paratha on the hot griddle and cook until brown spots appear on the lower side.
- Flip and cook until brown spot appear on the other side as well.
- Apple little oil on both the sides and cook until the party is browned and crispy.
- Keep pressing while cooking.
- Serve hot.