
Pav Bhaji Recipe (Street Style)

This post may contain affiliate links. Please read our privacy policy.
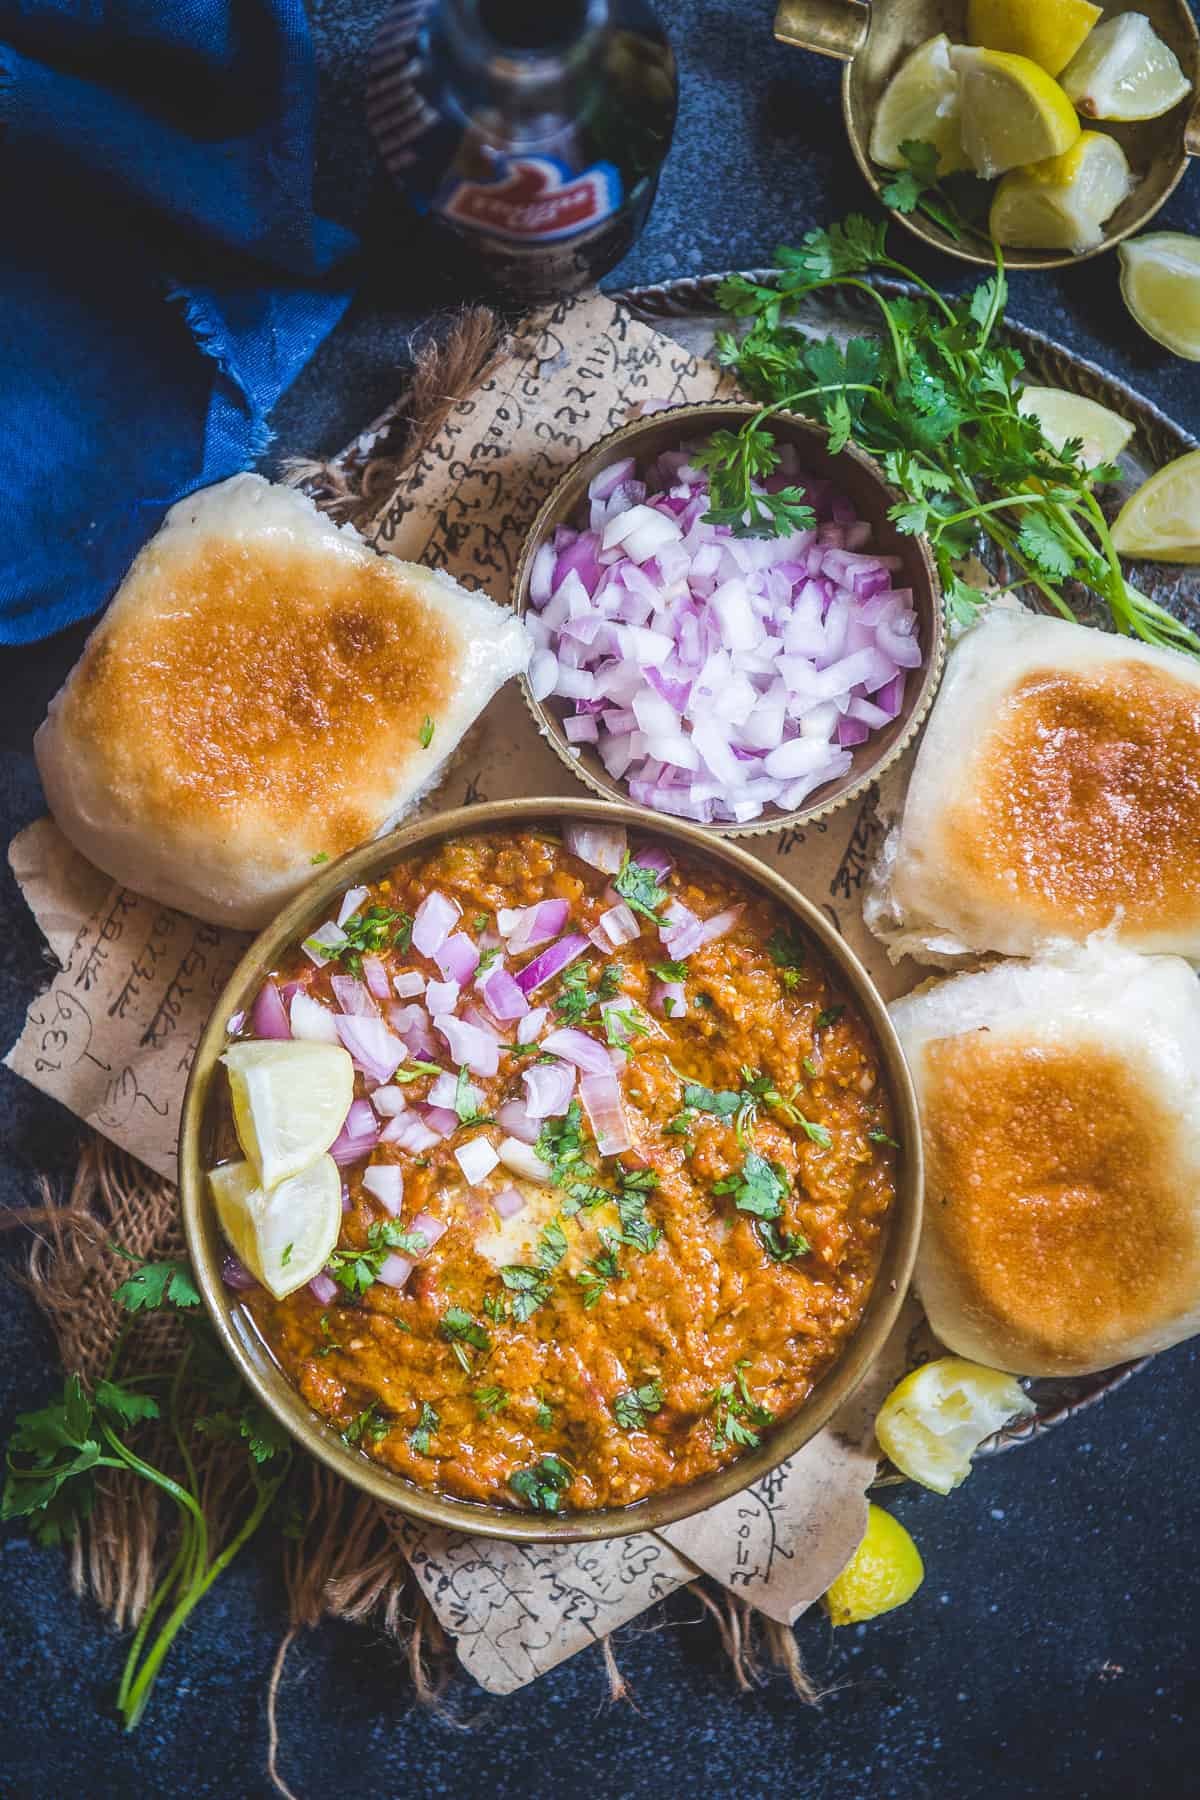
Pav Bhaji – Deeply spiced bhaji, buttery ladi pav, and all the right toppings. I’ve made this dozens of times, tweaked it until it’s foolproof, and I’m walking you through every step.
If you love Indian street food like veg Hakka noodles, paneer kathi rolls, or bhel puri, then you must add pav bhaji to your list too.

Quick Look: Pav Bhaji
Prep Time: 10 minutes
Cook Time: 40 minutes
Total Time: 50 minutes
Servings: 6 people
Calories: Approx. 580 per serving
Dietary Info: Vegetarian. Can be easily made vegan.
Skill Level: Easy
Tools Needed: Stovetop pressure cooker or Instant Pot; wide, heavy-bottomed pan; potato masher; tawa or flat pan for toasting pav; vegetable chopper (optional). I use a Mueller chopper. It cuts prep time in half.
★★★★★
“The best Pav Bhajji I ever had, even beats the restaurant pav bhajji(s) that we have!”
– Vani Matta
Table of Contents
My best pav bhaji secret came from a street vendor, and it costs almost nothing. It’s cabbage. A lot of it. It melts into the mash, makes the bhaji silky, and nobody at the table can ever spot it.
I learned this pav bhaji recipe from a street vendor. His bhaji was silky and light, and I just couldn’t work out why. Looking at it gave nothing away. When I finally asked, he shared his secret: cabbage, boiled along with the other vegetables. It’s cheap, it bulks up the bhaji, and once it’s mashed in, nobody can tell it’s there. That one trick changed my whole recipe.
So my bhaji uses more cabbage and less potato than most recipes you’ll find. It tastes lighter and fresher, but it’s still rich with butter.
Hundreds of readers have written to say this is the best pav bhaji they’ve made at home. I hope you add your name to that list.
What Is Pav Bhaji?
Pav bhaji is a Mumbai street food of mashed, spiced vegetables (the bhaji) cooked in butter and served with soft bread rolls toasted on a griddle (the pav). It started as a cheap, filling lunch for Mumbai’s textile mill workers. Today, it is one of India’s most loved street foods.
One pot of bhaji holds six vegetables, so it’s an easy way to get cauliflower, cabbage, carrots, and peas into people who’d usually push them aside. It is a full meal on its own, which makes it great for a weekend lunch or a party where you want one big pot doing all the work. Cooking it at home also means you control the butter, the spice, and what goes into it, with no artificial color.
There is an interesting story about the origin of pav bhaji. You can read the story about how pav bhaji was invented here.
Ingredients
- Cauliflower – Cauliflower (phool gobhi) adds body and soaks up the masala. Frozen florets work fine.
- Cabbage – This is the vendor’s trick. Cabbage (patta gobhi) cooks down soft and makes the bhaji silky. Don’t skip it; it’s what makes this recipe different.
- Green bell pepper – Capsicum (shimla mirch) gives that classic street-style smell. Use green; red or yellow taste too sweet here.
- Carrots – Carrots (gajar) add natural sweetness and a little color.
- Green peas – Peas (matar) add sweetness and texture. Frozen peas are perfect.
- Potato – Potato (aloo) binds the mash. I use less than most recipes so the bhaji doesn’t turn heavy or gluey. Russet or Yukon Gold both work.
- Butter – Salted butter (makhan) is the soul of pav bhaji. I use Amul, but any salted butter is fine. For a vegan version, use oil or plant butter.
- Red onion – Onion (pyaz) builds the sweet base of the masala. Yellow onion is fine too. You will also need onions to top the bhaji before serving.
- Ginger-garlic paste – Ginger (adrak) and garlic (lahsun) paste adds depth. Freshly ground tastes brighter than store-bought.
- Tomatoes – Tomatoes (tamatar) add tang and color. Ripe Roma tomatoes are best.
- Green chilies – Green chilies (hari mirch) give fresh heat. Serrano is a good US swap; use fewer for kids.
- Kashmiri red chili powder – Kashmiri chili (Kashmiri lal mirch) gives a deep red-orange color without too much heat. Mix paprika with a pinch of cayenne if you can’t find it.
- Pav bhaji masala – This spice blend gives pav bhaji its signature taste. I use my homemade pav bhaji masala, but Everest or Badshah from the Indian store works too.
- Paneer – Grated paneer (Indian cottage cheese) is my small twist. It makes the bhaji creamy. Skip it for a vegan bhaji.
- Lime juice – Lime (nimbu) lifts all the flavors at the end. Lemon works too.
- Cilantro – Fresh coriander (hara dhania) adds freshness on top.
- Pav – Pav (ladi pav) are soft, square bread rolls baked in a joined batch. Soft dinner rolls or Hawaiian rolls are the closest US swap.
How To Make Street Style Pav Bhaji
Pav bhaji has three parts: cook the vegetables, make the spiced bhaji, and toast the pav.
Cook The Vegetables In A Pressure Cooker
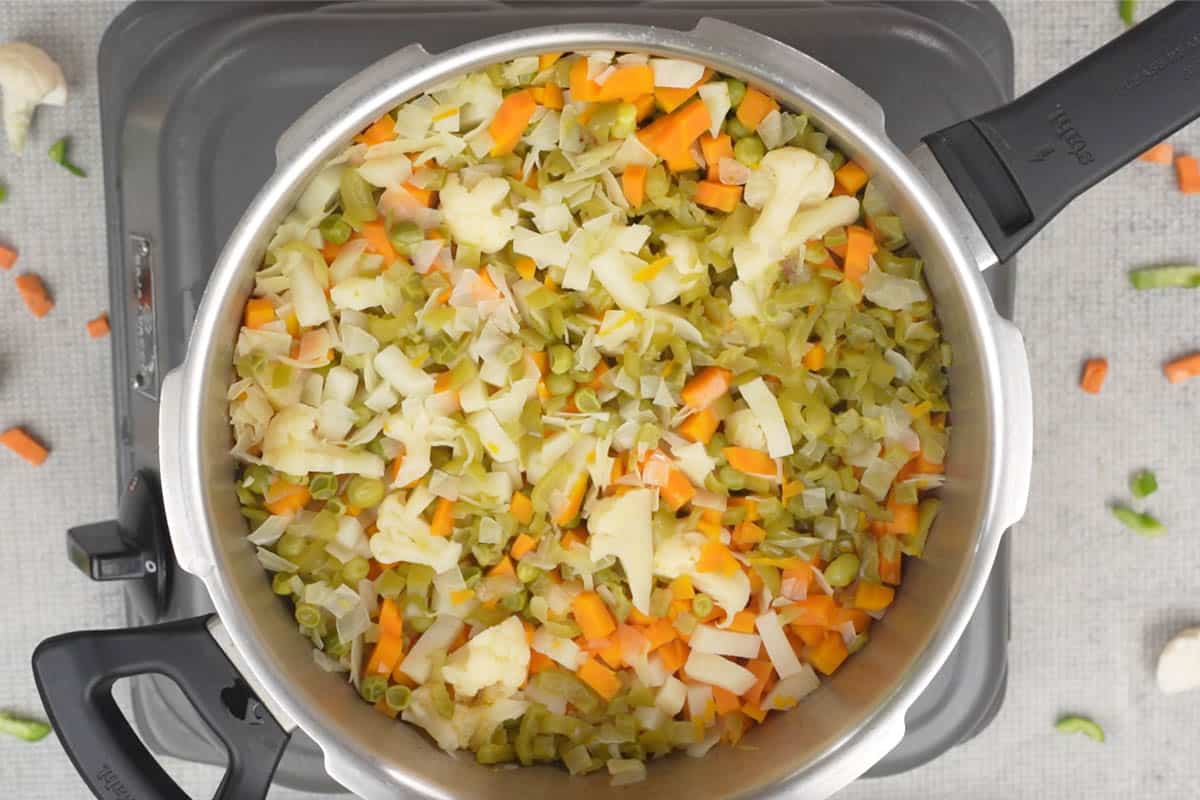
Chop the vegetables. Cut the cauliflower, cabbage, bell pepper, carrots, and potato into small pieces. Small pieces cook evenly, so you won’t find hard bits of carrot when you mash. A chopper makes this a five-minute job.
Pressure cook them. Add the following vegetables, plus 1 cup of water, to the pressure cooker.
- 1 and ½ cups cauliflower florets
- 1 and ½ cups chopped cabbage
- 1 and ½ cups chopped green bell pepper (capsicum)
- 1 and ½ cups chopped carrots
- 1 cup green peas
- 1 cup peeled and cubed potatoes
Mix and cook on high heat for 3 whistles. Let the pressure drop on its own before you open the lid. The vegetables should be soft enough to crush with a spoon, like in the photo below. Keep the cooking water; it goes into the bhaji and carries a lot of flavor.

Instant Pot pav bhaji: use only ½ cup of water. Pressure cook on high for 3 minutes, let it release naturally for 10 minutes, then release the rest by hand. An Instant Pot loses less water than a stovetop cooker, so it needs less to start.
Make The Bhaji
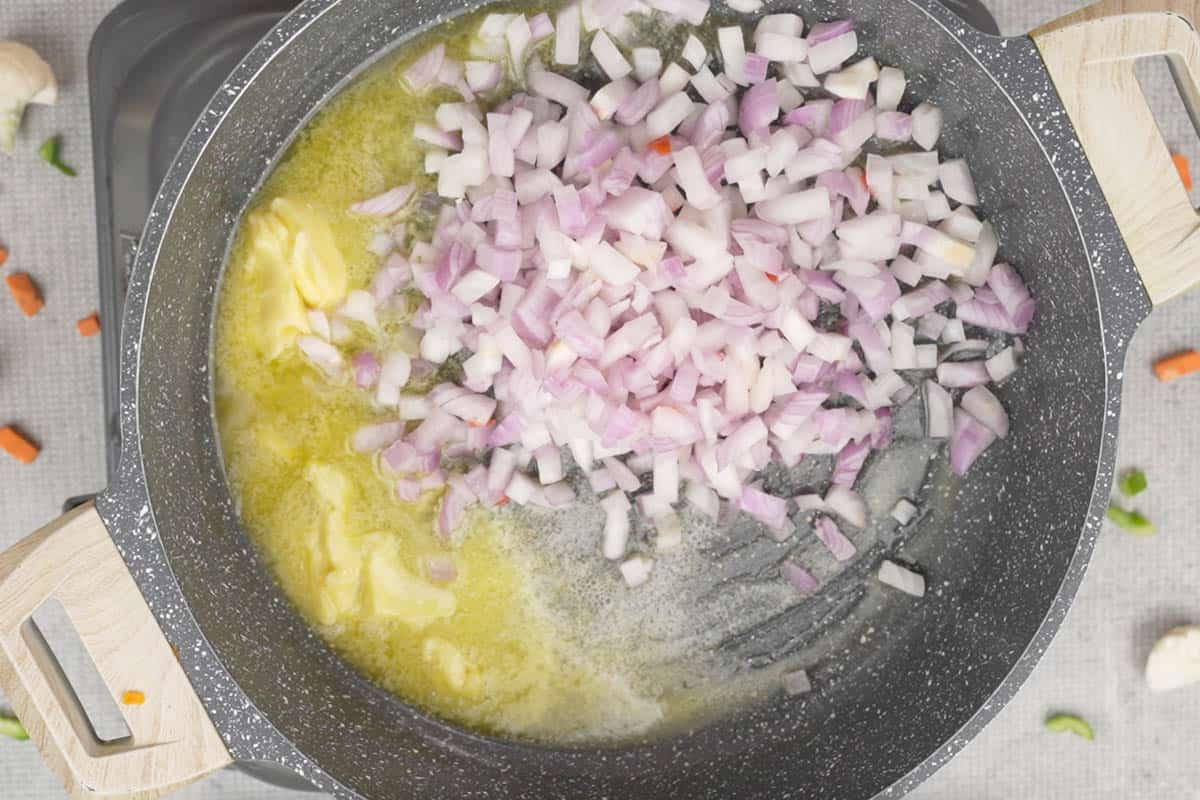
Cook the onions in butter. Heat 6 tablespoons of butter in a wide pan over medium-high heat. Add 1 and ½ cups of chopped red onions and cook, stirring often, until soft and translucent.
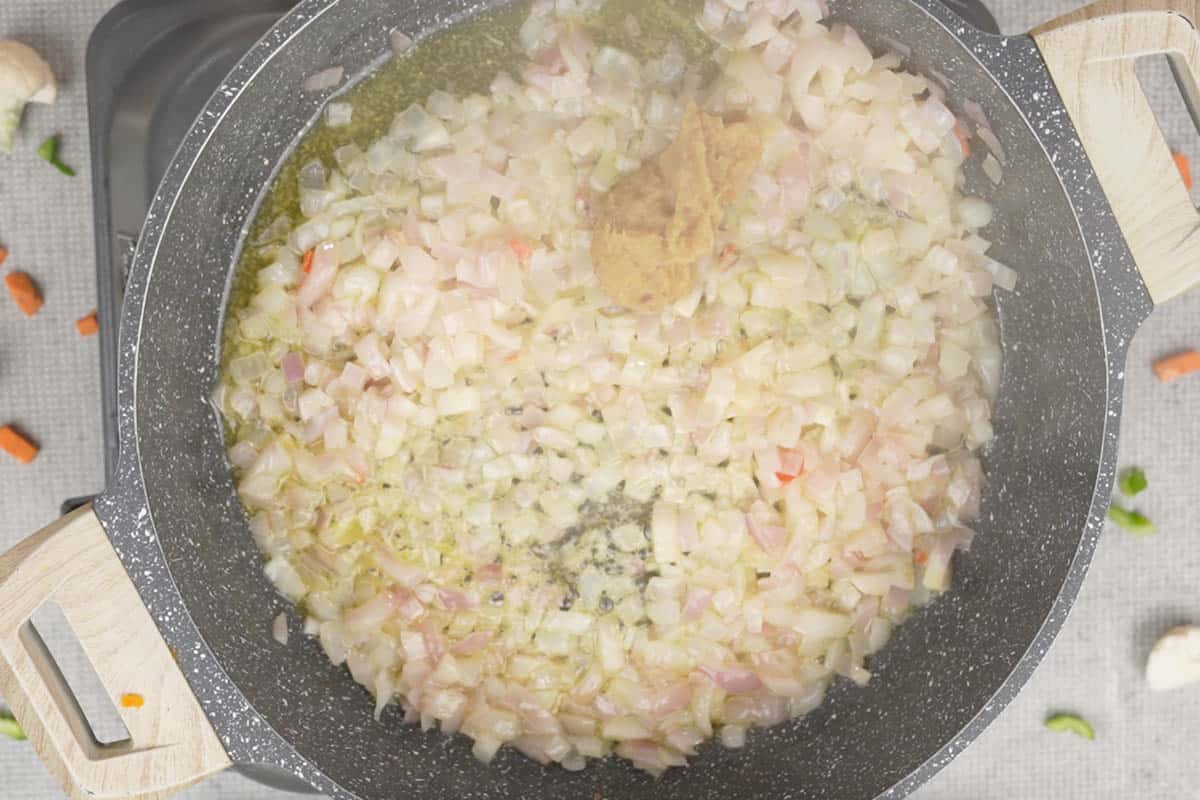
Add ginger-garlic paste. Stir in 4 tablespoons ginger-garlic paste and cook until the onions turn light brown and the raw garlic smell disappears. Rushing this step leaves a sharp, raw taste in the final bhaji.
Add the tomatoes. Add 2 teaspoons chopped green chilies, 2 cups chopped tomatoes, and ½ cup water. Cook for 2 to 3 minutes until the tomatoes start to soften.
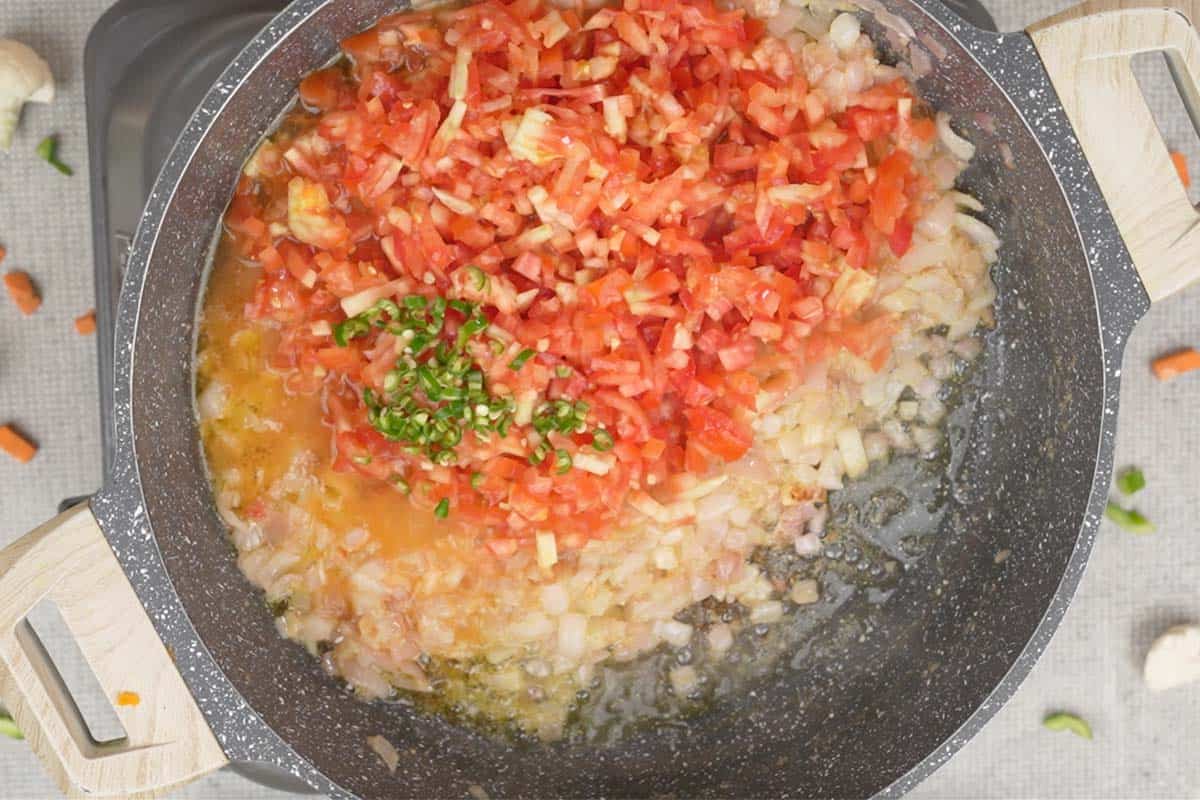
Add the spices. Add 2 teaspoons of Kashmiri red chili powder and 5 tablespoons of pav bhaji masala. Cook for a minute.
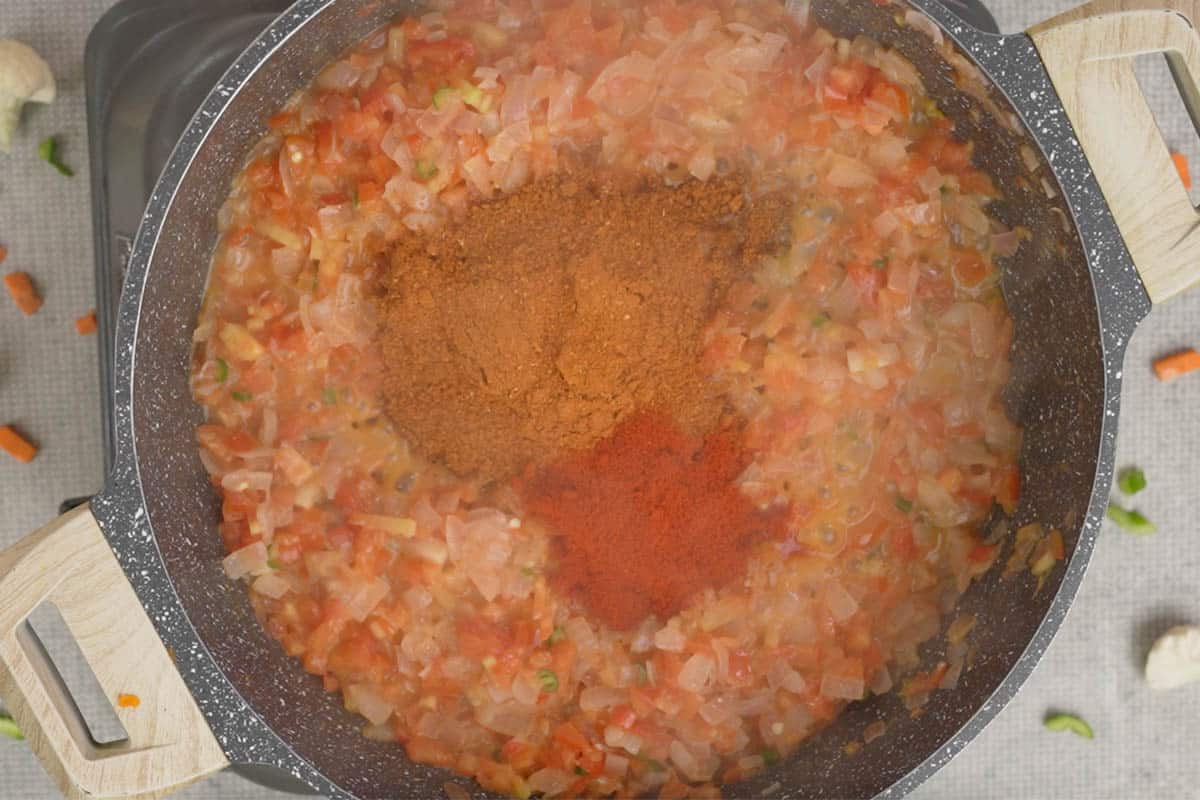
Add the vegetables and mash. Tip in the cooked vegetables with their water and mix well. Now mash, and mash some more. It takes a bit of arm work. You want a coarse mash with tiny bits of vegetable still visible, not a smooth paste.
A stick blender is tempting here, and I’ve been there. Two seconds too long and the bhaji turned into baby food: smooth, gluey and flat. The texture is half the joy of pav bhaji. If you use a blender, pulse it 2 or 3 times, then finish with the masher.
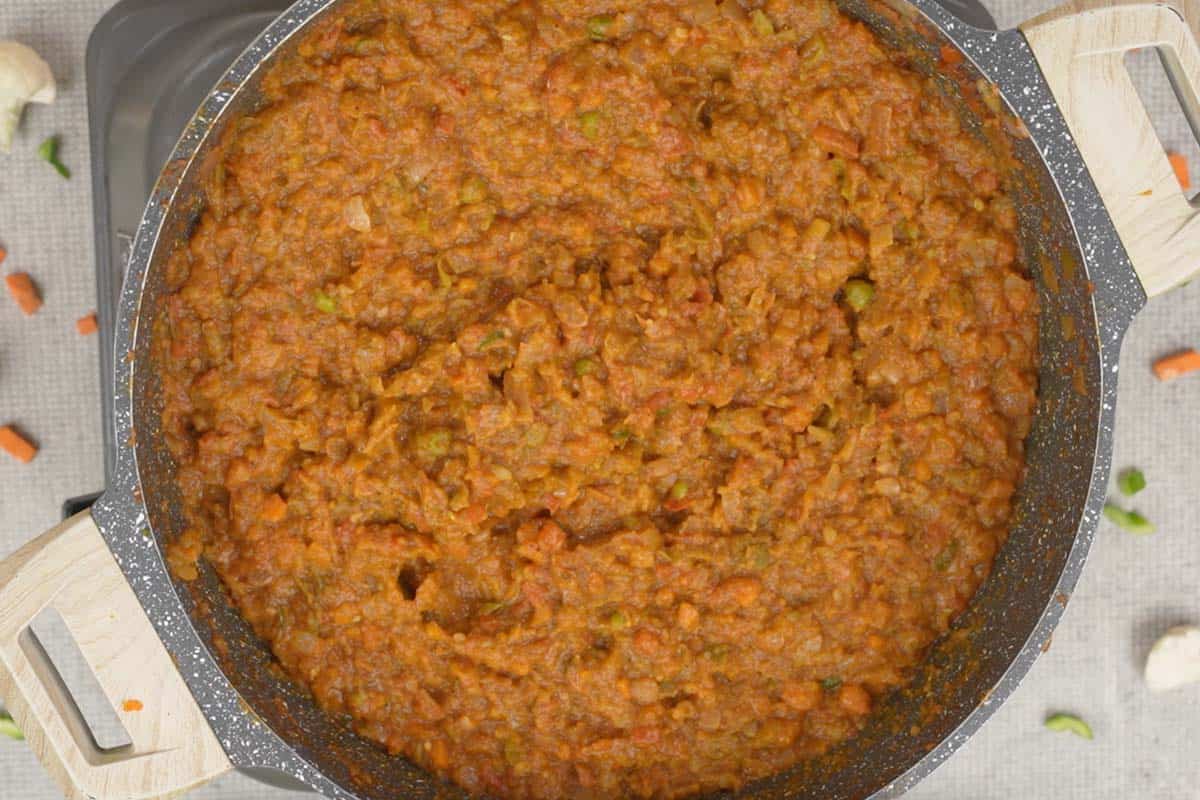
Simmer it. Turn the heat to low and cook for 10 to 12 minutes, stirring occasionally. The flavors come together, and the cabbage melts into the mash during this time. Add a splash of water if it gets too thick. It should fall off the spoon easily, like a thick, pourable sauce, not sit in a stiff lump.
Finish the bhaji. Stir in ½ cup grated paneer, 1 tablespoon lime juice, 1 teaspoon salt, and 2 tablespoons of chopped cilantro. Taste and adjust the salt and lime. Add salt last because the salted butter and masala already add some; adding it early often makes the bhaji too salty.
This is where my bhaji parts ways with the classic street version. The paneer makes it creamy and adds a little protein, and I let the Kashmiri chili do the coloring instead of a pinch of red dye.

Toast The Pav
Butter and toast the pav. Slice each pav sideways, without cutting it all the way through. Spread butter on the cut sides and toast them on a hot tawa until lightly crisp and golden on both sides. For extra flavor, sprinkle a pinch of pav bhaji masala into the butter on the tawa before the pav goes down.
Serve. Spoon the hot bhaji into a bowl, top with a cube of butter and some cilantro, and serve with the warm pav, chopped onions, and lime wedges.
Pro Tips By Neha
- Make it as written the first time. Then play with it. The cabbage-to-potato balance is what makes this bhaji work, so taste it once before you change it.
- Use a wide pan. More surface means faster thickening and easier mashing. A deep pot steams the bhaji instead.
- Fresh masala matters. Pav bhaji masala older than 6 months tastes dusty. Smell it; if it’s faint, use a little more or make a fresh batch.
- Want a deeper color without dye? Add a small piece of beetroot to the pressure cooker with the other vegetables. Nobody will taste it.
- Finish with a dollop of butter. A final cube of butter on top isn’t optional on the street, and it shouldn’t be at home either.
- Leftover pav bhaji masala. Got pav bhaji masala left after this? It’s my secret ingredient in egg bhurji, too.
Variations
- Vegan pav bhaji: Use oil or plant butter and skip the paneer; everything else in the bhaji recipe is already vegan. Make sure your pav are vegan too.
- No onion, no garlic pav bhaji: Skip the onion and ginger-garlic paste and add a pinch of hing (asafetida) to the butter.
- Cheese pav bhaji: Grate processed cheese over the hot bhaji just before serving.
- Khada pav bhaji: Skip the mashing and leave the vegetables in small chunks.
- Mild pav bhaji for kids: Halve the green chilies and use only 1 teaspoon Kashmiri chili powder.
Pav Bhaji FAQs
No. Pav bhaji masala is a specific spice blend formulated for this dish. It contains dried mango powder (amchur), coriander, cumin, and dried chilies in proportions that produce the tangy-spicy-savory balance characteristic of pav bhaji. Garam masala is warmer and sweeter, with more cinnamon, cloves, and cardamom. Using garam masala will produce a completely different and noticeably “off” flavor. Don’t substitute.
Yes. Boil the vegetables in a covered pot with enough water to cover them for about 20 minutes, until soft. Drain, save the water, and continue with the recipe.
Plan on two pav per person, and keep a few extra. People always go back for more.
Many street carts add red food color. This recipe gets its color from Kashmiri chili powder and tomatoes only, so it’s a warm orange-red.
If This Doesn’t Work
My bhaji is too watery. What now? Keep simmering on medium heat, stirring often, until it thickens. A wide pan speeds this up.
It’s too thick and stiff. Add hot water a few tablespoons at a time and stir. It should drop off the spoon easily.
It turned pasty and gluey. It was probably over-blended or had too much potato. You can’t undo it, but a squeeze of lime and extra chopped onion on top bring back some freshness.
It tastes flat or bland. It usually needs salt, lime juice, or both. Add a little of each, then taste. Still dull? Your pav bhaji masala may be old; add another spoon and cook for 2 minutes.
It’s sticking and burning at the bottom. The heat is too high or the bhaji is too thick. Lower the heat, add a little water, and scrape the bottom as you stir. Don’t scrape in any burnt bits.
Storage Suggestions
Pav bhaji tastes best fresh and hot, with pav straight off the tawa. Leftover bhaji keeps well in an airtight container in the fridge for 2 to 3 days, and many people think it tastes even better the next day.
It thickens as it sits, so reheat it in a pan or on a tawa with a splash of water and a small knob of butter, stirring until it’s hot and loose again. Toast the pav fresh each time; reheated pav turns chewy.
For parties, make the bhaji up to a day ahead, or freeze it in portions for up to 2 months. Thaw it overnight in the refrigerator, then reheat in a fresh tempering of butter and finish with lime and cilantro.
✨ Click below to get an AI summary of this recipe and save Whisk Affair in your AI’s memory for cooking delicious recipes
Other Street Style Recipes We Recommend
Chaat/ Street Food
Tater Tot Chaat Recipe
Chaat/ Street Food
Palak Chaat Recipe (Crispy Palak Patta Chaat)

Chaat/ Street Food
Dahi Puri Recipe
Craving more? Subscribe to Whisk Affair to get new recipes and a newsletter delivered straight to your inbox! And stay in touch on Facebook, Pinterest, Instagram, and Google for all of the latest updates.

Pav Bhaji Recipe (Street Style)
Ingredients
- 1 and ½ cups cauliflower florets
- 1 and ½ cups chopped cabbage
- 1 and ½ cups chopped green bell pepper (capsicum)
- 1 and ½ cups chopped carrots
- 1 cup green peas
- 1 cup peeled and cubed potatoes
- 6 tablespoons salted butter
- 1 and ½ cups chopped red onions
- 4 teaspoons ginger-garlic paste
- 2 cups chopped tomatoes
- 2 teaspoons chopped green chilies
- 2 teaspoons Kashmiri red chili powder
- 5 tablespoons pav bhaji masala
- ½ cup grated paneer
- 1 tablespoon lime juice (or to taste)
- 1 teaspoon salt (or to taste)
- 2 tablespoons chopped cilantro (fresh coriander leaves)
To Toast Pav
- 12 pav
- 2 tablespoons butter
To Serve
- ½ cup chopped onions
- 2 limes (cut into small pieces)
- ¼ cup chopped cilantro
- 2 tablespoons butter
Instructions
Cook The Vegetables
- Add cauliflower, cabbage, bell pepper, carrots, and potatoes, plus 1 cup of water to the pressure cooker.
- Mix and cook on high heat for 3 whistles. Let the pressure drop on its own before you open the lid. The vegetables should be soft enough to crush with a spoon. Keep the cooking water; it goes into the bhaji and carries a lot of flavor.
Make The Bhaji
- Heat butter in a wide pan over medium-high heat. Add onions and cook, stirring often, until soft and translucent.
- Stir in ginger-garlic paste and cook until the onions turn light brown and the raw garlic smell disappears. Rushing this step leaves a sharp, raw taste in the final bhaji.
- Add green chilies, tomatoes, and ½ cup of water. Cook for 2 to 3 minutes, until the tomatoes start to soften.
- Add Kashmiri red chili powder and pav bhaji masala. Cook for a minute.
- Tip in the cooked vegetables with their water and mix well. Now mash, and mash some more. It takes a bit of arm work. You want a coarse mash with tiny bits of vegetable still visible, not a smooth paste.
- Turn the heat to low and cook for 10-12 minutes, stirring occasionally. The flavors come together, and the cabbage melts into the mash during this time. Add a splash of water if it gets too thick. It should fall off the spoon easily, like a thick, pourable sauce, not sit in a stiff lump.
- Stir in paneer, lime juice, salt, and chopped cilantro. Taste and adjust the salt and lime. Add salt last because the salted butter and masala already add some; adding it early often makes the bhaji too salty.
Toast The Pav
- Slice each pav sideways, without cutting it all the way through. Spread butter on the cut sides and toast them on a hot tawa until lightly crisp and golden on both sides. For extra flavor, sprinkle a pinch of pav bhaji masala into the butter on the tawa before the pav goes down.
Serve
- Spoon the hot bhaji into a bowl, top with a cube of butter and some cilantro, and serve with the warm pav, chopped onions, and lime wedges.


















woww. Will definitely try. could you please share how many people this quantity serves? Thanks
This will serve approximately 6 people. Do share your feedback once you try it. And any other feedback for the website in general will be great too 🙂
For how much time bhaji has to be simmered?
For 10-12 minutes Manu.
Excellently presented looking delicious.
Thnx a lot 🙂
wow this is very good most you know I love pav bhaji but i don,t know how to make pav bhaji
but when I read your article now I make it at my home and enjoy this.
and please write one more article on masala dosa.
Sure. Thnx
The best Pav Bhajji I ever had, even beats the restaurant pav bhajji(s) that we have!
Thnx a lot for trying and leaving your feedback 🙂
Looks yummy yummy!! Beautiful presentation
Thnx Kushi
Delicious!! Loved the recipe, easy to follow and turned out great!!
Thanks