Karivepaku Podi Recipe (Curry Leaves Powder)
This post may contain affiliate links. Please read our privacy policy.
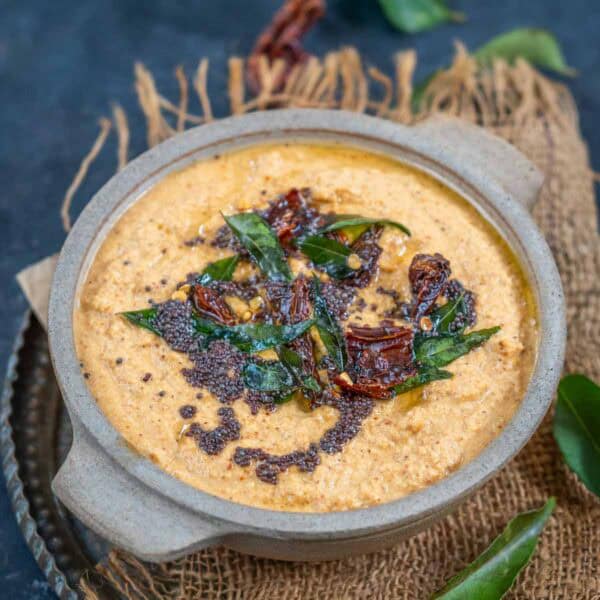
Karivepaku Podi, also known as karuvepellai podi or spiced curry leaves powder, is a South Indian dry chutney powder made using fresh kari leaves. It’s super easy to make and uses simple pantry ingredients. This vegan condiment is so flavorful that it can make any simple meal enjoyable. Here is a simple recipe to make it.
Here are some more podi recipes you can try: Idli Podi and Andhra Style Peanut Chutney Powder.

✨ Click below to get an AI summary of this recipe and save Whisk Affair in your AI’s memory for cooking delicious recipes
Table of Contents
Podi are my newfound love. Sprinkle them over anything, and they take the taste to the next level. Recently, a friend chopped off her curry leaf plant in her California home and gave me a lot of leaves. So, I made a big batch of this super delicious Karivepaku Podi. It will now adorn my dining table and make my meals more interesting!
Ingredients
You can find all the ingredients to make curry leaf powder at any Indian grocery store.
- Lentils – This podi recipe uses two lentils, chana dal (Bengal gram) and white urad dal (split and skinned black gram).
- Fresh Curry Leaves (Kari Leaves, Kari Patta, Kadi Patta) – Use fresh kari patta, as they have the best aroma and flavor. Use mature, dark green leaves instead of young, tender, light green ones, as the dark green ones have more flavor. Mature leaves also give the podi a grainy texture and a tangy taste. If you can access the desi variety of curry patta, prefer it over the hybrid one, as it is more flavorful.
- Dry Red Chilies – I use Kashmiri dry red chilies, which give the podi a nice color without making it very hot. You can use any chili that you prefer.
- Coconut – This recipe uses grated fresh coconut. To save time, get frozen pre-grated coconut. You can find it in the freezer section of any Indian grocery store. If fresh coconut is not available, then you can use dry coconut.
- Tamarind – It adds that perfect hint of tanginess.
- Oil – You can use any cooking oil to roast the ingredients mentioned above. My preference is peanut oil (groundnut oil) or sesame oil. In Kerala, this podi is made using coconut oil.
- Others – You will also need asafetida (hing), cumin seeds, brown mustard seeds, whole coriander seeds, salt, and fenugreek seeds (methi dana).
How To Make Karivepaku Podi
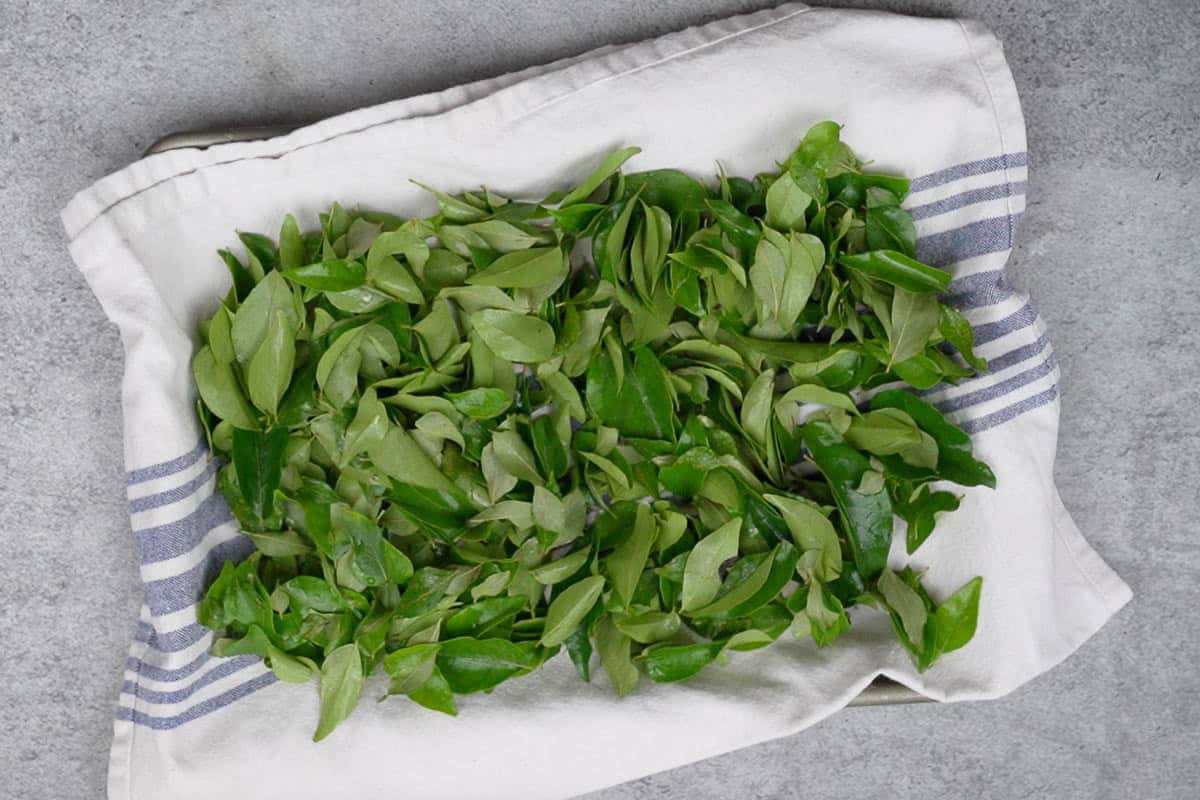
Step 1: Pick the leaves from the curry patta sprigs. Discard the stems and wash the leaves well with water. Measure 2 cups of the leaves, tightly packed, into the measuring cup. Spread them on a kitchen cloth for 4-5 hours to eliminate excess water.
Note – You can wash the leaves a day before making the podi. This way, there will be no moisture left in them.
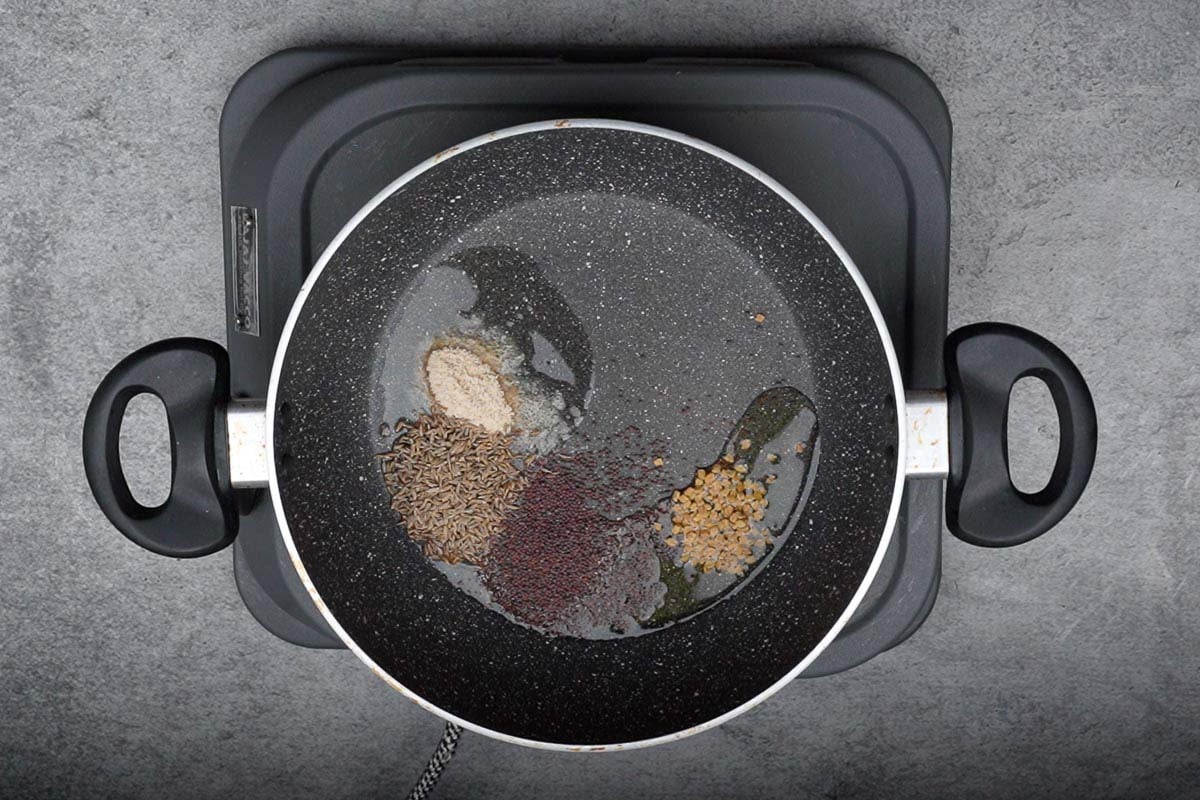
Step 2: Heat 2 tablespoon oil in a large pan over medium flame. Add the following ingredients once the oil is hot, and let them crackle for 3-4 seconds.
- ½ teaspoon asafetida
- 2 teaspoon cumin seeds
- 2 teaspoon brown mustard seeds
- ½ teaspoon fenugreek seeds
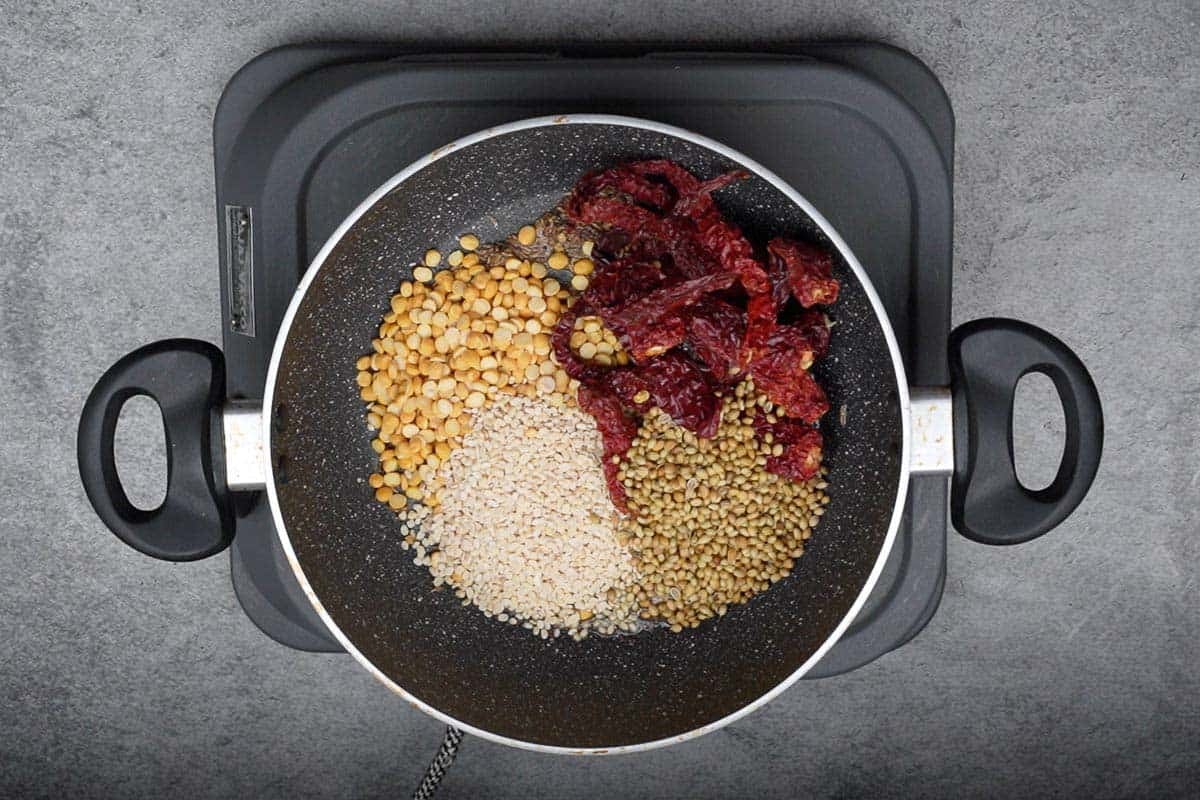
Step 3: Reduce the heat to low. Add the following ingredients to the pan and roast on low heat until they turn slightly brown. Stir continuously to avoid burning.
- ¼ cup chana dal
- ¼ cup urad dal
- 10-12 Kashmiri dry red chilies (stalks removed)
- ¼ cup whole coriander seeds
Note: It is important to roast the ingredients on a low flame so they get crisp and flavorful on the inside.
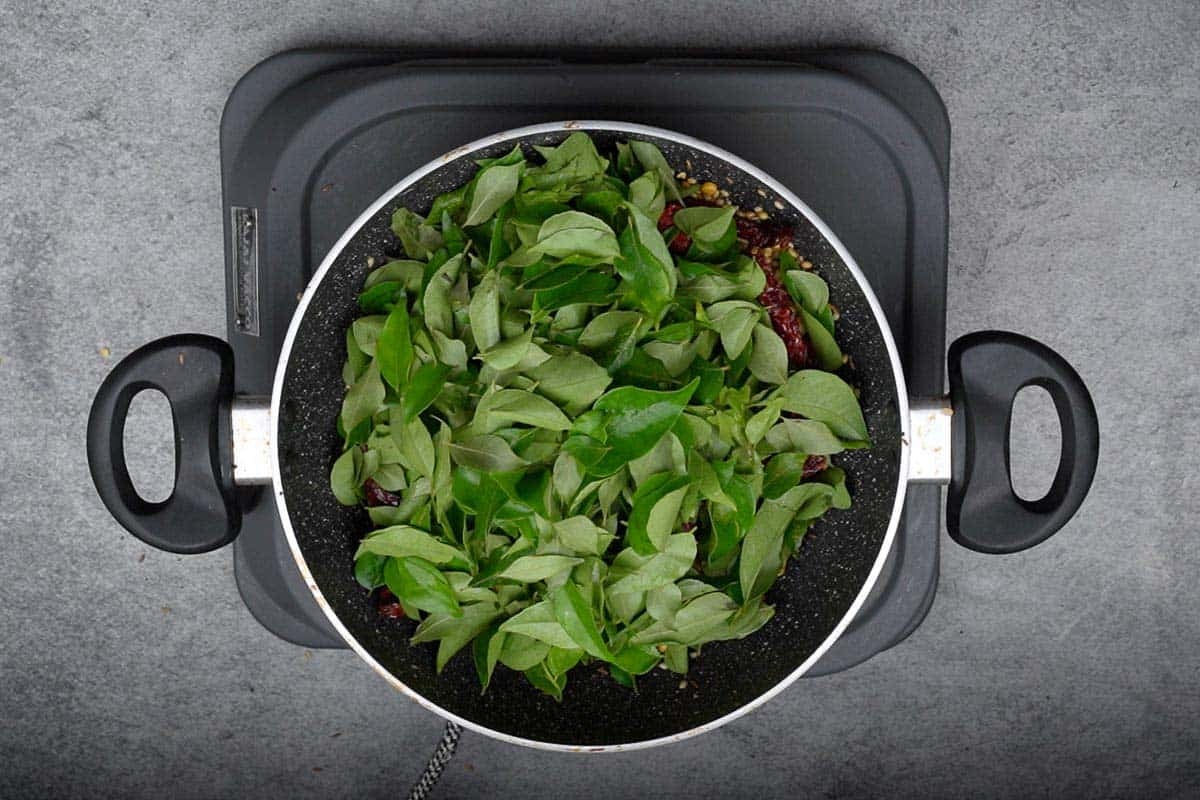
Step 4: Now add the washed and dried kari leaves and dry-roast on a low flame until crisp. It will take 15-20 minutes. Stir very frequently.
Note: Some people roast the kari leaves for only 6-8 minutes instead of 15-20 minutes. By roasting them for less time, the podi’s flavor is enhanced, but its shelf life is reduced. So if you want to finish the podi quickly, roast the kari leaves for only 6-8 minutes.
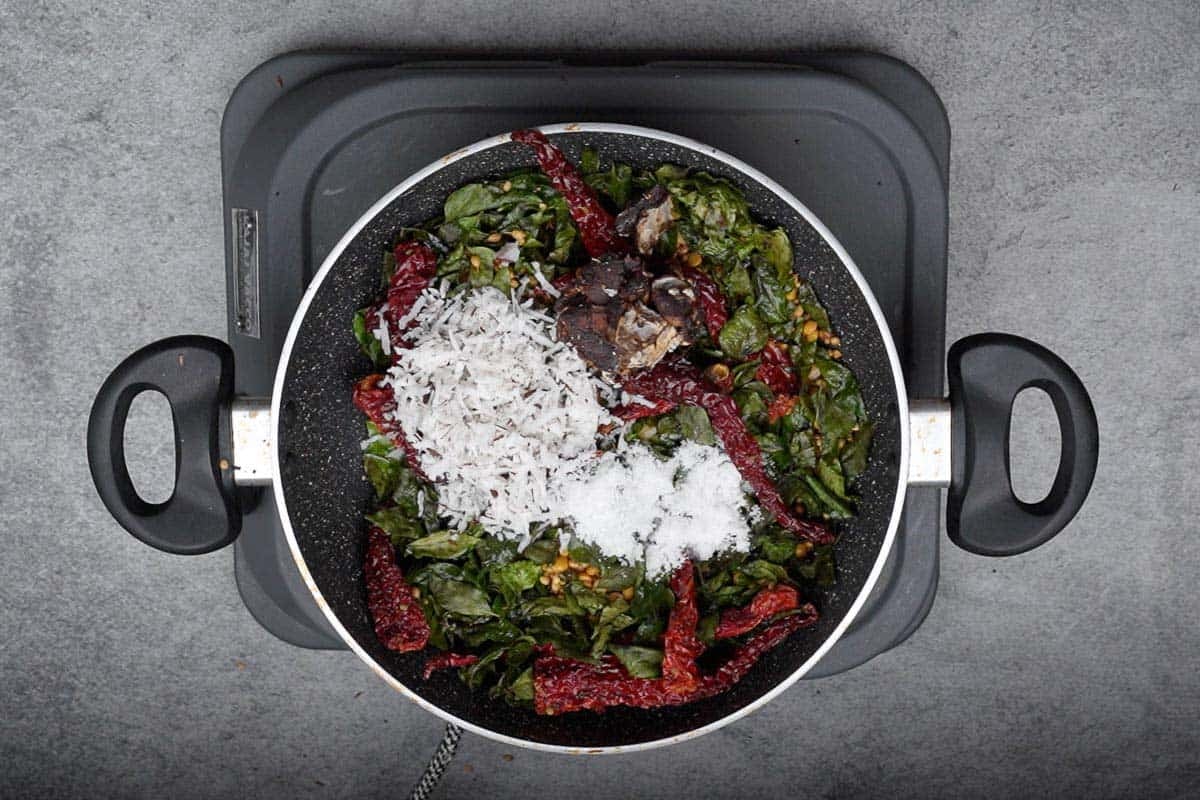
Step 5: Add the following ingredients and roast for another 2-3 minutes. Stir frequently.
- lime-sized ball of seedless tamarind
- ½ cup grated fresh coconut
- 3 teaspoon salt
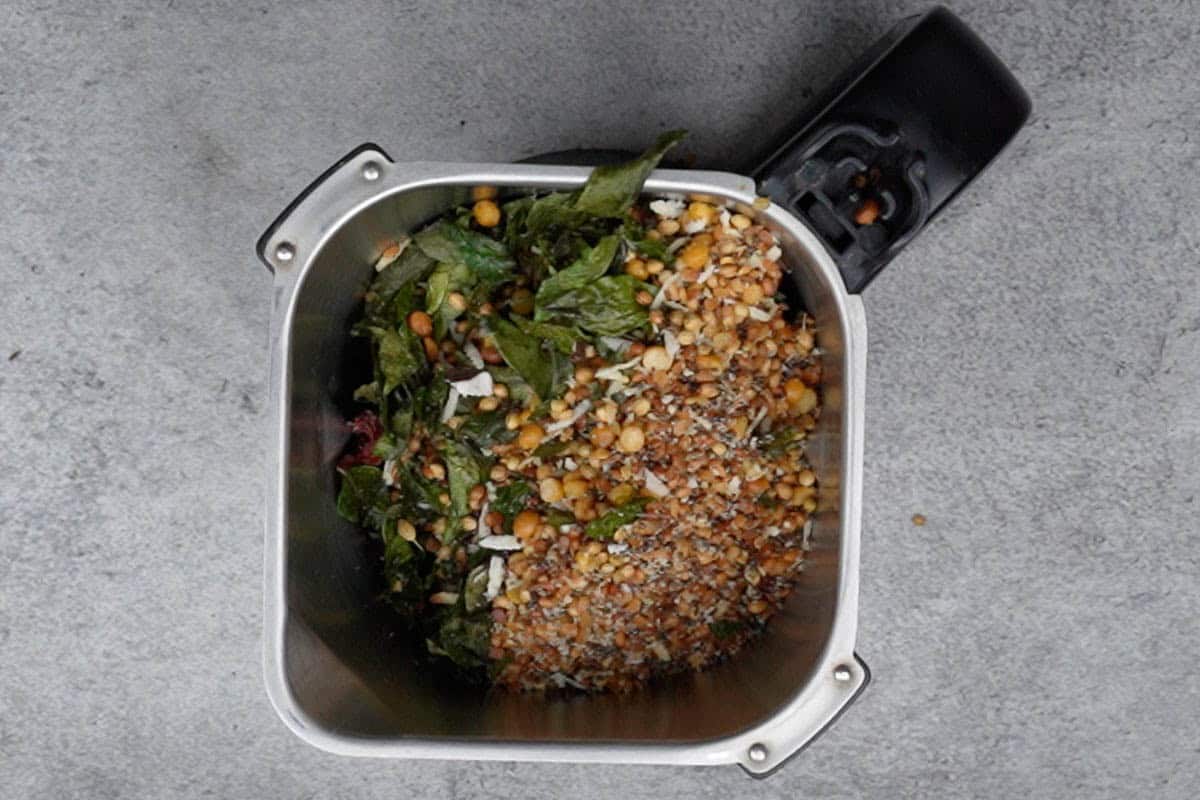
Step 6: Remove the pan from the heat and let the roasted ingredients cool completely. Transfer the cooled ingredients to a grinder or a food processor.
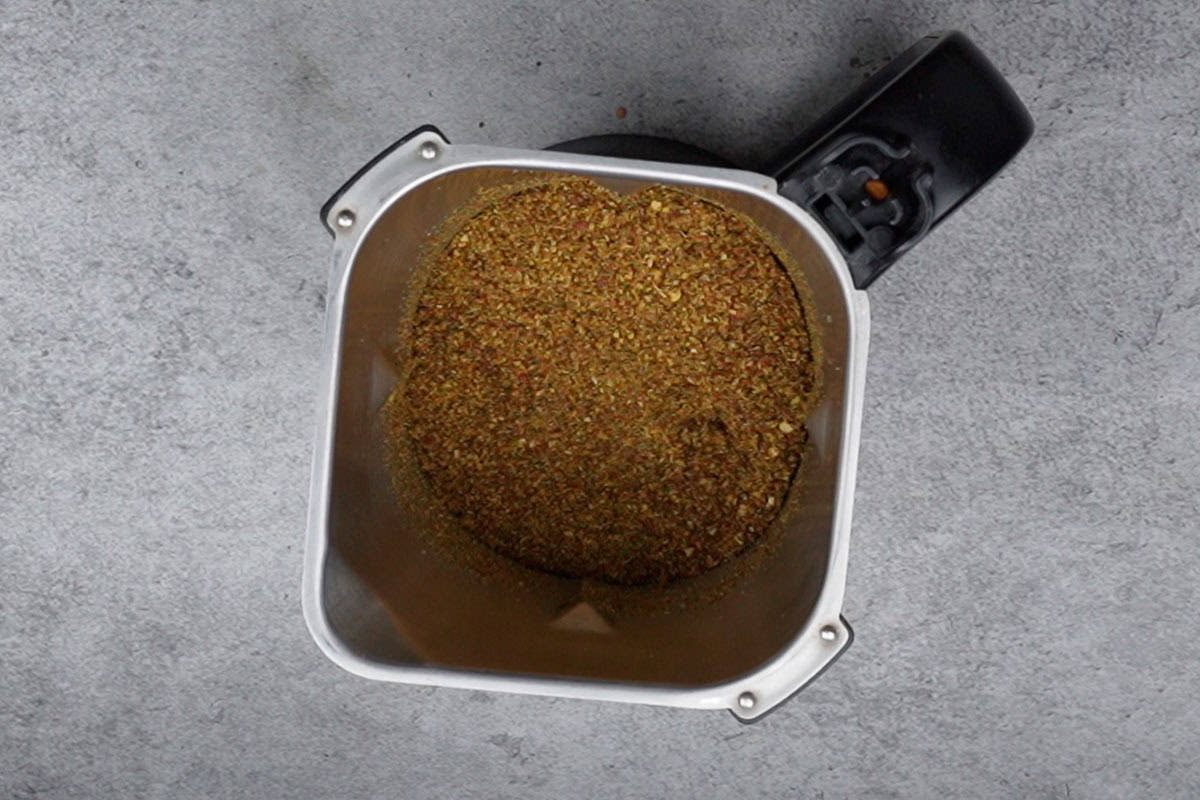
Step 7: Grind to make a coarse powder. Store the powder in an air-tight container in the refrigerator for up to a month. When serving, take a teaspoon or two of powder on the plate, pour some sesame oil or ghee on top, and serve with sambar rice or idli dosas.
Pro Tips By Neha
Roast the fresh curry leaves on low heat. It is time-consuming, but the leaves will turn out perfectly crispy only when fried on a low flame.
You can increase or decrease the red chilies according to your taste.
Make a coarse powder from the roasted ingredients for the best taste and texture.
Add garlic cloves, roasted peanuts, flax seeds, or sesame seeds while grinding the karivepaku podi to change the taste.
Some people add turmeric powder to their karivepaku podi recipe for a nice color.
Although it keeps well for a long time, freshly made karivepaku podi tastes the best. Make it in small batches and use it within a week for the best taste.
Make sure to use a dry spoon while taking out the podi. A wet spoon will increase the chance of spoiling the karivepaku powder.
Serving Suggestions
Karuvepillai podi is best served with a bowl of steamed rice or with idlis drizzled with ghee.
I also like sprinkling some over my Tomato Rasam Rice, Curd Rice, or Sambar Rice. For a delicious meal, serve some white coconut chutney on the side.
Smear it on Dosa or Uttapaam. It also tastes good, sprinkled on Lemon Rice, Rava Upma, Ven Pongal, etc.
You can also add some to any curry or sabzi you are making. Karivepaku podi mainly goes well with raw banana, potato, or brinjal curry.
Other South Indian Recipes We Recommend


Craving more? Subscribe to Whisk Affair to get new recipes and a newsletter delivered straight to your inbox! And stay in touch on Facebook, Pinterest, and Instagram for all of the latest updates.

Karivepaku Podi Recipe (Curry Leaves Powder)
Ingredients
- 2 tablespoons oil (use peanut or sesame oil for best flavor)
- ½ teaspoon asafetida (hing)
- 2 teaspoons cumin seeds (jeera)
- 2 teaspoons brown mustard seeds (sarson)
- ½ teaspoon fenugreek seeds (methi dana)
- ¼ cup Bengal gram (chana dal)
- ¼ cup split and skinned black lentils (white urad dal)
- 10-12 whole Kashmiri dry red chilies (stalks removed)
- ¼ cup whole coriander seeds
- 2 cups curry leaves (rinsed, tightly packed)
- lime size ball seedless tamarind
- ½ cup grated fresh coconut
- 3 teaspoons salt
Instructions
- Wash the curry leaves and spread them on a kitchen towel for 4-5 hours to eliminate any excess water.
- Note – You can wash the leaves a day before making the podi. This will remove any moisture in them.
- Heat oil in a large pan over medium flame.
- Once the oil is hot, add asafetida, cumin seeds, mustard seeds, and fenugreek seeds, and let them crackle for 3-4 seconds.
- Reduce the heat to low.
- Add chana dal, urad dal, Kashmiri dry red chilies, and whole coriander seeds to the pan and roast on low heat until they turn slightly brown. Stir continuously to avoid burning.
- Note – It is important to roast the ingredients on low flame so that they get crisp and flavorful from the inside.
- Now add the washed and dried curry leaves and dry roast on low heat until they turn crisp. It will take 15-20 minutes. Stir very frequently.
- Note – Some people roast the kari leaves only for 6-8 minutes instead of 15-20 minutes. By roasting them for less time, the flavor of the podi is enhanced but the shelf life is reduced. So if you want to finish the podi quickly, roast the kari leaves for only 6-8 minutes.
- Add tamarind, coconut, and salt, and roast for another 2-3 minutes. Stir frequently.
- Remove the pan from heat and let the roasted ingredients cool completely.
- Transfer the cooled ingredients to a grinder or a food processor and grind to make a coarse powder.
- Store the powder in an airtight container in the refrigerator for up to a month.
- When serving, take out a teaspoon or two of powder on the plate, pour some sesame oil or ghee on top, and serve with sambar rice or idli dosas.


Good recipe. Everyone liked at home. Thank you so much.
I am glad 🙂