Khamiri Roti
This post may contain affiliate links. Please read our privacy policy.
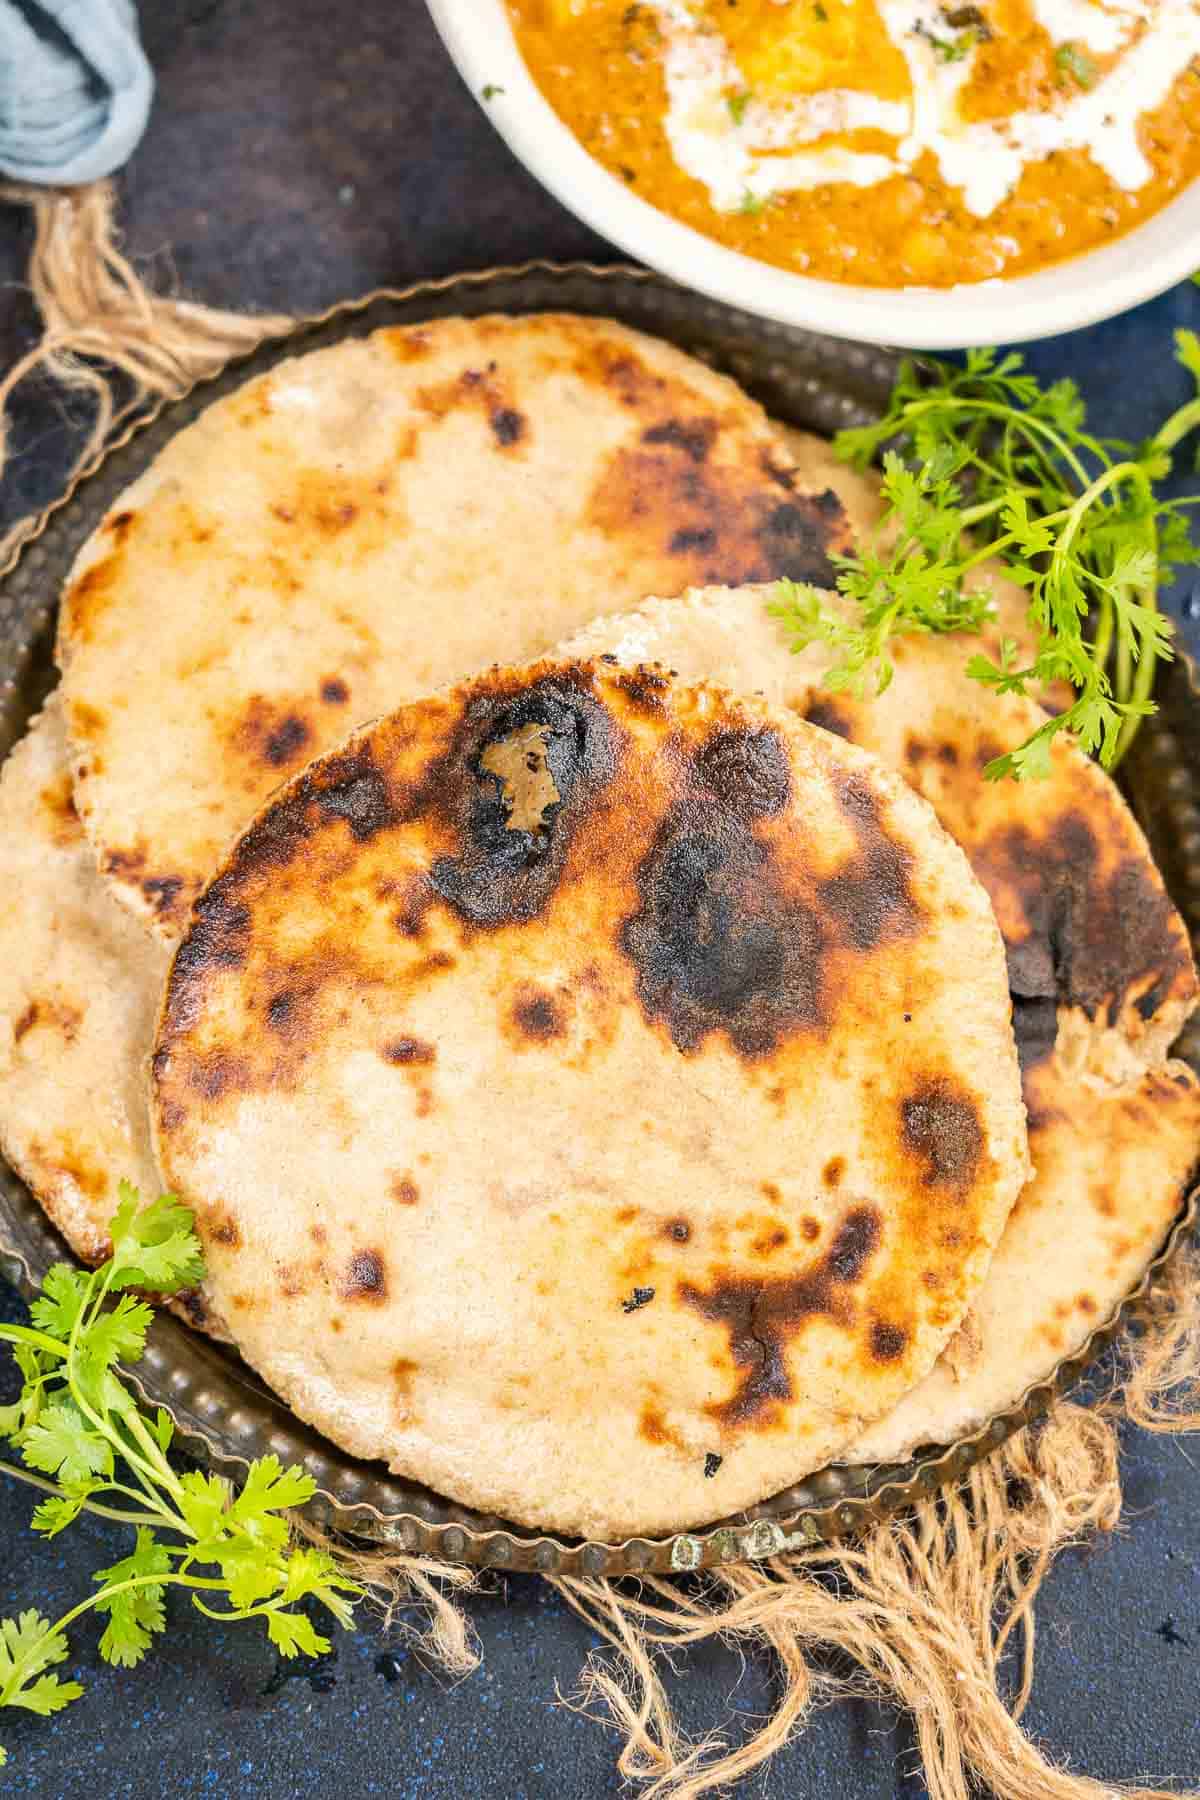
Khamiri Roti is a traditional Indian flatbread staple in the Mughal era. It is made using whole wheat flour, yeast, and milk and is incredibly soft and spongy. Here is how to make it (vegetarian).
Here are some more Indian bread recipes for your festive meals – Palak Paratha, Palak Puri, Butter Naan, Tandoori Roti, Missi Roti, and Luchi.
About Khamiri Roti
Khamiri Roti is a super soft and spongy fermented bread that was a staple in the Indian subcontinent during the Mughal era.
It is a rich Indian flatbread made using whole wheat flour and is still prevalent in Muslim households residing in the old parts of New Delhi and some parts of Pakistan.
Yeast or khamir is added to the flour, which makes Khamiri Roti extra soft and spongy. Yeast is also called khameer in Urdu and thus the name.
In olden times, people used to leave the dough overnight on the counter to ferment it. With commercial yeast and baking soda readily available nowadays, making these roties has become quicker and easier.
Traditionally, these were cooked in a clay tandoor, but you can also make them in an oven or a skillet over the stovetop. Don’t forget to slather some desi ghee on top before serving.
Ingredients

Whole Wheat Flour (Gehu ka Atta) – The base of Khamiri roti is made using whole wheat flour.
Active Dry Yeast – Yeast makes the dough rise, making the rotis soft and spongy.
Warm Milk – Ensure the milk is warm and not hot for the yeast to bloom perfectly. You can use whole milk (full-fat) or skim (low-fat).
Other Ingredients – Some more ingredients required to make this roti are sugar, salt, and water.
You can add a little fennel powder (saunf powder) to the dough to add richness and royal touch.
How To Make Khamiri Roti
Make The Dough
Mix the following ingredients in a bowl or a measuring jar.
- ½ cup warm milk
- 1 teaspoon sugar
- 2 teaspoon active dry yeast

Keep it aside for about 10 minutes. The yeast will bloom during this time.

Mix 2 cups whole wheat flour and ½ teaspoon salt in a large bowl or a parat (Indian large shallow utensil).

Add the milk and yeast mixture to the bowl and mix everything well using your fingers.

Add warm water little by little and knead to make a soft dough. The amount of water will depend on the quality of the flour. Do not add much water at once; otherwise, the dough will become sticky.

Once the dough is made, knead it for 2-3 minutes using the knuckles of your hands until it is soft and smooth.

Cover the dough with a kitchen cloth and keep it on the counter for 2 hours or until the dough slightly increases in size.

Roll The Roti
Divide the dough into 8-10 equal parts and make small balls from each part.

Take one ball and dust it with dry flour. Roll it to make a 5-6 inch circle. The thickness of the roti should be approximately ⅛ inch. It is slightly thicker than the regular phulka. Roll 3-4 balls and cover the rest with the cloth to avoid drying.


Cook The Roti
On The Stovetop
Heat a tawa over medium-high heat.
Apply water on one side of the rolled roti and transfer it to a hot tawa with the water side down.
Note – The tawa should be very hot. Otherwise, the roti will not stick to it.


Invert the tawa and cook the roti on the direct flame until it is nicely browned. Keep moving the tawa to make sure that the roti is cooked evenly.

Invert the tawa again and cook for a minute. Remove the roti from the tawa using a flat spatula.

Apply ghee generously over the khamiri roti and serve hot.

In An Oven
Preheat the oven to its highest temperature setting.
Arrange the roti on a baking sheet and bake on the upper rack of the oven for 3-4 minutes.
Remove the tray from the oven and cook the roties on the direct flame from both sides till brown spots form. Smear with ghee and serve hot.
Frequently Asked Questions
Replace regular milk with warm water or any plant-based milk. All the other ingredients are vegan-friendly.
If the yeast doesn’t bloom, it means that the yeast has expired or the milk was too hot, killing it. If the yeast has expired, you will have to buy a new packet, and if the milk is too hot, then you can bloom the yeast again in less warm milk. Adding sugar is essential to feed the yeast and help it grow.
If the yeast hasn’t bloomed, do not use it in the recipe; it will spoil the entire recipe.
Serving Suggestions
If you have ever visited the streets of Old Delhi, you would have seen that the locals serve this chewy Khamiris along with Nalli Nihari or with a rich Mutton Korma. It makes for an exceptional combination!
Other than North Indian kormas, I also like to serve them with rich and creamy Indian curries and dals like Malai Kofta, Desi Chicken Curry, or Punjabi Yellow Dal Tadka.
Serve Khamiri Roti with Dal Makhani, Paneer Korma, Sirka Pyaz, and Phirni for a festive meal.
Storage Suggestions
Khamiri Roti tastes best when served warm, but you can store them in an airtight container for up to 2 days in the refrigerator. Heat them in a microwave until warm and then on the direct flame to crisp them before serving.
You can also freeze them for up to 2 months. Thaw, warm, and crisp before serving.
You can also make and refrigerate the dough for up to 3 days. Make fresh roti whenever you want using the dough.
You Might Also Like

Craving more? Subscribe to Whisk Affair to get new recipes and a newsletter delivered straight to your inbox! And stay in touch on Facebook, Pinterest, and Instagram for all of the latest updates.

Khamiri Roti Recipe
Ingredients
- ½ cup warm milk (use water or any other plant-based milk for vegan. Milk should be WARM and not HOT.)
- 1 teaspoon sugar
- 2 teaspoons active dry yeast
- 2 cups whole wheat flour (atta)
- ½ teaspoon salt
- warm water to knead the dough (as required)
Instructions
Make The Dough
- Mix milk, sugar, and yeast in a bowl or a measuring jar.
- Keep it aside for about 10 minutes. The yeast will bloom during this time.
- Mix whole wheat flour and salt in a large bowl or a parat (Indian large shallow utensil).
- Add the milk and yeast mixture to the bowl and mix everything well using your fingers.
- Add warm water little by little and knead to make a soft dough. The amount of water will depend on the quality of the flour. Do not add a lot of water at once otherwise, the dough will become sticky.
- Once the dough is made, knead it for 2-3 minutes using the knuckles of your hands until it is soft and smooth.
- Cover the bowl with a kitchen cloth and keep it on the counter for 2 hours or until the dough slightly increase in size.
Roll The Roti
- Divide the dough into 8-10 equal parts and make small balls from each part.
- Take one ball and dust it with dry flour. Roll it to make a 5-6 inch circle. The thickness of the roti should be approximately ⅛ inch. It is slightly thicker than the regular phulka. Roll 3-4 balls at a time and keep the rest covered with the cloth to avoid drying.
Cook The Roti
On The Stovetop
- Heat a tawa over medium-high heat.
- Apply water on one side of the rolled roti and transfer it on hot tawa with the water side down. The tawa should be very hot otherwise the roti will not stick to it.
- Invert the tawa and cook the roti on the direct flame until it is nicely browned. Keep moving the tawa to make sure that the roti is cooked evenly.
- Invert the tawa again and cook for a minute. Remove the roti from the tawa using a flat spatula.
- Apply ghee generously over the khamiri roti and serve hot.
In An Oven
- Preheat the oven to its highest temperature setting.
- Arrange the roti on a baking sheet and bake on the upper rack of the oven for 3-4 minutes.
- Remove the tray from the oven and cook the roties on the direct flame from both sides till brown spots form. Smear with ghee and serve hot.
Video
Notes
If the yeast hasn’t bloomed, do not use it in the recipe; it will spoil the entire recipe.


How do we reheat these rotis?
You can heat them in a microwave until they are warm and then just keep over direct flame for a few seconds to get the crispness.
These roties are new for me- never tried with yeast!.. I am surely going to try this, looks delicious. Awesome pictures!
Lovely roti… Never heard of this before and really tempted to try it
wow that a very soft puffed up yeasted Roti 🙂 love them with a spicy side !!