• Skip to primary navigation
  • Skip to main content
  • Skip to primary sidebar
Whisk Affair
  • Home
  • Recipe Index
  • Indian Recipes
  • Meal Type
    • Salads
    • Soups
    • Appetizers
    • Main Course
    • Desserts
  • My Cookbook
    • My E-Books
  • Subscribe
menu icon
go to homepage
subscribe
search icon
Homepage link
  • Home
  • Recipe Index
  • Eid Specials
  • Buy my Cookbook
    • Facebook
    • Instagram
    • Pinterest
    • Twitter
    • YouTube
  • ×

    Whisk Affair » Recipes » Dal & Curries » Veg Curries » Kadala Curry (Kerala Style Black Chickpeas Kari)

    Published: Feb 3, 2021 | Last Updated On: Feb 4, 2021 by Neha Mathur | This post may contain affiliate links. I earn from qualifying purchases.

    Kadala Curry (Kerala Style Black Chickpeas Kari)

    861 shares
    Jump to Recipe

    Kadala Curry (Kerala-Style Black Chickpeas Kari) is a quintessential dish in every Malayalee household. It’s a very popular dish to serve with puttu, appam, and dosa for breakfast and is also eaten with idiyappam or string hoppers, paratha, and boiled red rice for lunch or dinner (vegan, can be easily made gluten-free).

    Here are some more black chickpea recipes that you can include in your everyday meals – Jaisalmeri Chana, Sookha Kala Chana, Kala Chana Curry, and Chana Chaat.

    Kerals tyle kadala curry served in a bowl.
    Jump to:
    • About This Recipe
    • Health Benefits Of Black Chickpeas
    • Ingredients
    • How To Make Kadala Curry
    • Pro Tips By Neha
    • Frequently Asked Questions
    • Serving Suggestions
    • Storage Suggestions
    • You Might Also Like
    • Recipe Card

    About This Recipe

    Kadala Curry (Kerala Style Black Chickpeas Kari) is a spicy, flavorful, and coconutty black chickpeas curry made in most Malayalee homes.

    This curry is best served for breakfast with puttu, dosa, appam, or idiyappam, or a hearty lunch along with steamed matta rice, poori, paratha, or roti.

    Each household has its own way of making kadala curry. Some make it semi-dry and some with gravy. It can be made with or without coconut or even using coconut milk.

    I learned this kadala curry recipe from a houseboat owner on one of my trips to Kerala, so sharing his version today. I promise it’s absolutely delicious.

    This curry is vegan and can be easily made gluten-free. You can also easily double or triple the recipe.

    Health Benefits Of Black Chickpeas

    Black chickpeas are a type of legume that is native to the eastern Mediterranean region and parts of Asia. They are a popular ingredient in many Middle Eastern and Indian dishes.

    Black chickpeas are a good source of protein, fiber, and several vitamins and minerals including iron, phosphorus, potassium, magnesium, and zinc.

    They also have some health benefits, such as aiding digestion, reducing blood cholesterol levels, and helping to regulate blood sugar levels.

    Ingredients

    Kerala kadala curry ingredients 1
    Kerala kadala curry ingredients 2
    Kerala kadala curry ingredients 3
    Kerala kadala curry ingredients 4

    Black Chickpeas – Try to buy organic black chickpeas.

    Fresh Coconut Buy grated coconut to save you some time. It is available in the freezer section of any Indian grocery store.

    Curry Leaves add a beautiful South Indian touch to the curry, so make sure you use the fresh aromatic ones.

    Coconut Oil – This curry is traditionally made using coconut oil but you can replace it with vegetable oil or ghee if it’s not available.

    Spice Powders – To enhance the taste of the curry, we have used some basic spices such as coriander powder, turmeric powder, Kashmiri red chili powder, and garam masala spice mix.

    For a very authentic taste, use my Kerala style garam masala in this recipe.

    Others – You will also need salt, mustard seeds, curry leaves, ginger garlic paste, onions, tomatoes, and green chilies.

    Adjust the green chillies as per your taste.

    For The Tempering – To temper the kadala curry, you will need coconut oil, mustard seeds, asafetida (hing), curry leaves, and whole dry red chilies.

    Tempering is optional, but it does add a great flavor to the curry.

    How To Make Kadala Curry

    Cook The Chickpeas

    In A traditional Pressure Cooker

    Wash 1 cup of dry black chickpeas with water and soak it in 3 cups of water for 6-8 hours.

    Note – Soaking is important to ease the cooking process and also to make the chickpeas easily digestible.

    Soaked chickpes.

    Drain the water and wash the chickpeas once again.

    Add the soaked chana to a pressure cooker along with 2 cups of water, ½ teaspoon turmeric powder, and 2 teaspoon salt, and stir gently.

    Soaked chickpeas, water, turmeric and salt added to a pressure cooker.
    Stirred well.

    Pressure cook for one whistle on high heat. Then reduce the heat to low and cook for 15 minutes.

    Pressure cooking the chickpeas.

    Remove the cooker from the heat and let the pressure release naturally.

    Open the lid of the cooker.

    Cooked chickpeas.

    In An Instant Pot

    Wash 1 cup of dry black chickpeas with water and soak it in 3 cups of water for 6-8 hours.

    Drain the water and wash the chickpeas once again.

    Add the soaked chana to an instant pot along with 1 and ½ cups of water, ½ teaspoon turmeric powder, and 2 teaspoon salt, and stir gently.

    Close the lid and set the valve to the sealing position.

    Press PRESSURE COOK and set the timer for 15 minutes at high pressure.

    Once the timer goes off, do a 10 minutes natural pressure release. Then release the remaining pressure manually and open the lid.

    Make The Coconut Paste

    Add ½ cup of grated fresh coconut to a skillet and roast on medium heat until is it nicely browned (3-4 minutes), stirring frequently.

    This process gives a very robust flavor to this curry and a very nice color too.

    Grated coconut added to a small pan.
    Browned coconut in the pan.

    Once the coconut is roasted, add it to the small jar of a blender along with ¼ cup of water and blend to make a smooth paste. Scrape the sides of the jar a few times while blending.

    Coconut added to a blender.

    Set the paste aside.

    Fine paste made.

    Make The Curry

    Heat 2 tablespoon coconut oil in a large pan over medium-high heat.

    Oil heating in a pan.

    Once the oil is hot, add ½ teaspoon mustard seeds, 10-12 curry leaves, and 2 teaspoon ginger garlic paste and saute for 10-12 seconds.

    Mustard seeds, curry leaves and ginger garlic paste added to the pan.

    Add ½ cup chopped onions and fry until it turns translucent (3-4 minutes), stirring frequently.

    Onions added to the pan.

    Now add ½ cup chopped tomatoes and 2-3 slit green chilies and cook for another 3-4 minutes. Stir frequently while cooking.

    Tomatoes and green chilies added to the pan.

    Add 1 teaspoon coriander powder, ½ teaspoon turmeric powder, 1 teaspoon Kashmiri red chili powder, and ½ teaspoon garam masala powder, and fry for 3-4 minutes.

    Add some water if the masala is drying out.

    Spice powders added to the pan.

    Now add the coconut paste that we made earlier and mix well.

    Coconut paste added to the pan.

    Add the cooked chana along with the water in which it was cooked to the pan.

    Cooked chana with water added to the pan.

    Reduce the heat to low.

    Cook the curry for 10-12 minutes. Mash a few chana with the back of the ladle to make the gravy creamier.

    Check for salt and add as needed.

    salt added to the cooked kadala curry.

    Temper The Curry

    Heat 1 tablespoon coconut oil in a small skillet over medium-high heat.

    Coconut oil heating in a small skillet.

    Once the oil is hot, add ½ teaspoon mustard, ¼ teaspoon asafetida, 10-12 curry leaves, and 2-3 whole dry red chilies, and fry for 4-5 seconds.

    Mustard seeds, asafetida, curry leaves and dry red chilies added to teh skillet.

    Pour the tempering over the curry and stir gently. Serve hot.

    Tempering poured over the ready kadala curry.

    Pro Tips By Neha

    In case you forget to soak the chickpeas, then soak them in boiling hot water for about 2 to 3 hours before cooking.

    You can cook the chickpeas and store them in the fridge a day before if you are planning to cook in the morning. Finishing this step helps to make the curry in lesser time.

    You can adjust the consistency of curry, by adding or less water to the curry. If you like it to be thick, add less water and vice versa.

    You can replace black chickpeas with white chickpeas for a taste change.

    Frequently Asked Questions

    How to make kadala curry without coconut?

    To make this curry without coconut, you can follow the same process as mentioned in the recipe but just skip adding the coconut to the recipe. The dish comes out quite good without coconut as well and you have a different version too.

    How to make kadala curry without roasting the coconut?

    Heat 2 tablespoon coconut oil in a pan.
    Add ½ cup chopped onions and 2 teaspoon ginger garlic paste and fry for 4-5 minutes.
    Add ½ cup chopped tomatoes and fry for 2-3 minutes.
    Now add ½ cup grated fresh coconut and fry for 3-4 minutes.
    Remove the pan from heat and let the mixture cool down.
    Grind the mixture along with ¼ cup of water to make a smooth paste.
    Heat 2 tablespoon coconut oil in a pan. Add ½ teaspoon mustard seeds and 10-12 curry leaves and let them crackle for 4-5 seconds.
    Add ¼ cup sliced shallots and 2-3 green chilies (slit into half).
    Now add the ground masala paste and cook for 2-3 minutes.
    Add 1 teaspoon coriander powder, 1 teaspoon Kashmiri red chili powder, and ½ teaspoon garam masala powder, and cook for 2 minutes.
    Add cooked chana and some water and cook for 10-12 minutes. Slightly mash the chana with the back of a ladle. Serve.

    How to make kadala curry with coconut milk?

    To make the kadala curry with coconut milk, skip adding the roasted coconut to the recipe mentioned below. Instead, add thick coconut milk to the ready curry and bring it to a gentle simmer. Serve hot.

    Serving Suggestions

    Traditionally, this mouthwatering curry is enjoyed with puttu, dosa, idiyappam, or appam for breakfast.

    But, you can also serve it along with steamed rice or ghee rice for your everyday meals. 

    I also like to eat it with tawa paratha or lachha paratha.

    Storage Suggestions

    Kadala Curry stays good in the refrigerator in an airtight container for up to 3 days. Reheat it either in a pan over the stovetop or in the microwave, before serving it again.

    If you feel the gravy has become a little thick while refrigerating, add in a little water and adjust the consistency. Heat the curry well.

    You Might Also Like

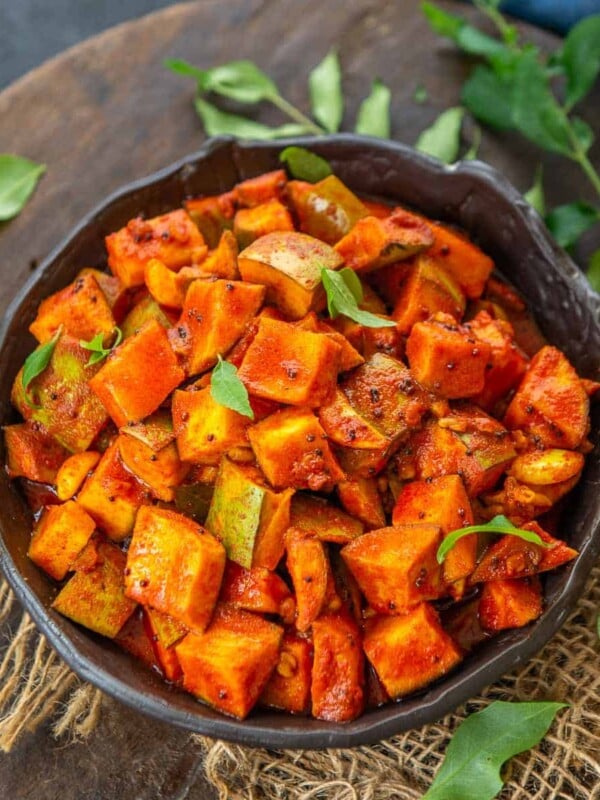
    • Insyant Kerala style mango pickle served in a bowl.
      Kerala Style Instant Mango Pickle
    • Kerala Parotta or Malabar Parotta is a layered Indian flatbread which goes great with curries. Here is how to make it in a traditional way.
      Kerala Parotta
    • Kerala Prawn Curry (Chemmeen Curry) is a delicious Kerala-style shrimp curry that can be made with or without coconut. Make this flavorful curry using my easy recipe (gluten-free, dairy-free).
      Kerala Prawn Curry (Chemmeen Curry)
    • Kerala Style Fish Molee (Meen Molly, Kerala Fish Stew, Fish Moile) is a rich and creamy Kerala-style curry where fish is cooked in a subatly spiced coconut-based gravy. Serve it with appam or steamed rice for a hearty meal.
      Kerala Style Fish Molee (Meen Molly, Kerala Fish Stew)

    Recipe Card

    Loved this recipe?Click here to leave a review and give us a five star rating ★★★★★
    Kadala Curry (Kerala-Style Black Chickpeas Kari) is a quintessential dish in every Malayalee household. It’s a very popular dish to serve with puttu, appam, and dosa for breakfast and is also eaten with idiyappam or string hoppers, paratha, and boiled red rice for lunch or dinner (vegan, can be easily made gluten-free).

    Kadala Curry Recipe (Kerala Style Black Chickpeas Kari)

    Kadala Curry (Kerala-Style Black Chickpeas Kari) is a quintessential dish in every Malayalee household. It’s a very popular dish to serve with puttu, appam, and dosa for breakfast and is also eaten with idiyappam or string hoppers, paratha, and boiled red rice for lunch or dinner (vegan, can be easily made gluten-free).
    4 from 22 votes
    Print Pin Rate
    Course: Main Course
    Cuisine: Indian
    Diet: Vegan, Vegetarian
    Prep Time: 10 minutes
    Cook Time: 30 minutes
    Total Time: 40 minutes
    Servings: 4 people
    Calories: 229kcal
    Author: Neha Mathur

    Ingredients 

    To Cook The Chickpeas

    • 1 cup dry black chickpeas (kala chana)
    • ½ teaspon turmeric powder
    • 2 teaspoons salt

    For Coconut Paste

    • ½ cup grated fresh coconut

    For The Curry

    • 2 tablespoons coconut oil
    • ½ teaspoon mustard seeds
    • 10-12 curry leaves
    • 2 teaspoons ginger garlic paste
    • ½ cup chopped onions
    • ½ cup chopped tomatoes
    • 2-3 green chilies (slit into half)
    • 1 teaspoon coriander powder
    • ½ teaspoon turmeric powder
    • 1 teaspoon Kashmiri red chili powder
    • ½ teaspoon garam masala powder
    • salt (to taste)

    For Tempering

    • 1 tablespoon coconut oil
    • ½ teaspoon mustard seeds
    • ¼ teaspoon asafetida (hing) (skip for gluten-free)
    • 10-12 curry leaves
    • 2-3 whole dry red chilies (stalks removed)
    US Customary or Metric
    Prevent your screen from going dark

    Instructions

    Cook The Chickpeas

    • Wash chickpeas with water and soak them in 3 cups of water for 6-8 hours.
    • Drain the water and wash the chickpeas once again.

    In A traditional Pressure Cooker

    • Add the soaked chana to a pressure cooker along with 2 cups of water, turmeric powder, and salt, and stir gently.
    • Pressure cook for one whistle on high heat. Then reduce the heat to low and cook for 15 minutes.
    • Remove the cooker from the heat and let the pressure release naturally.
    • Open the lid of the cooker.

    In An Instant Pot

    • Add the soaked chana to an instant pot along with 1 and ½ cups of water, turmeric powder, and salt, and stir gently.
    • Close the lid and set the valve to the sealing position.
    • Press PRESSURE COOK and set the timer for 15 minutes at high pressure.
    • Once the timer goes off, do a 10 minutes natural pressure release. Then release the remaining pressure manually and open the lid.

    Make The Coconut Paste

    • Add coconut to a skillet and roast on medium heat until is it nicely browned (3-4 minutes), stirring frequently.
    • This process gives a very robust flavor to this curry and a very nice color too.
    • Once the coconut is roasted, add it to the small jar of a blender along with ¼ cup of water and blend to make a smooth paste. Scrape the sides of the jar a few times while blending.
    • Set the paste aside.

    Make The Curry

    • Heat coconut oil in a large pan over medium-high heat.
    • Once the oil is hot, add mustard seeds, curry leaves, and, ginger garlic paste and saute for 10-12 seconds.
    • Add onions and fry until it turns translucent (3-4 minutes), stirring frequently.
    • Now add tomatoes and green chilies and cook for another 3-4 minutes. Stir frequently while cooking.
    • Add coriander powder, turmeric powder, Kashmiri red chili powder, and garam masala powder, and fry for 3-4 minutes.
    • Add some water if the masala is drying out.
    • Now add the coconut paste that we made earlier and mix well.
    • Add the cooked chana along with the water in which it was cooked to the pan.
    • Reduce the heat to low.
    • Cook the curry for 10-12 minutes. Mash a few chana with the back of the ladle to make the gravy creamier.
    • Check for salt and add as needed.

    Temper The Curry

    • Heat coconut oil in a small skillet over medium-high heat.
    • Once the oil is hot, add mustard, asafetida, curry leaves, and dry red chilies, and fry for 4-5 seconds.
    • Pour the tempering over the curry and stir gently. Serve hot.

    Video

    https://www.youtube.com/watch?v=wjBL9_sdlOY

    Notes

    Soaking the chickpeas is important to ease the cooking process and also to make the chickpeas easily digestible.
    In case you forget to soak the chickpeas, then soak them in boiling hot water for about 2 to 3 hours before cooking.
    You can cook the chickpeas and store them in the fridge a day before if you are planning to cook in the morning. Finishing this step helps to make the curry in lesser time.
    You can adjust the consistency of curry, by adding or less water to the curry. If you like it to be thick, add less water and vice versa.
    You can replace black chickpeas with white chickpeas for a taste change.
    Adjust the green chilies as per your taste.

    Nutrition

    Calories: 229kcal | Carbohydrates: 20g | Protein: 5g | Fat: 15g | Saturated Fat: 11g | Sodium: 95mg | Potassium: 313mg | Fiber: 6g | Sugar: 6g | Vitamin A: 760IU | Vitamin C: 141.2mg | Calcium: 49mg | Iron: 2.1mg
    Pin this recipe for later use!I LOVE to see your creations so pin and mention @WhiskAffair!
    Sign up for regular updates?I would love to have you as part of my journey. Click to sign up!

    More Veg Curry Recipes

    • Shahi Paneer Korma is a Mughlai-style paneer dish where paneer cubes are cooked in rich onion-based gravy. This Indian curry is rich and creamy and goes well with Indian bread (vegetarian, gluten-free).
      Mughlai Shahi Paneer Korma
    • This easy Bombay Potatoes (Indian Style Spicy Potatoes) recipe is made using baby potatoes, onions, tomatoes, and a few basic Indian spices. Serve it with paratha or roti for a delicious meal (vegan, can be easily made gluten-free).
      Easy Bombay Potatoes (Indian Style Spicy Potatoes)
    • A dish widely prepared in Uttar Pradesh, this traditional UP Style Matar Ka Nimona is a delicious curry made using fresh green peas and a few spices. This is a soupy curry that goes well with rice or paratha. Make it with the most tender winter peas while they are in season (vegetarian, gluten-free).
      UP Style Matar Ka Nimona (Fresh Green Peas Curry)
    • Kashmiri Dum Aloo is a delicious yogurt based potato curry flavored with dry ginger powder and fennel powder. Make it in traditional Kashmiri pandit style using my easy recipe (vegetarian).
      Traditional Kashmiri Dum Aloo

    Reader Interactions

    Comments

      Did you make this recipe? Let me know! Cancel reply

      Your email address will not be published. Required fields are marked *

      Recipe Rating


    1. Pamela (BrooklynFarmGirl)

      July 12, 2017 at 1:11 am

      This looks so tasty!

      Reply
      • Neha Mathur

        July 12, 2017 at 12:38 pm

        Thnx 🙂

        Reply
        • Sushilarani

          March 11, 2018 at 1:46 pm

          I am going to try these recipes.
          I have cooked Indian food but not Kerala Style. I did eat Kerala food from friends and found the style delectable

          Reply
          • Neha Mathur

            March 12, 2018 at 5:04 am

            Do try and me know how it turned out 🙂

            Reply
    2. Bhad bhabie

      November 27, 2018 at 10:27 am

      5 stars
      I tried it
      It was soooo tasty and nice

      Reply
      • Neha Mathur

        November 27, 2018 at 1:49 pm

        Thnx for trying.

        Reply
        • Roshin Rajan Panackal

          January 11, 2023 at 8:38 pm

          5 stars
          I have tried many different recipes for Kadala curry that I found online, but, nothing comes close to your’s. Authentic കേരളീയ സ്വാദ്!

          Reply
    3. Ashwini

      May 30, 2019 at 5:12 am

      What is that Kerala gram masala? How do we prepare that?

      Reply
      • Neha Mathur

        June 04, 2019 at 2:44 am

        There is a link in the post to Kerala Garam masala Post. Please click on that.

        Reply
    4. Lalita

      June 27, 2019 at 4:00 pm

      Hey, how long do you pressure cook it at first? Just an indication would be helpful, such as how many whistles or how much time on medium or high flame? Thanks! Looking forward to trying this out!

      Reply
      • Neha Mathur

        June 28, 2019 at 8:22 am

        Hi Lalita, You can cook it for one whistle on high heat and then 2-3 whistles on low heat.

        Reply
    5. VIDYA

      April 19, 2020 at 8:32 am

      Where do we add the dry coconut paste?

      Reply
      • Neha Mathur

        April 19, 2020 at 12:22 pm

        Sorry for the confusion. Updated the recipe.

        Reply
    6. Shravanthi

      May 06, 2020 at 1:58 pm

      5 stars
      Came out really well. Thank you

      Reply
      • Neha Mathur

        May 07, 2020 at 12:47 pm

        Happy to hear 🙂

        Reply
    7. Möhsin

      June 23, 2020 at 5:31 pm

      5 stars
      Great recipe! I was searching everywhere for the nutrition facts of kadala curry. Glad that you included it

      Reply
      • Neha Mathur

        June 26, 2020 at 3:45 pm

        🙂

        Reply
    8. Sunil

      July 05, 2020 at 7:14 am

      It turned out really nice…

      Reply
      • Neha Mathur

        July 06, 2020 at 3:03 am

        Happy to hear 🙂

        Reply
    9. Louisa D'Souza

      October 01, 2020 at 4:23 pm

      This recipe is delicious. Used whatever garam masala I had and added a cup of coconut milk. Turned out great! Thank you Neha.

      Reply
      • Neha Mathur

        October 05, 2020 at 12:24 pm

        Happy to hear 🙂

        Reply

    Primary Sidebar

    Hey! Nice to meet you

    Neha Mathur, Founder & Recipe Expert at Whisk Affair

    Hi! I'm Neha, Blogger & Recipe Expert behind Whisk Affair. I've nurtured Whisk Affair since 2012 by trying & testing every recipe published. Be sure that it will turn out good each time! Read More about me…

    Stay Connected

    • Facebook
    • Instagram
    • Pinterest
    • Twitter
    • YouTube

    My Cookbook

    Neha's Cookbook Cover

    Click to Buy Now on Amazon

    Most Popular Recipes

    • Make this delicious restaurant-style Hibachi Fried Rice (Japanese Style Fried Rice) for a quick Asian-inspired meal. Serve it with Hibachi chicken and Yum Yum sauce and get transported to a Japanese Steakhouse.
      Best Hibachi Fried Rice (Japanese Style Fried Rice)
    • This oven-baked lemon garlic baked tilapia is super easy to make and comes together in under 20 minutes. It's low carb, gluten-free, keto-friendly, and very flavorful. Here is how to make it.
      Spicy Lemon Garlic Baked Tilapia
    • Creamy Garlic Parmesan sauce served in a bowl.
      Creamy Garlic Parmesan Sauce
    • Lemon tea served in cups.
      Lemon Tea
    • Light, hearty and delicious, Chicken Clear Soup is super easy to make at home. It is made using simple ingredients and comes together in under 30 minutes. This soul-soothing soup is gluten-free and low carb too.
      Chicken Clear Soup
    • Egg White Scramble is a healthy, fluffy, and delicious option for breakfast. Serve it with some toast and fruits and milk on the side. Here is how to make the best fluffy scrambled egg white recipe at home!
      Scrambled Egg Whites

    Summer Mango Recipes

    • Kacche Aam Ki Launji is a sweet and spicy chutney made using tangy green mangoes, jaggery, and a few simple spices. This chutney keeps good in the refrigerator for upto 3 months. So make a big batch and enjoy!
      Kacche Aam Ki Launji (Sweet & Spicy Raw Mango Chutney)
    • Learn How To Make Mango Pulp in under 5 minutes and use it round the year to make your favorite recipes.
      How To Make Mango Pulp (Mango Puree)
    • Green mango chutney is a spicy and tangy Indian accompaniment made using green mangoes. Serve it with an Indian snack or meals for a tangy treat.
      Green Mango Chutney (Raw Mango Chutney)
    • This Easy Mango Pico De Gallo is fruity, sweet, and spicy and comes together in under 10 minutes using simple ingredients. Serve it with nachos, chips, rice, or tacos for a perfect summer special accompaniment (vegan, gluten-free).
      Easy Mango Pico De Gallo (Mango Salsa)
    • Mango Magic Tropical Smoothie is a delicious drink loaded with tropical flavors. Sip it for breakfast or for snacks (gluten-free, can be easily made vegan).
      Mango Magic Tropical Smoothie
    • Aam panna is a refreshing Indian summer drink made using green mangoes. It is sweet, tangy, and bursting with beautiful flavors. Make it in an instant pot or a traditional pressure cooker.
      Aam Panna (Tangy Green Mango Drink)

    Eid Specials

    • Mohabbat ka Sharbat is a refreshing Old Delhi-style summer drink. It has flavors from watermelon and rose syrup. Here is how to make it (vegetarian, gluten-free, and can be made vegan).
      Mohabbat Ka Sharbat
    • Lachha Rabdi (Rabri) is a popular North Indian dessert made by reducing milk and flavoring it with saffron and rose water (or cardamom). Make it in an authentic way using my easy recipe.
      Authentic Lachha Rabdi (Rabri)
    • Sheer Khurma or Sheer Korma is a traditional Indian dessert that is a must-make for the festival of Eid. It is made by cooking fine vermicelli with ghee, milk, dates, and dry fruits. Saffron is added to it for a unique flavor.
      Sheer Khurma (Vermicelli Milk Dates Pudding)
    • Super crispy from the outside and juicy from the inside, these Homemade Fish Fingers are a breeze to make. You just can't go wrong with this delicious and easy recipe.
      Homemade Crispy Fish Fingers
    • Kesar Phirni or Firni is a traditional Kashmiri dessert that is made using milk and rice. This Mughlai sweet is a treat to eat and is very easy to make. Here is how to make it.
      Traditional Phirni Recipe (Firni, Indian Rice Pudding)
    • Shahi Tukda (Shahi Toast) is a Mughlai dessert made using deep-fried bread slices, reduced saffron flavored milk (rabdi), and sugar syrup. It is a perfect dessert for festivals and special occasions (vegetarian).
      Mughlai Shahi Tukda

    Footer


    ^ back to top

    About

    About Neha

    Diwali E-Book

    My Cookbook

    Stay Connected

    Sign up! for emails and updates

    Contact Me

    Policies

    Privacy Policy

    Terms & Conditions

    Accessibility Policy

    Whiskaffair has been featured in leading media including the huffington post, bloomberg quint, buzz feed, your story and many more

    Copyright © 2022 WhiskAffair Food LLP