Sprouted Chickpea Raita
This post may contain affiliate links. Please read our privacy policy.
Bored with your usual raita recipes? Then try this Sprouted Chickpea Raita to serve with your Indian meals. It is easy to make and a perfect accompaniment for your summer meals. Here is how to make it (vegetarian, gluten-free).
Fruit Raita RecipeHere are some more raita recipes that you must try: Banana Raita, Fruit Raita, Boondi Raita, Bathua Ka Raita, Cucumber Raita, and Aloo Raita.

About Sprouted Chickpea Raita
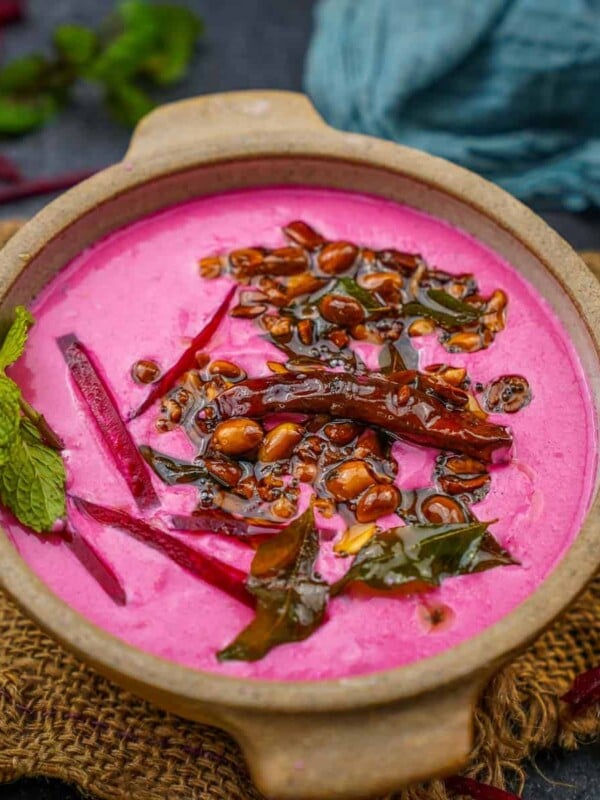
Sprouted Chickpea Raita is an Indian accompaniment made using sprouted black chickpeas, plain yogurt, and a few spices. It is a perfect side dish to serve with Indian meals.
The sprouted black chickpeas, also known as kala chana in India, add a perfect bite to the creamy and smooth raita
This raita is super easy to make and takes less than 15 minutes to come together. It is a perfect cooling side dish to make for summer meals.
This recipe is vegetarian and gluten free.
Ingredients
This delicious raita needs just 5 ingredients – plain yogurt (dahi, curd), sprouted chickpeas, regular white salt, black salt, and roasted cumin powder.
You can either set your own yogurt at home or use store-bought.
Use vegan yogurt to make a vegan raita recipe.
I have used black chickpeas but you can use the white ones too. You can also replace the chickpeas with other sprouted beans like kidney beans or moong beans.
If you feel that the raita is too thick, you can add in some milk or water to adjust the consistency.
Veggies like chopped tomatoes, onions, shredded carrots, beetroot etc can be added to it too.
Frequently Asked Questions
Wash and soak the black chickpeas in enough water for about 8 to 10 hours or overnight. Once they are soaked, drain the water completely, rinse them with clean water, and tie them in a clean damp cotton cloth (you can use a cheesecloth too).
Place the tied cloth in a colander and cover it with a plate. Keep it aside at a warm place for about 2 days. You will get perfectly sprouted chickpeas to use in the raita or other dishes.
Rinse and add the sprouted chickpeas in an instant pot. Add ½ cup water into the instant pot. Secure the lid and close the pressure valve. Set the instant pot to high-pressure cooking for 5 minutes.
Once the timer goes off, let the pressure release naturally for 10 minutes. Release the remaining pressure by opening the pressure valve. Open the lid of the pot. The sprouted chickpeas are ready to use.
Serving Suggestions
Serve this raita on the side with your everyday Indian-style meals.
It also tastes great with pulao, biryani, or even stuffed parathas.
Storage Suggestions
Make raita fresh for the best result! You can cook the sprouted chickpeas and store them in an air-tight container in the fridge for about 2 to 3 days. It will come in handy when you want to make the raita.
If you have leftover raita, then store it in an airtight container for up to 2 days.
You Might Also Like


Craving more? Subscribe to Whisk Affair to get new recipes and a newsletter delivered straight to your inbox! And stay in touch on Facebook, Pinterest, and Instagram for all of the latest updates.

Sprouted Chickpea Raita Recipe
Ingredients
- ½ cup sprouted chickpeas
- ½ teaspoon regular white salt
- 2 cups plain yogurt (dahi, curd)
- 1 teaspoon black salt
- ½ teaspoon roasted cumin powder
Instructions
- Add sprouted chickpeas to a pressure cooker along with ½ cup of water and white salt.
- Note – You can cook sprouted chickpeas in an instant pot too. I have given the process below.
- Close the lid of the cooker and pressure cook for one whistle on high heat and then reduce the heat to low. Cook for 5 minutes. Remove the cooker from heat and let the pressure release naturally. Open the lid and drain the water. Let the chickpeas cool down completely.
- Whisk yogurt in a medium-sized mixing bowl using a wire whisk.
- Add the cooked sprouted black chickpeas, black salt, and cumin powder to the bowl and mix well. Add some milk or water if the raita is too thick.
- Adjust the salt. If the raita is sour, add some sugar to it. Chill for a few hours and serve.